How to Schedule a Process
Overview
Explains how to schedule Colleague processes.
Goal
After completing this tutorial you will have the knowledge on how to schedule a process. However you should talk with your area's super user or IT to determine what times are appropriate for scheduling processes.
Steps
Decide How To Get Your Reports
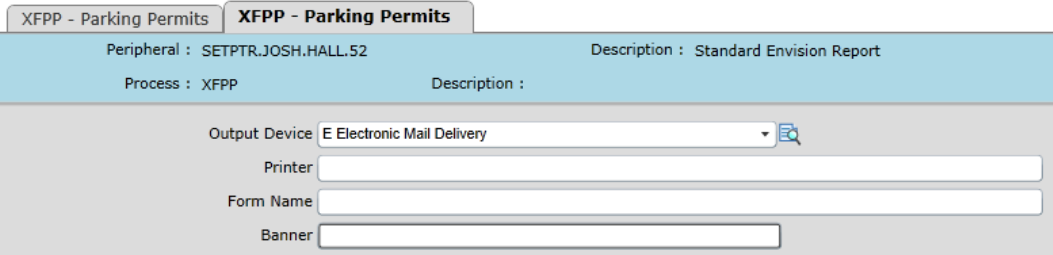
If you are going to schedule a report, then it will not pop up on your screen for easy printing. So, when scheduling it is recommended that you send all reports to email.
- When you get to the screen allowing you to choose an output method, type 'E' and hit Enter.

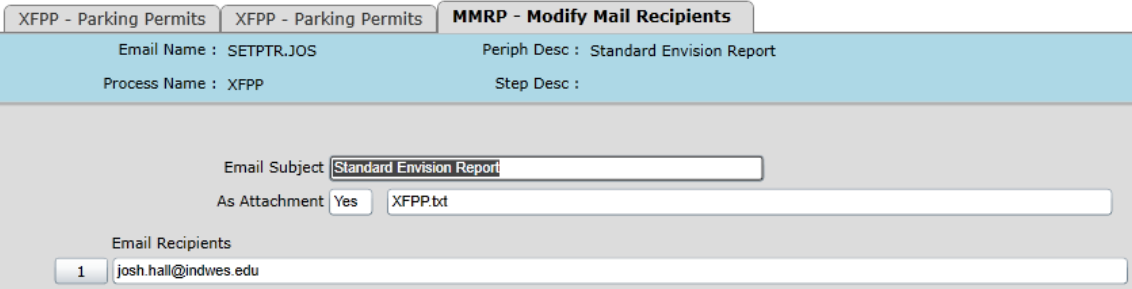
- This will take you to a screen allowing you to specify the email address(es) where the emails will be sent.

- You should send the report as an attachment making it easier to open in Word if you need to reformat it for printing.
- You can send it to any number of email addresses you choose, but keep in mind when scheduling, that everyone on this list will recieve a copy for every sceduled instance.
- Save to confirm the addresses and return to the output selection screen.
- Save again to confirm that you want to receive emails rather than the on-screen report.
- You may have to repeat steps 1 - 4 several times if your mnemonic produces more than one report.
Setting Up the Schedule
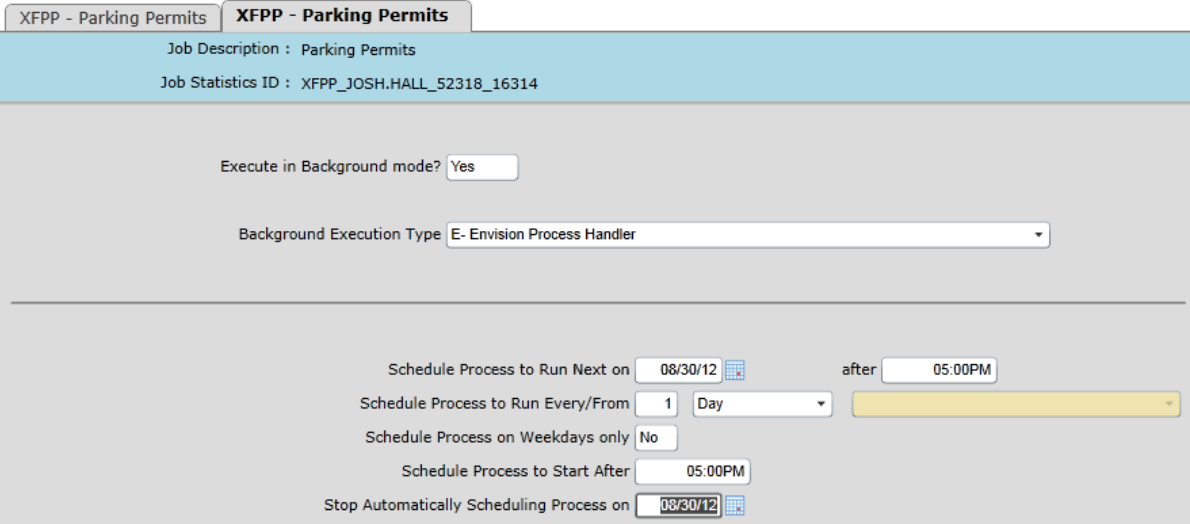
- After choosing your output method, most mnemonics have another screen that allows you to choose to run in the background.

- If this screen is not provided, then you will not be able to schedule that mnemonic. Furthermore, there is probably some reason that the process should not be scheduled.
- Type 'Y' and hit Enter to enable the background mode.
- Type 'E' and hit Enter to select the Envision Process Handler
- Now you get to set an actual schedule:
- The first row allows you to set the date and time of the next scheduled run that will be added to the process queue. "Next"
At this point, as you are setting up a new schedule, "next" could just as easily be "first". However the meaning will change slightly if you later adjust this schedule. - The second row allows you to adjust the frequency with which the process is repeated.
- The third row allows you to restrict scheduled instances to Weekdays (12AM Sun/Mon to 12 AM Fri/Sat).
- The fourth row allows you to set the time that all scheduled runs beyond the one specified in the first row will be added to the process queue.
- The fifth row allows you to specify the day of the last scheduled run.
- The first row allows you to set the date and time of the next scheduled run that will be added to the process queue.
- Once you are satisfied with your settings, Save out and the Envision Process Handler will handle the rest.
Managing Your Schedules (MYPR)
You may run the mnemonic manually without affecting any schedules you've set up. So, if you find the need to review existing schedules, adjust a schedule, or cancel a schedule, you will need to use MYPR. Keep in mind this only lets you view schedules that you've personally setup, so if someone setup a schedule for you, they will also have to do any maintence required.

Adjusting a Schedule
- Drill down on the schedule you want to adjust.
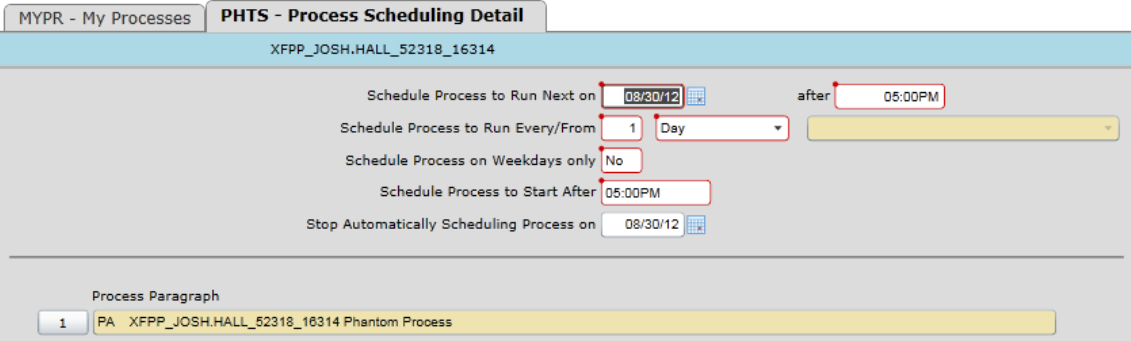
- The fields at the top operate the same way as when the process was originally scheduled.
- In general the process paragraph can be ignored. It contains details on the steps that are being scheduled and with considerable practice may be used this to determine the parameters, but in general it can be ignored.
- Once you have made the desired adjustment save to return to MYPR.
- The adjustment will not take effect until you also save out of MYPR.

Canceling a Schedule
- Click on the number to the left of the schedule you want to cancel.
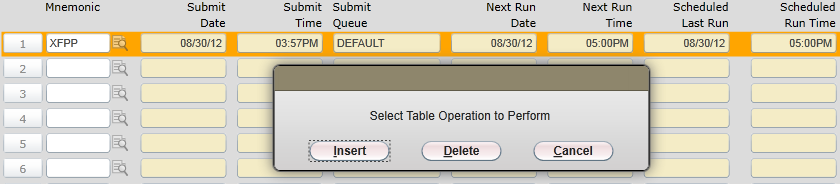
- Click on "Delete" in the first dialog box.
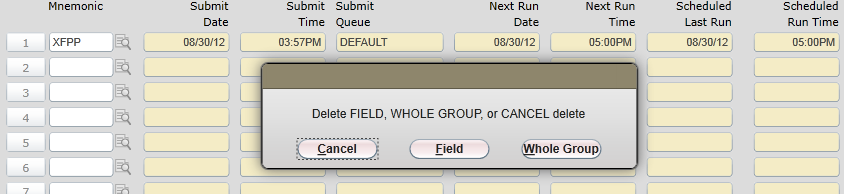
- Click on "Whole Group" in the second dialog box.
- The cancellation will not take effect until you save out of MYPR.

