Wireless Microphone kit
Wireless Microphone Kit
This microphone kit is available for check-out, at the Media Services desk at the Jackson Library. These standard components are included in the lightweight equipment case.
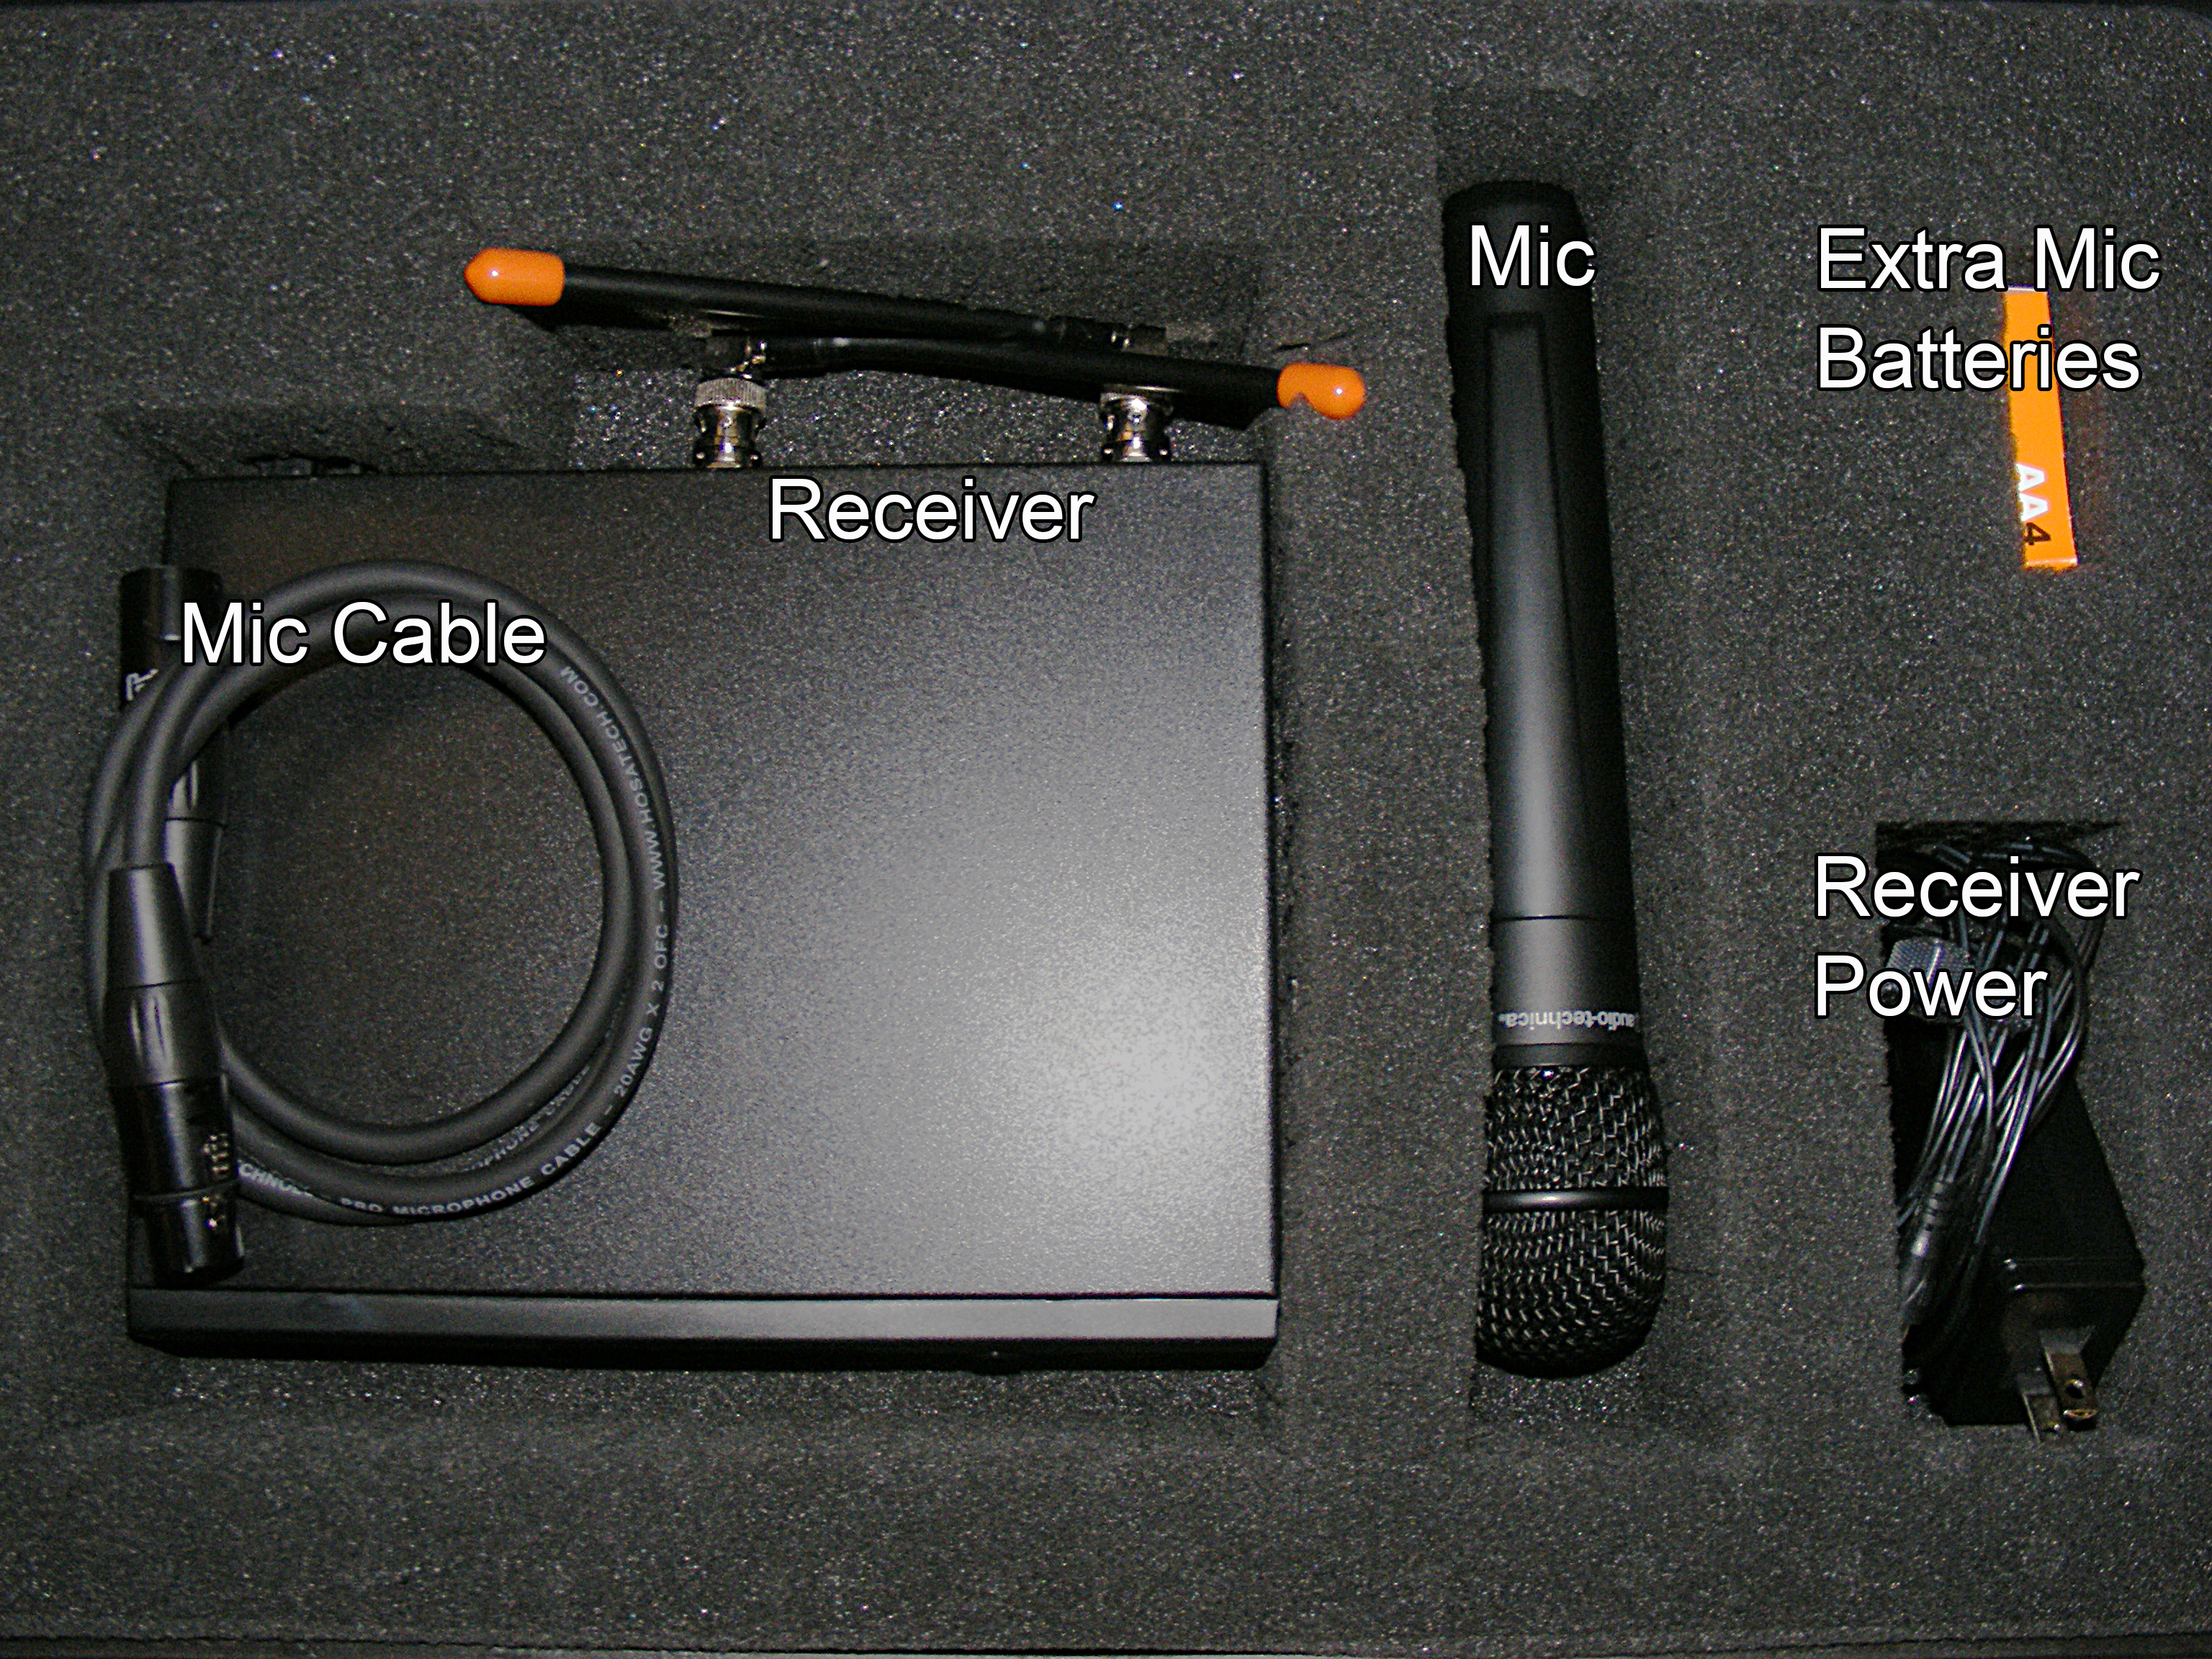
Audio-Technica UHF Receiver (ATW-R2100a)

The ATW-R2100a is a True Diversity UHF wireless receiver operating in the UHF band of 487.125–506.500 MHz. The automatic frequency scanning eliminates the need for searching for clear channels and automatically selects the most appropriate frequency for the area in which the wireless is operating. A pre-coordinated integral channel plan allows for simultaneous operation of any of the ten channels in a given location.
Set-Up
Before set up, be sure that the speaker system/camera you intend to use is powered down (OFF) until all cables are connected.
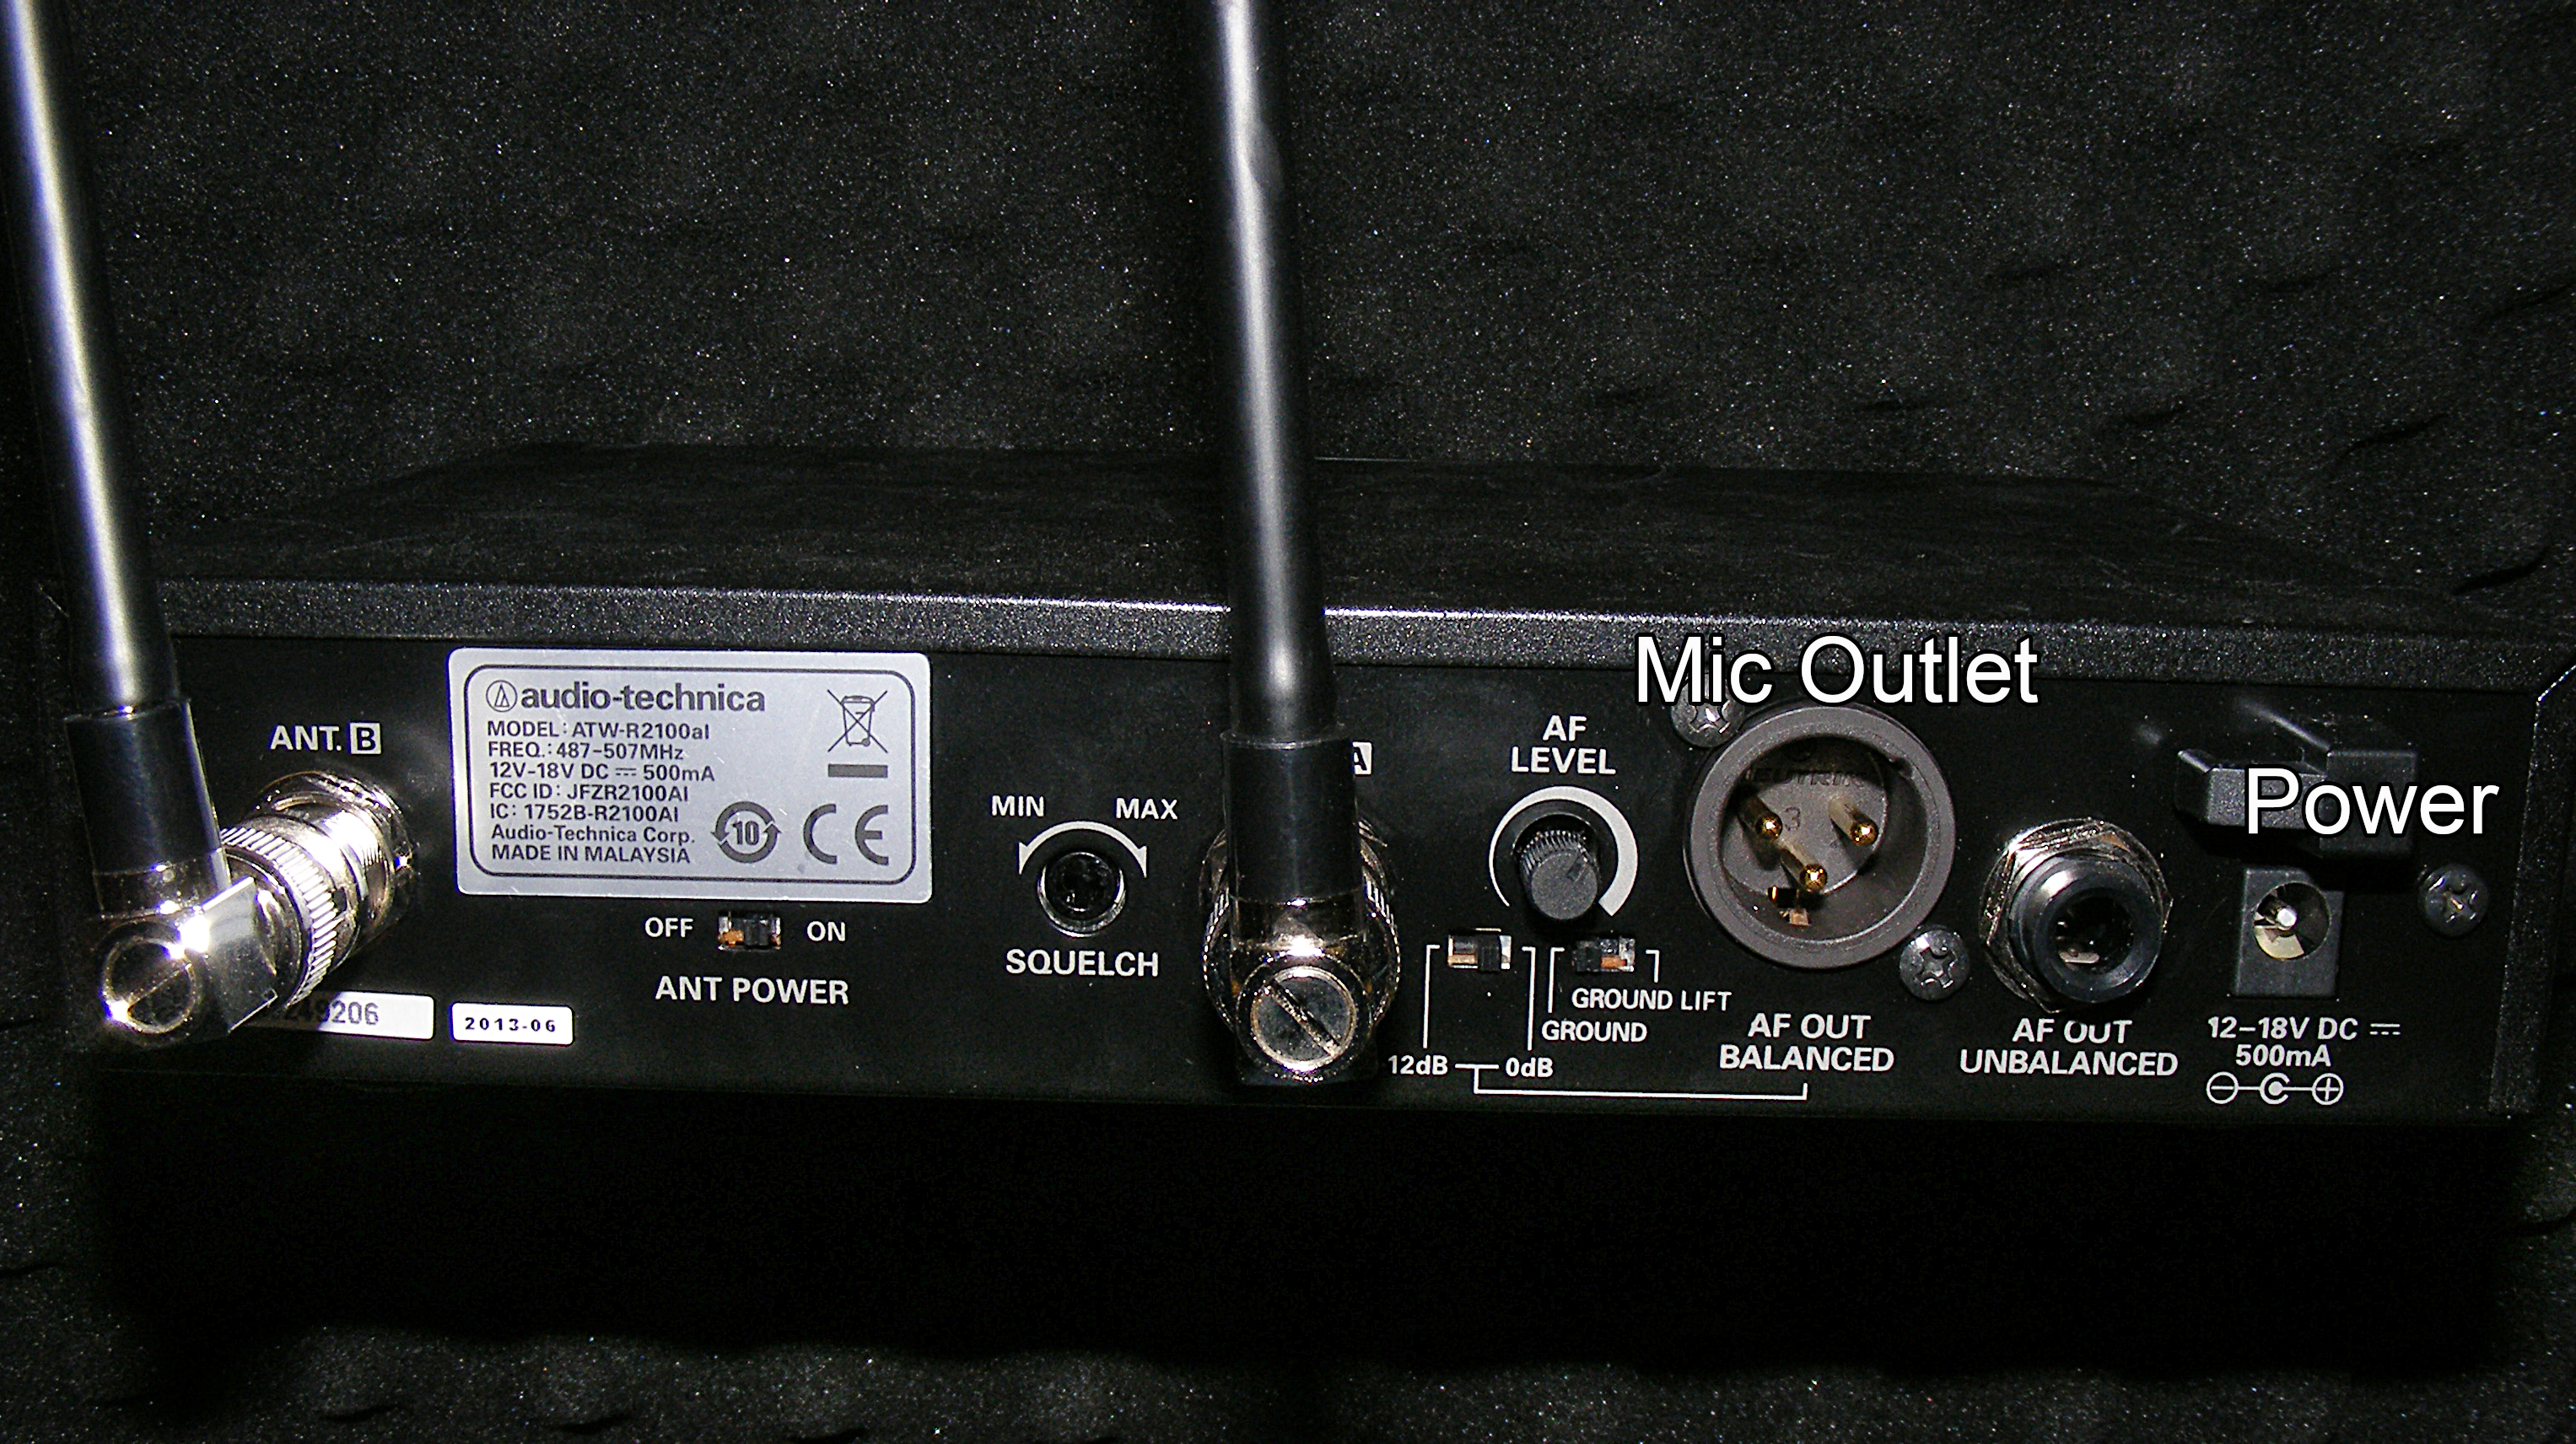
If the anntennae are not already connected, attach them to the antennae posts on the receiver's back panel. Twist to lock the BNC-type connection, so that they cannot fall off. Orient the antennae vertically for optimal reception of the wireless signal.
Using the mic cable (XLR) and the power cables, set up the system this way:
- Make sure all devices are powered off.
- Plug one end of the microphone cable into the receiver (AF Out) and the other end to the sound system, PC, or camera.
- Plug in the receiver's power cable.
- Power on the receiver first. Then power on the sound system or camera, and the microphone you are using.
Mic Cable Receiver DC Power


Receiver Back

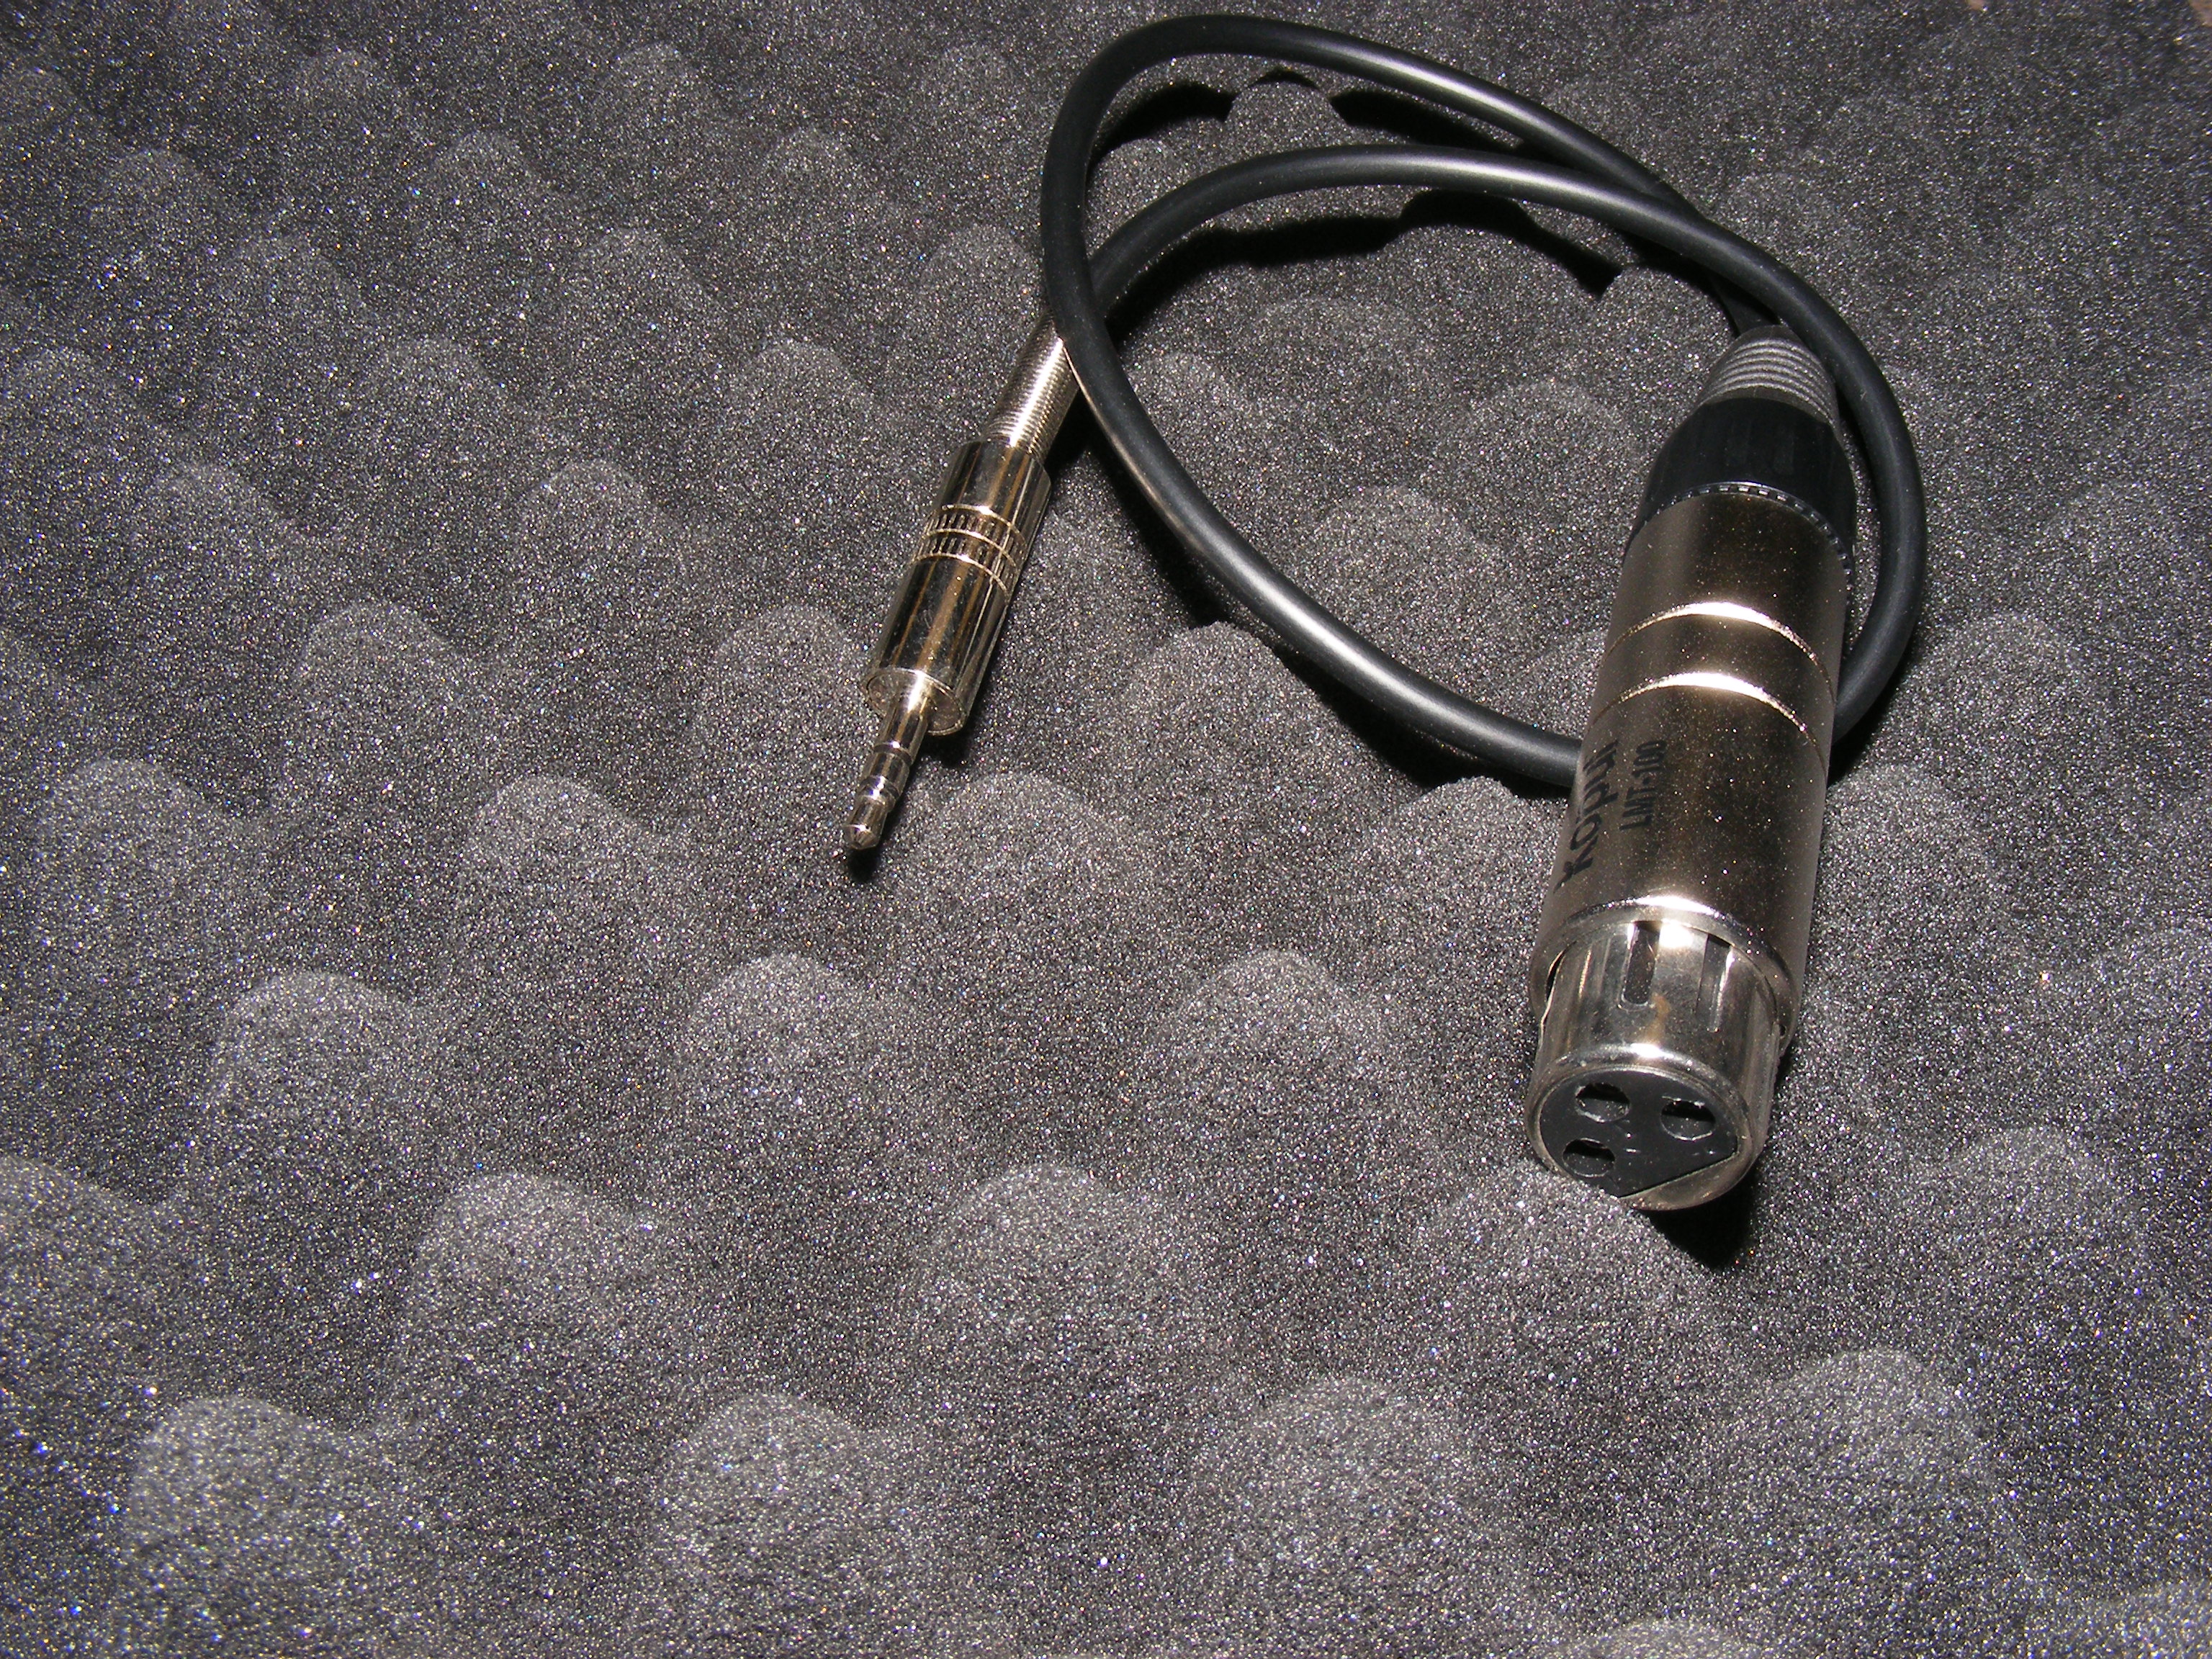
When connecting to a Camera, Camcorder, Phone, Tablet or Computer, use this optional adapter cable. This cable may not be included in the equipment case with the microphone, so ask for it to be included.

Hand-held mic power switch (on bottom of the mic)
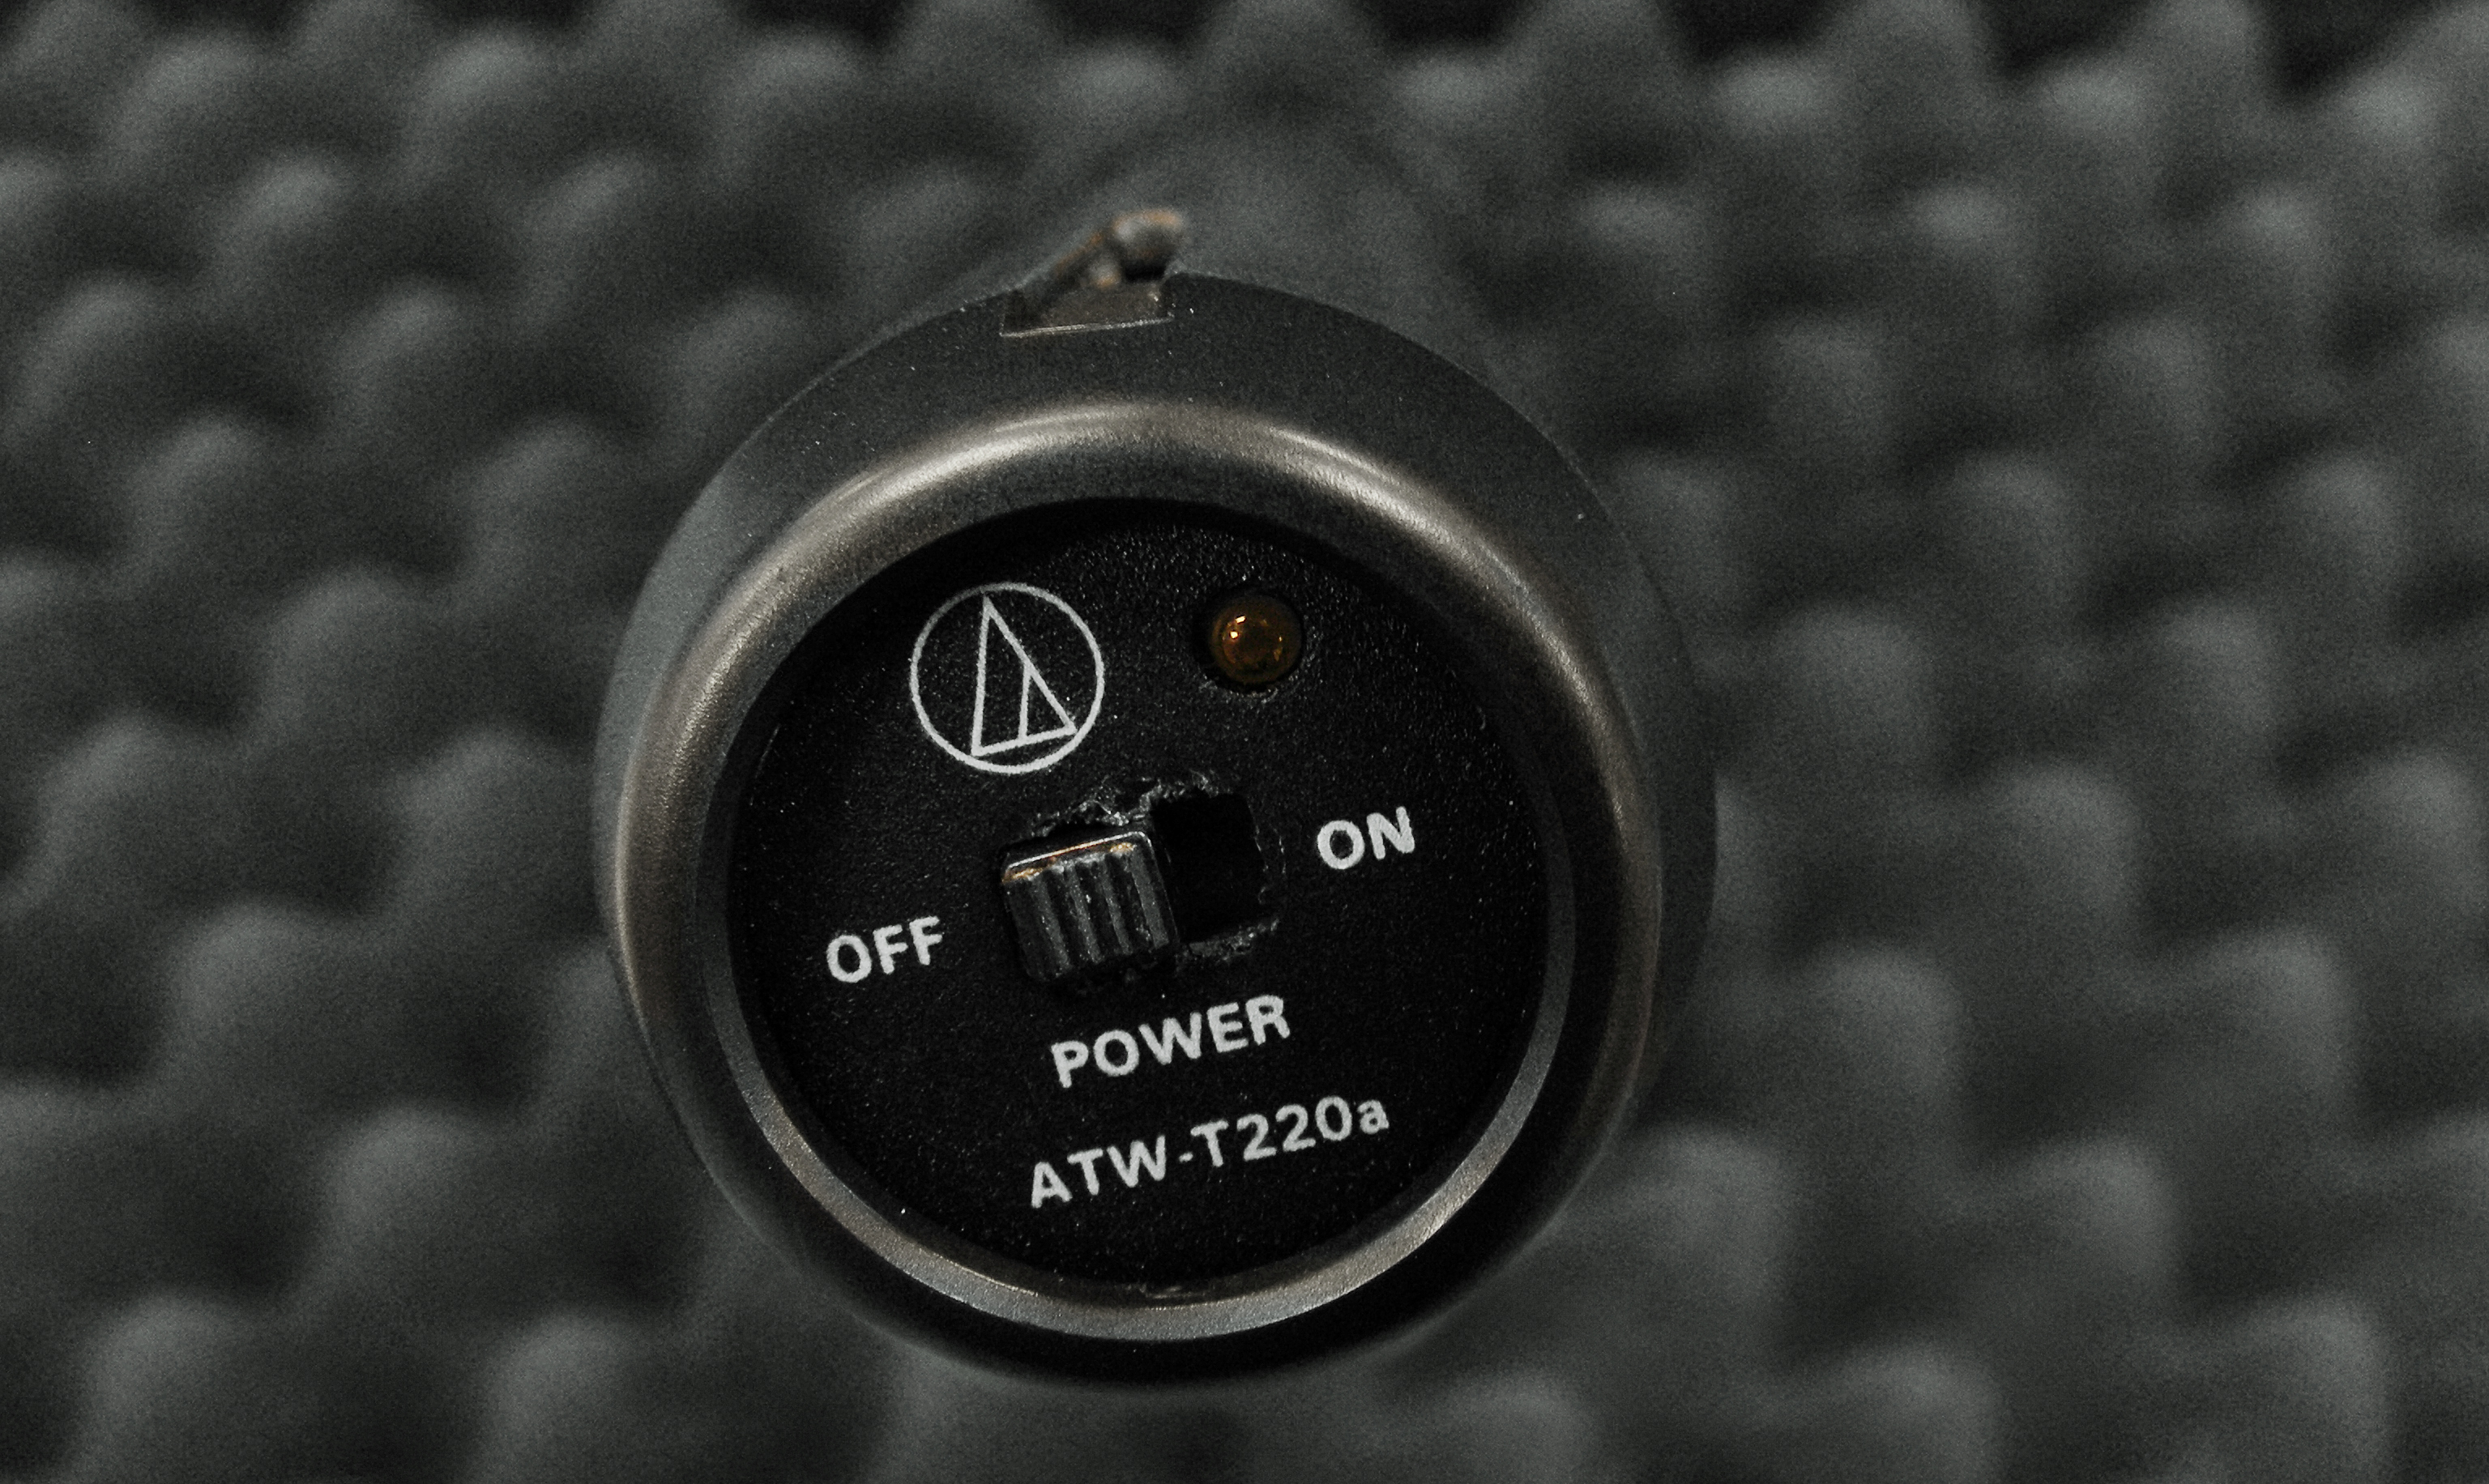
When using the handheld wireless microphone, turn the transmitter on or off by the switch on the bottom of the handle. Make sure to turn it off when not in use, to prevent running down the battery, and to prevent amplifying unwanted noise.
Troubleshooting
Setting channels
If the receiver does not detect the signal from the transmitter, you may need to verify the channels are set correctly on both devices. There are 10 user selectable channels from which to choose. Please contact the Support Center or the Media Services desk if you are uncomfortable doing this yourself.
-
Make sure the microphone is set to the same channel as the receiver.
-
Set the channel on the Receiver first.
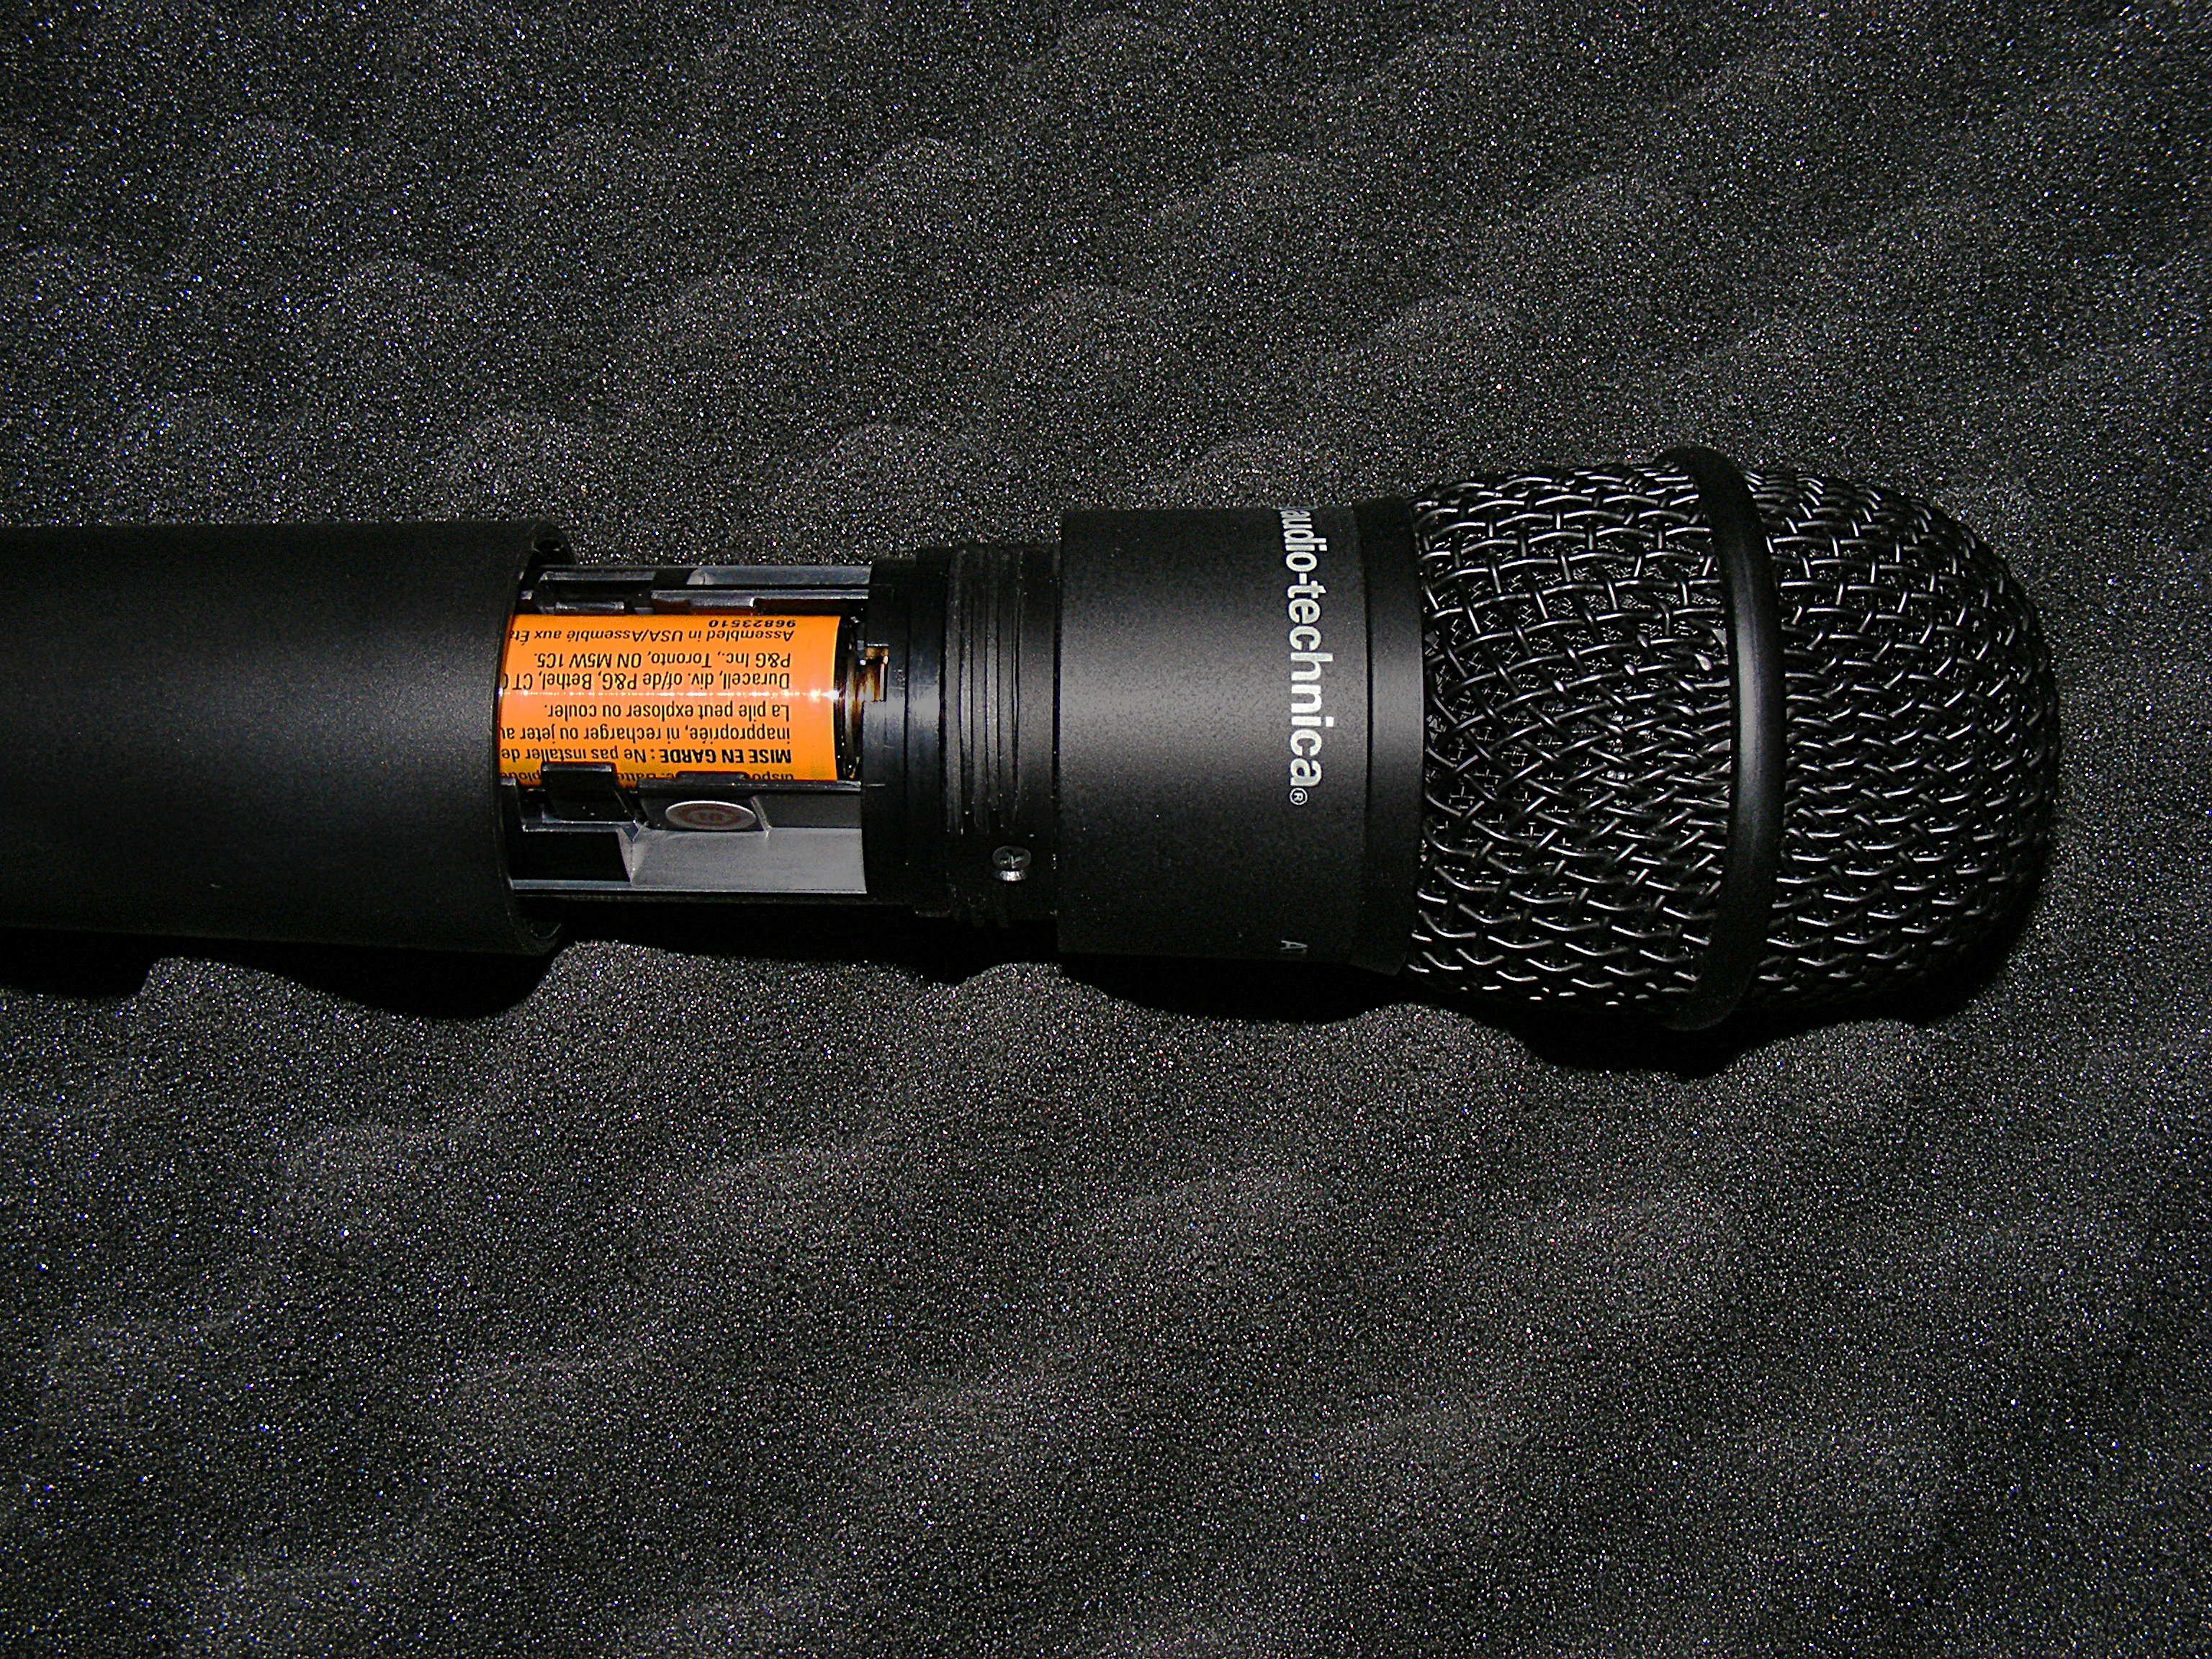
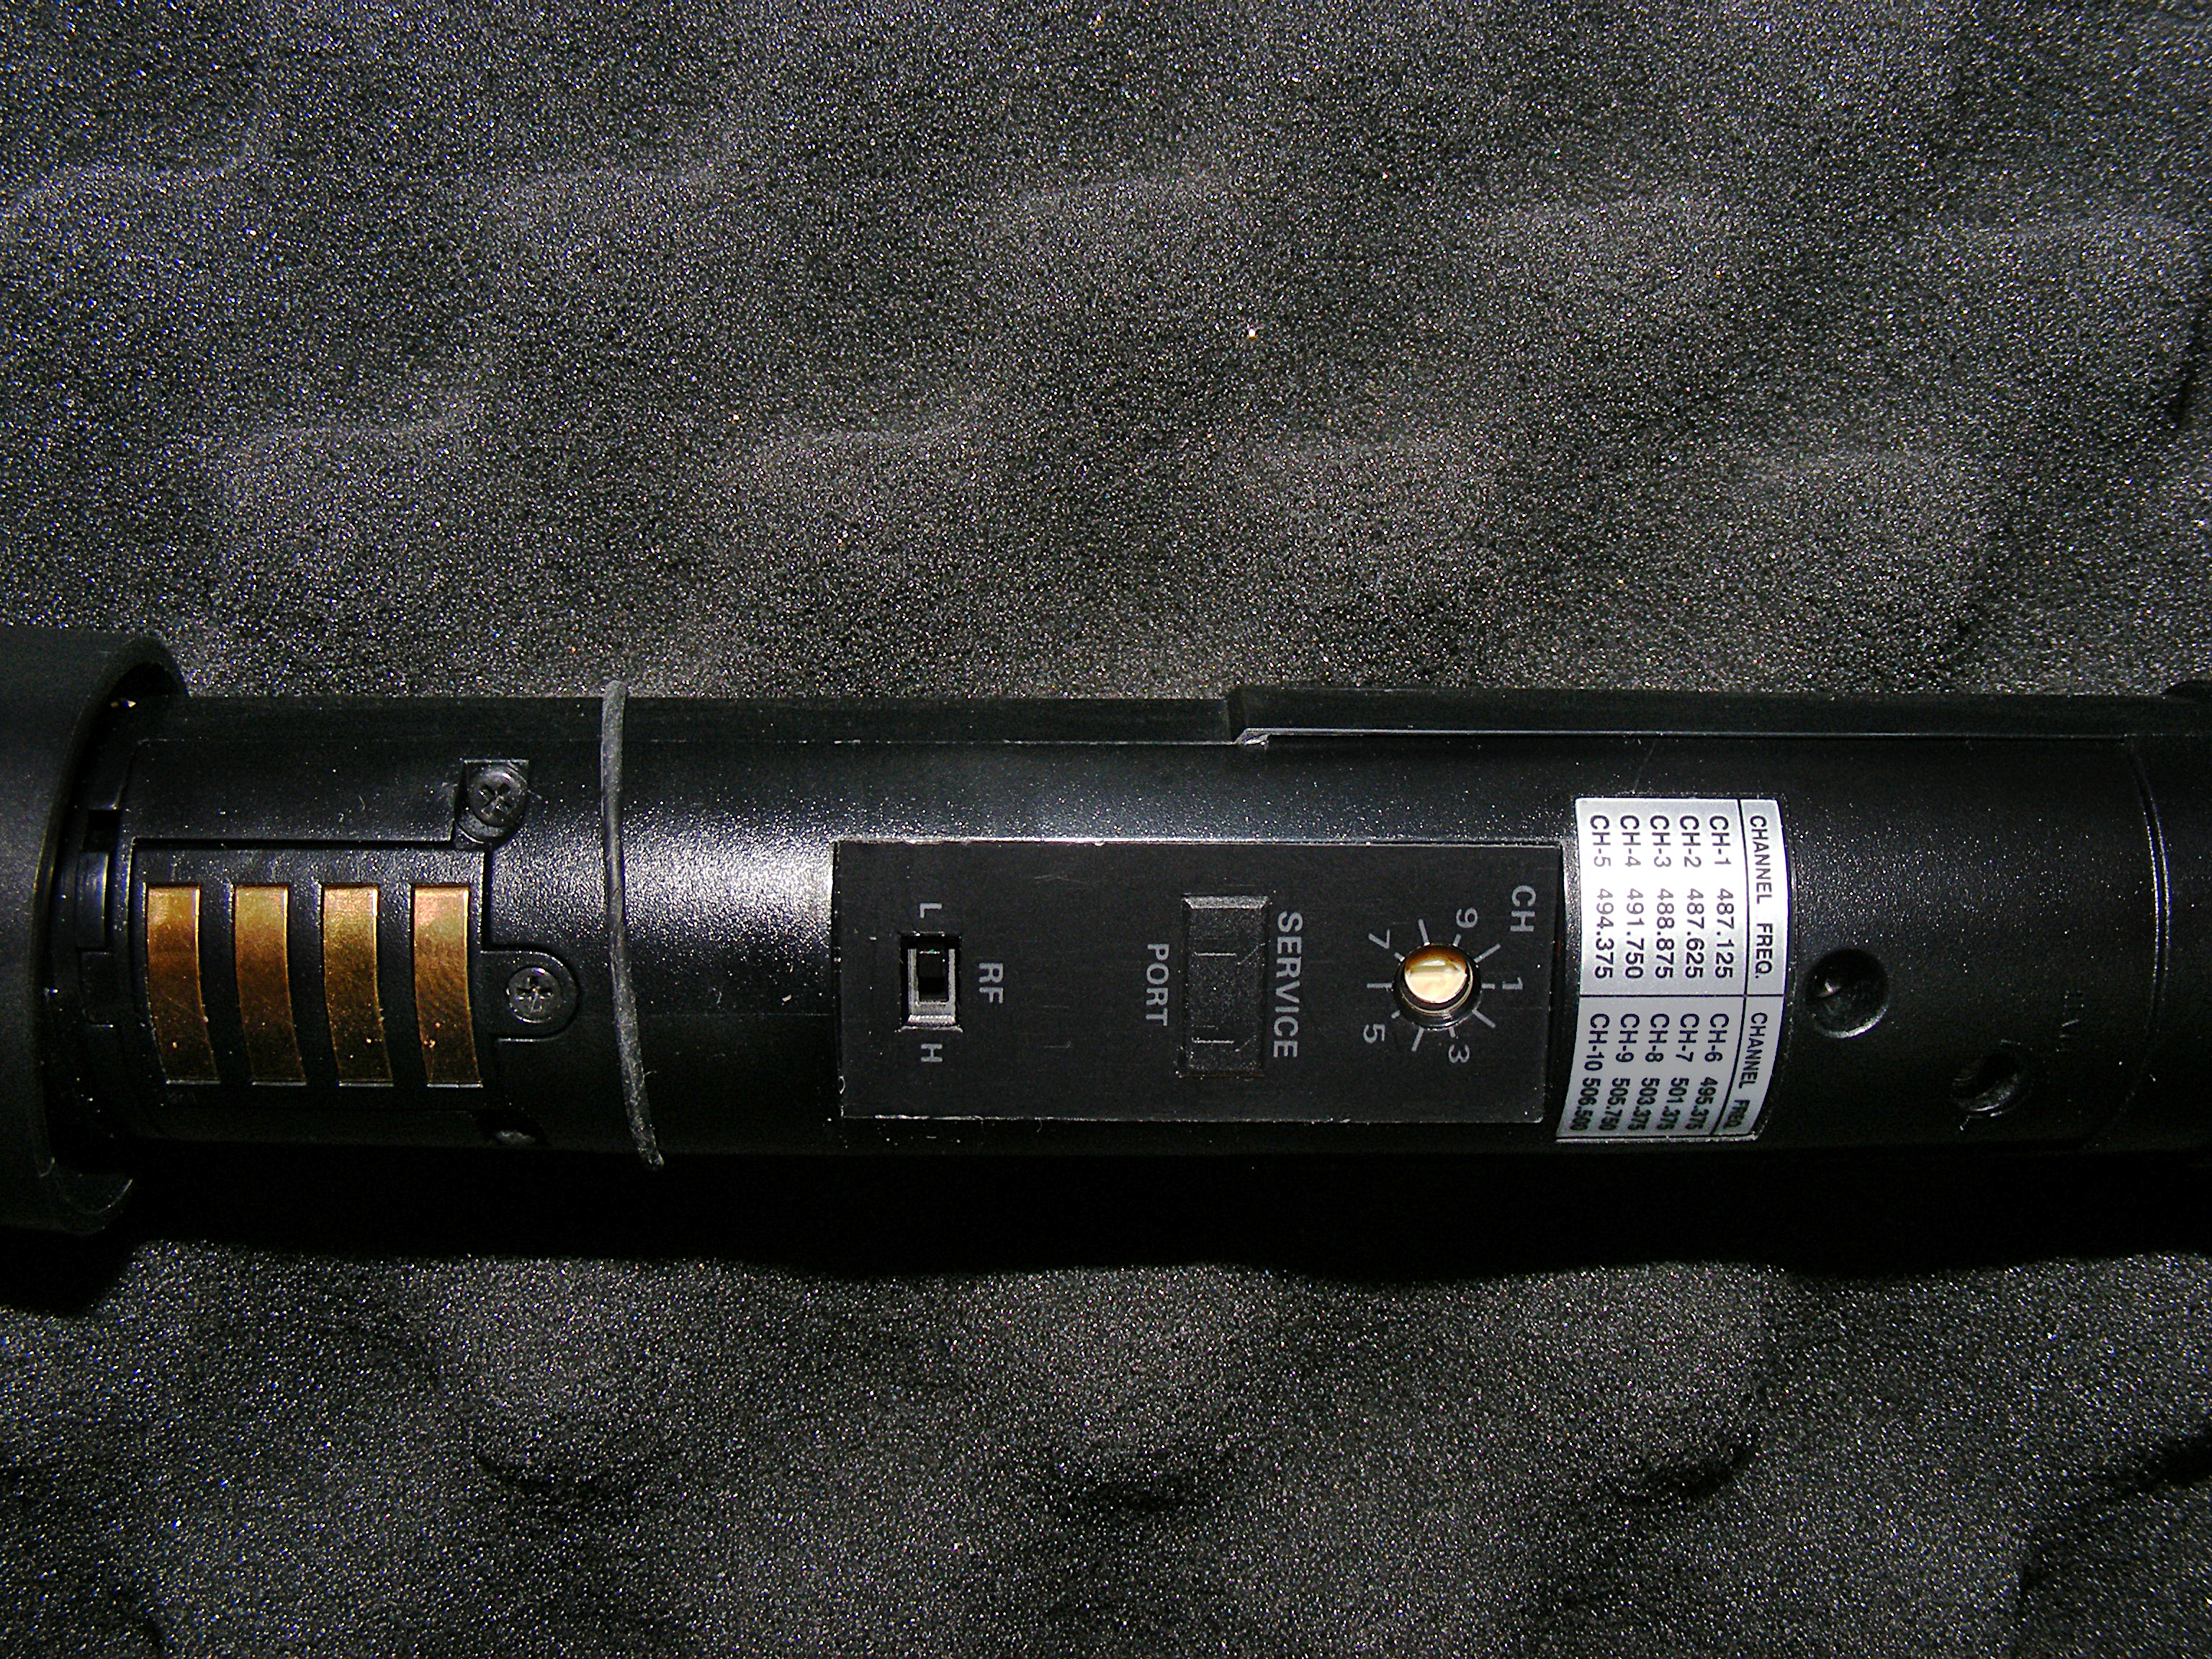
- Twist to unscrew the handle of a hand held microphone to access both the batteries and the channel setting control.
- use a small screw driver to turn the arrow and point it at the channel number you desire.
- For a hands free microphone, (headset, or lapel mic) the channel setting control is inside the battery compartment of the transmitter, or belt pack.
- use a small screw driver to turn the arrow and point it at the channel number you desire.

Tear Down
- First power down the sound system, speakers first.
- Next power down the microphone transmitter and receiver.
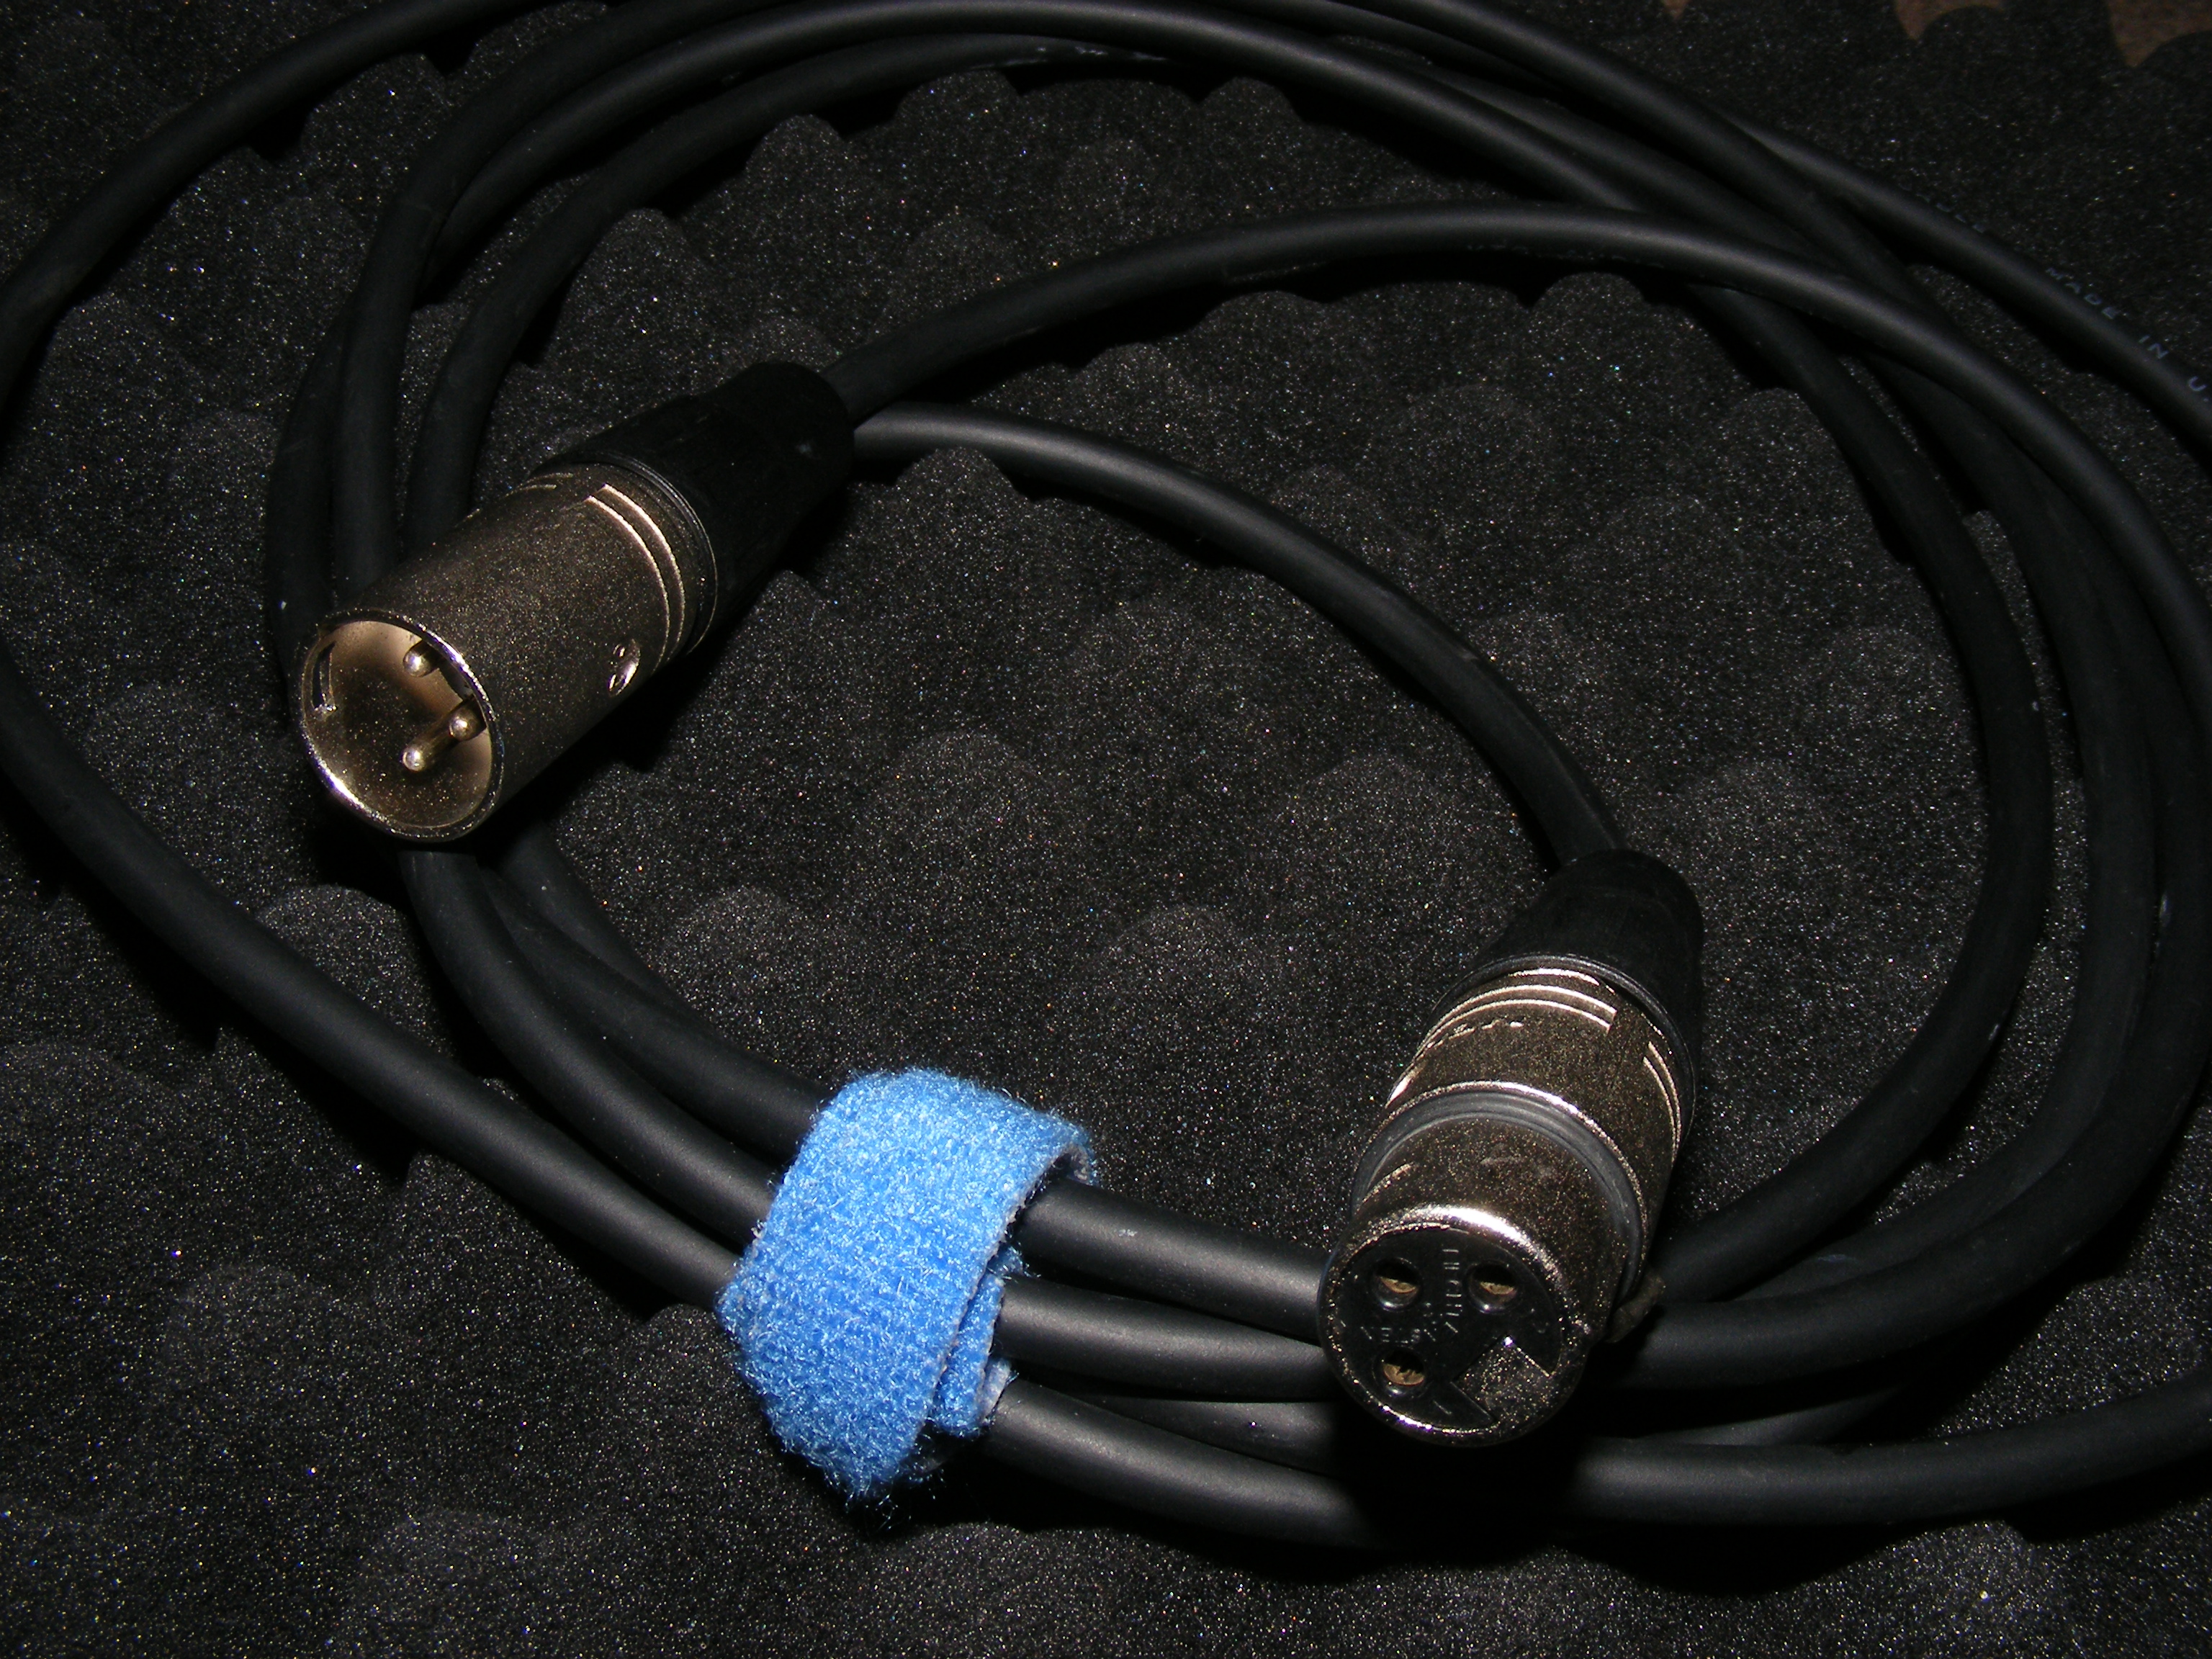
- Remove cables and wrap them neatly, using the cable wrap to hold them in place.
- Place all items neatly in their case.