Desktop PC
Overview
This document discusses the educational tool: the Desktop PC located in the classroom or lab teaching station cart. The brand of PC is typically HP.
Features
The Desktop PC can be used for a variety of functions including the following; Slide Show Presentation, Video Player, Document Reader, Document Editor, Internet Browser, and much more.
Software Applications
Microsoft Office Applications
Google Chrome browser
Firefox browser
Microsoft Edge browser
Foxit PDF viewer
VLC Player
Windows Media Player
Zoom
Hardware
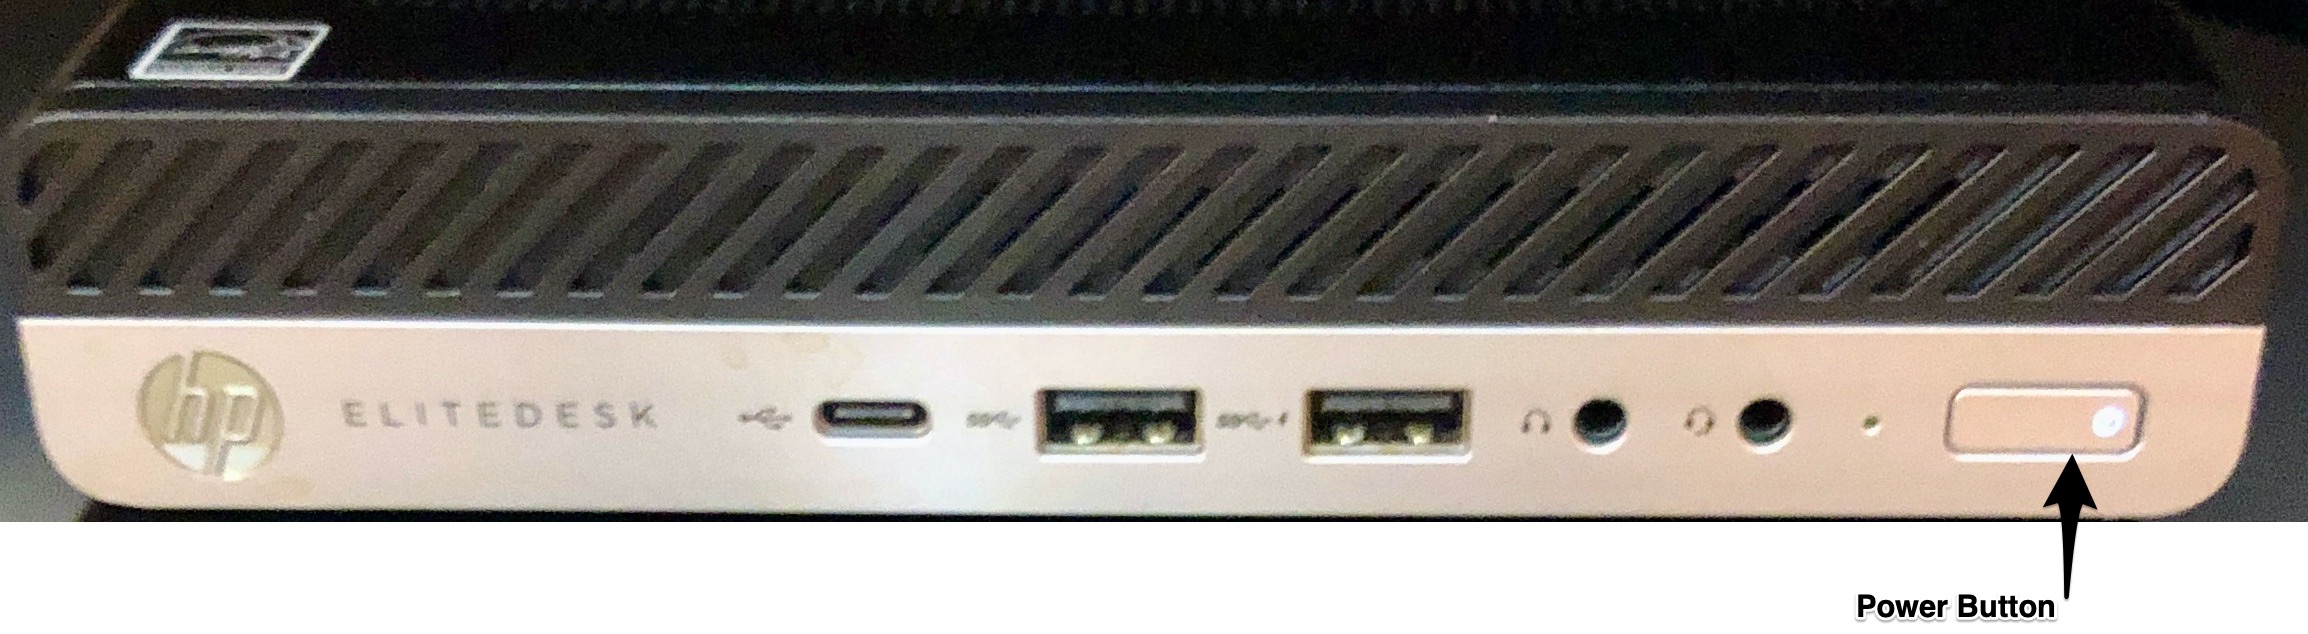
USB jacks on front panel
mic jack, or headset jack, on front panel
power button on front panel
USB optical mouse with scroll wheel
USB keyboard
widescreen, high definition LCD monitor
Sleep Mode
To conserve energy, the Desktop PC has been configured to enter sleep mode after an extended period of inactivity.
To wake the PC from sleep mode, wiggle or click the mouse, or press a key on the keyboard.
Logging In
The desktop PC will automatically log into a classroom profile, with local administrative permissions. You do not need to log in to your own Windows profile.
If you find that the computer is prompting you to log in, simply restart the PC and it will log in to the classroom profile.
Once Windows has launched, you can open a browser and log into the IWU portal, BrightSpace, or Office 365 apps, using your IWU user name and password.
How to Use the Desktop PC
First Steps
On the teaching station control panel, select the PC button, then press the Display On button to turn on the projector of flat panel TV.
If using a teaching stations which lacks a push-button control panel, first wake the PC, by pressing a keyboard key or wiggling the mouse. Then touch the interactive flat panel monitor on top of the teaching station. If the PC desktop image doesn't automatically appear on the monitor, press the yellow plus button in the control ribbon along the bottom of the monitor. From among the available input source options, select the one that is labeled Computer. If the computer is turned off, it will not appear among these available source options. To turn on the PC, press the power button on the front panel of the desktop PC.
Optional Steps
DVDs
Some users may want to play a video for the students in the classroom and simultaneously make it seen and heard by online students, or students who will watch a recording of the class at a later time. If the video media is a DVD, this can be accomplished by using a USB DVD drive to the PC. If the classroom does not have a connected DVD drive, you may check one out from the Jackson Library Media Services desk. DVD players in a protective travel case are provided to each academic building and regional education center (those that do not have DVD players installed in each classroom). To control the playback of a USB DVD drive, please use VLC player software.
Bluetooth
Some users connect a Bluetooth microphone (like the AfterShokz Trekz Air headset), for use in a hybrid class setting. This requires that the PC have Bluetooth enabled). Sometimes a newer PC will have built-in Bluetooth reception, and others will have a small USB dongle that receives the Bluetooth signal from the headset. Make sure the dongle remains plugged into the USB jack on the PC, and follow these steps to pair your headset to the PC's Bluetooth reciever. If you need additional help using Bluetooth on the PC, check out this troubleshooting guide.
Audio
Sound from a computer should be heard from the room speakers--either in the ceiling or the front wall near the projection screen. If sound is instead coming from the PC's internal speakers, follow these sound troubleshooting steps.
Display
The video output from the PC is shown both on the local monitor, and mirrored on the projector or flat panel TV. There is only one video output from the PC, ensuring that the image seen by the instructor on the monitor is identical to what is shown to the class. Because of this, Power Point's presenter mode will not work with the PC, because this feature requires one display for the preview/control images, and another for the presentation seen by the audience. Also, you should be aware when opening your email application, or anything that could contain personal information, that the audience can see what is on the display, so you should either Display Mute (Blank) or turn off the projector or TV when needing to access this information on the teaching station PC.
Last Steps
These are important final steps when using the Desktop PC. Doing this will improve the performance of the PC and improve the experience of the person who next uses the Desktop PC.
1. Restart the PC. Click on the Windows button. Click the Power option, and then click on Restart. Confirm by clicking YES. The PC will reboot, clearing out any stored files, downloaded apps, or logged in profiles. The PC will automatically log in to the classroom profile for the next user. The PC will enter sleep mode to conserve energy, but will still be able to accept system and security updates during the night.
2. Turn off the Projector or flat panel TV. See this page for detailed instructions on the shutdown procedure.
3. Leave the PC monitor powered on. As a courtesy to the next user, please do not turn off the monitor. This monitor will enter sleep mode when the computer does.