Wireless Microphones in Classrooms
Wireless Microphone Systems
Benefits of installed wireless microphone systems
Some classrooms have dedicated microphone systems installed in the classroom, providing the following benefits:
- speech from the microphone is heard through the room's installed ceiling speakers
- sound level of the speech can be adjusted by the volume knob inside the cart
- no visible cables
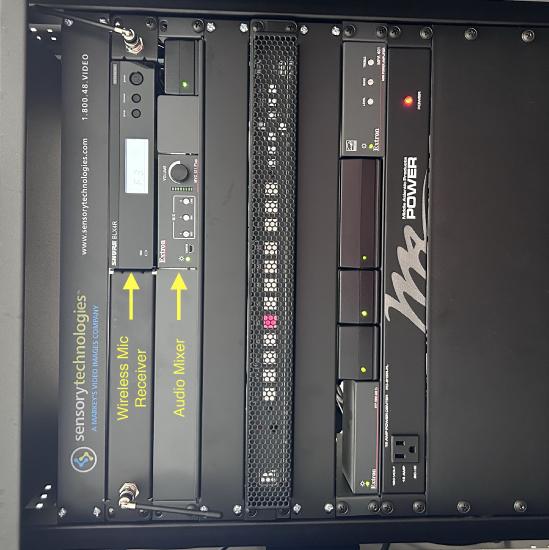 Cautions when using the installed wireless microphone systems
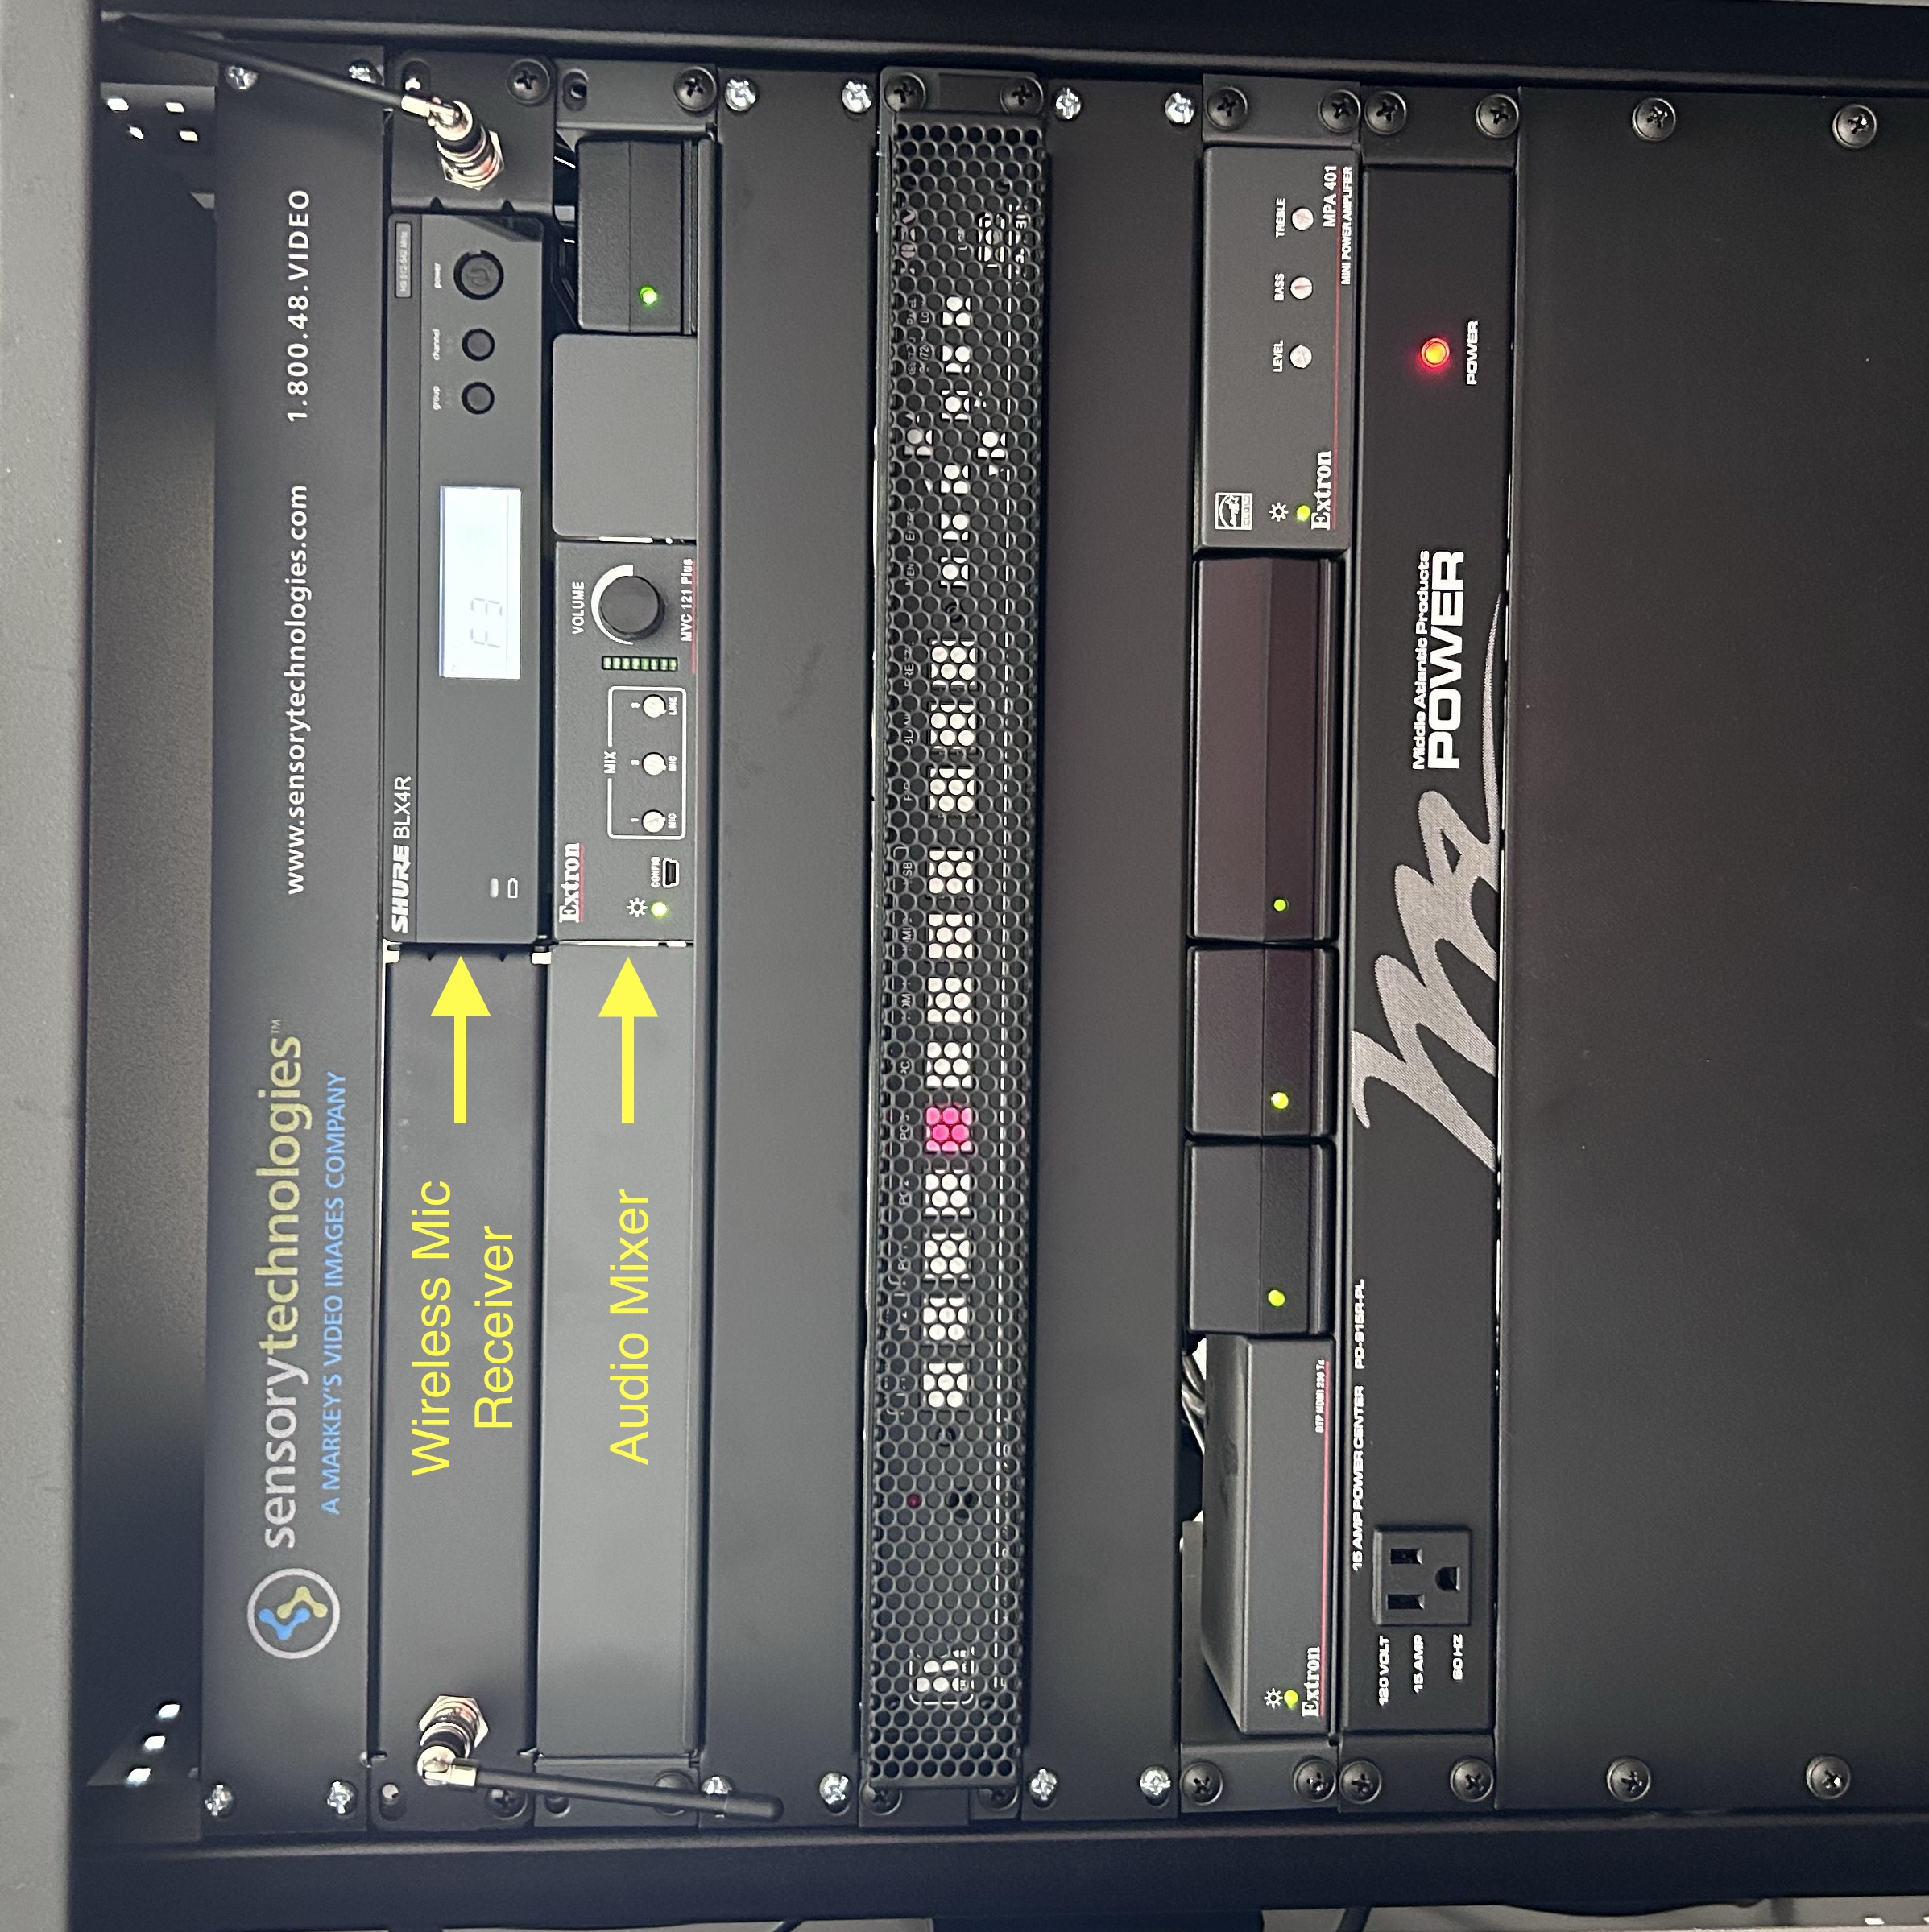
- These microphone transmitters are paired with the receiver that is in the teaching station. Therefore they should not be taken from the room for use anywhere else. The Group and Channel numbers or letters will identify the transmitters to the paired receiver.
- In rooms which include both types of transmitters (handheld microphone; beltpack with body-worn microphone), only one can be used at a time. For instance, with the Shure BLX models, whenever both mic transmitters are turned on, the beltpack (with body-worn mic) takes precedence over the handheld microphone, effectively muting the handheld microphone.
- Various factors contribute to different volume levels:
- Proximity. The closer the microphone is to the mouth, the louder it will sound through the speakers. Therefore, the headset mic will be louder than the lapel mic.
- Volume control at the teaching station. Inside the teaching station's front door, a volume knob adjusts the volume of both the microphone and the program (PC) audio.
- Volume control on the microphone transmitter. The transmitter may have an internal volume control, which may not be accessible to end users.
- Batteries are required. When the transmitter's status LED turns red, the battery charge is low (less than 60 minutes of usage remaining); replace or recharge them.
- Alkaline or Lithium. Recycle when low.
- NiMH. Recharge and reuse.
- Both the transmitters and the receiver must be powered on.
- Press and hold the button on the handheld microphone transmitter until the status LED illuminates
- Flip the protruding switch on the top of the beltpack transmitter from Off to On.
- Press and hold the power button on the microphone receiver until the screen illuminates.
- Verify that the Frequency Group and Channels are the same on both the transmitter and receiver. To view the Group and Channel on the transmitter, open the battery compartment.
- To open the battery compartment of the handheld transmitter, unscrew the bottom half of the handle.
- To open the battery compartment of the beltpack transmitter, squeeze the triggers on the sides of the beltpack, and pull outward and downward, like a pickup tailgate.
Links
Articles