Video Camera and Encoder
This page gives an overview of how the encoder system functions and how you use it properly. It informs where you can find these systems, the encoder's appearance, when you should use this feature, and how to use it.
Locations
- Noggle Christian Ministries Worship Lab - 134
- Elder Hall Speech Lab - 147
- One Button Studio, Jackson library - 05
- Baker Recital Hall, PPAC - 141
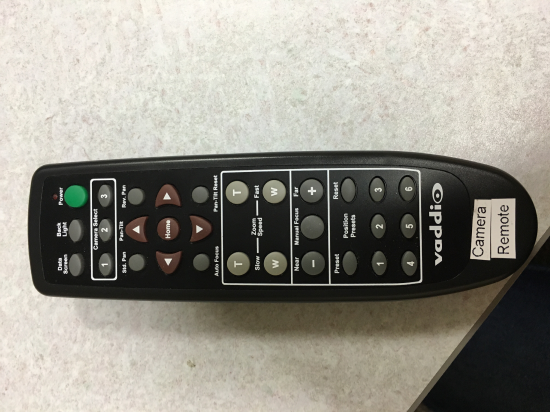 (Remotely control the camera's pan, tilt, zoom, and any preset positions. Aim this at the camera, or the IR receiver)
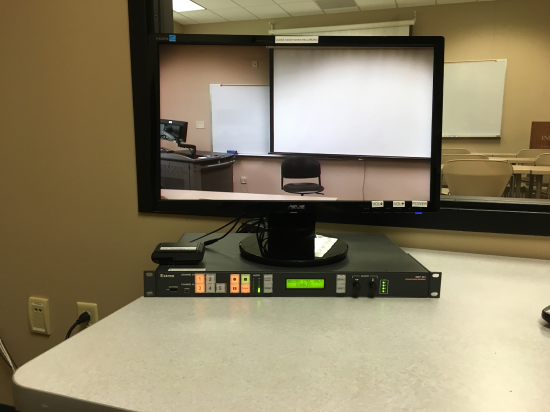 (Preview monitor, and encoder system)
What this Encoder can do
Recording a video file (.mp4) to a USB flash memory stick
Noggle Christian Ministries Worship Lab - 134
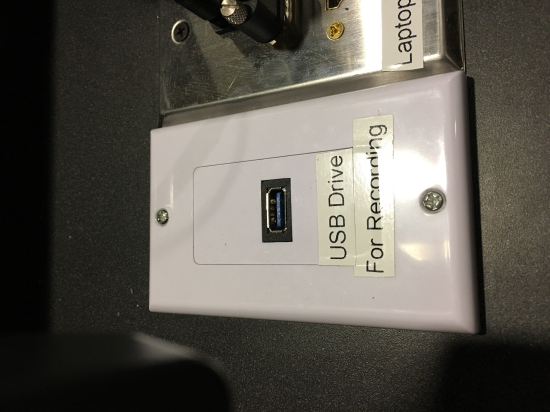 (Plug your USB drive into this jack)
Elder Hall Speech Lab - 147
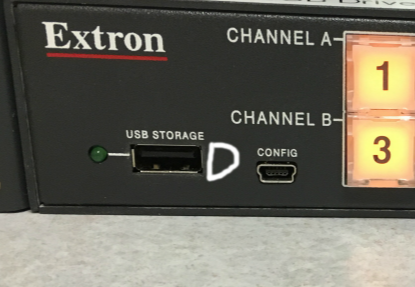 (Plug your USB drive into the USB Storage jack, labeled D)
When should you use this feature, and how do you use it?
Use this feature when you want to make a recording to a flash memory stick.
Noggle Christian Ministries Worship Lab - 134
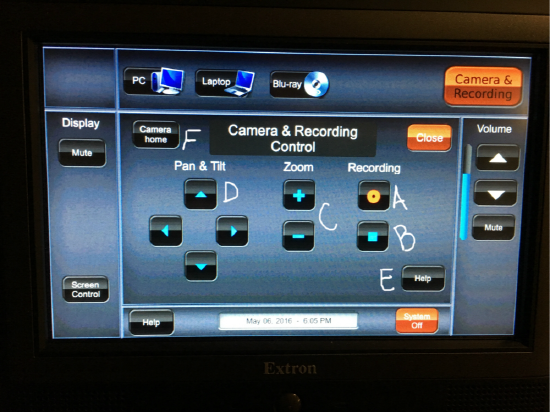
First stick the FLASH MEMORY STICK into the USB DRIVE jack (See the classroom image above to identify the USB port for that room)
FUNCTIONS OF THE ENCODER.
A.) Press the button (labeled A) to start recording
B.) Press the button to stop the recording and to be saved onto the FLASH MEMORY STICK. (Labeled B)
C.) Press the + or - to zoom in or out on the camera. (Labeled C)
D.) Press any of the arrow buttons to pan up or down, left or right on the camera. (Labeled D)
E.) Press this button for help on how to work the ENCODER. (Labeled E)
F.) Press the button to center the camera back to its original preset frame. (Labeled F)
Lastly, remember to remove your FLASH MEMORY STICK that has your saved recording on it. (Reference picture above for this classroom of where to locate the FLASH MEMORY STICK).
Elder Hall Speech Lab - 147
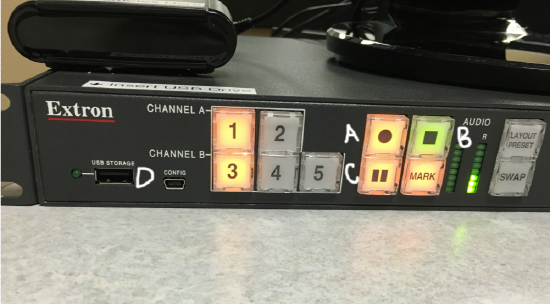
First insert the flash memory stick into the USB Storage jack (Labeled D)
A.) Press the Button (Labeled A) to start recording.
B.) Press the button (Labeled B) to stop recording completely.
C.) Press the Button (Labeled C) to pause the recording then hit record again to start the recording process from where you left off.
Lastly, remove your FLASH MEMORY STICK from the jack labeled D.
if you don't already know what to do with the recorded video file, click here.
