How To Add / Remove Members On myIWU Portal Sites
Only Site Owners of the SharePoint site are allowed to complete this.
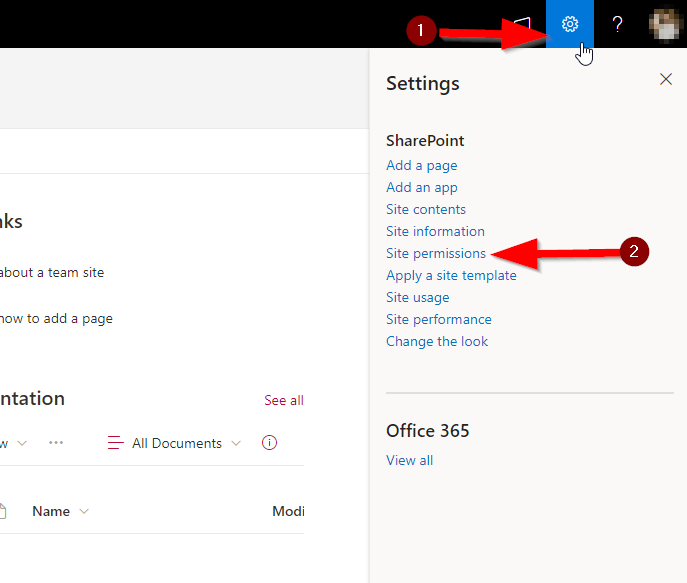
Starting on the site homepage, click on the gear icon in the top right corner. Clicking the gear icon will show a settings window. Next click on Site permissions.
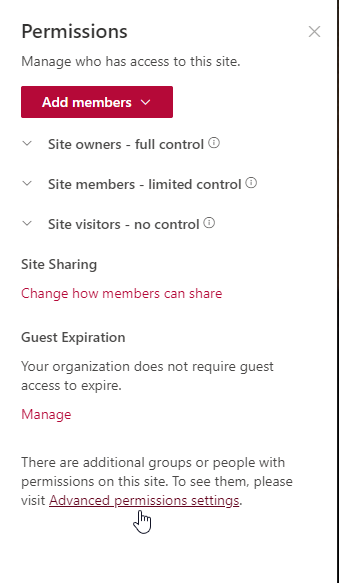
On the Permissions page click on the Advanced permissions settings.
The Advanced Permissions Settings page should look like this:
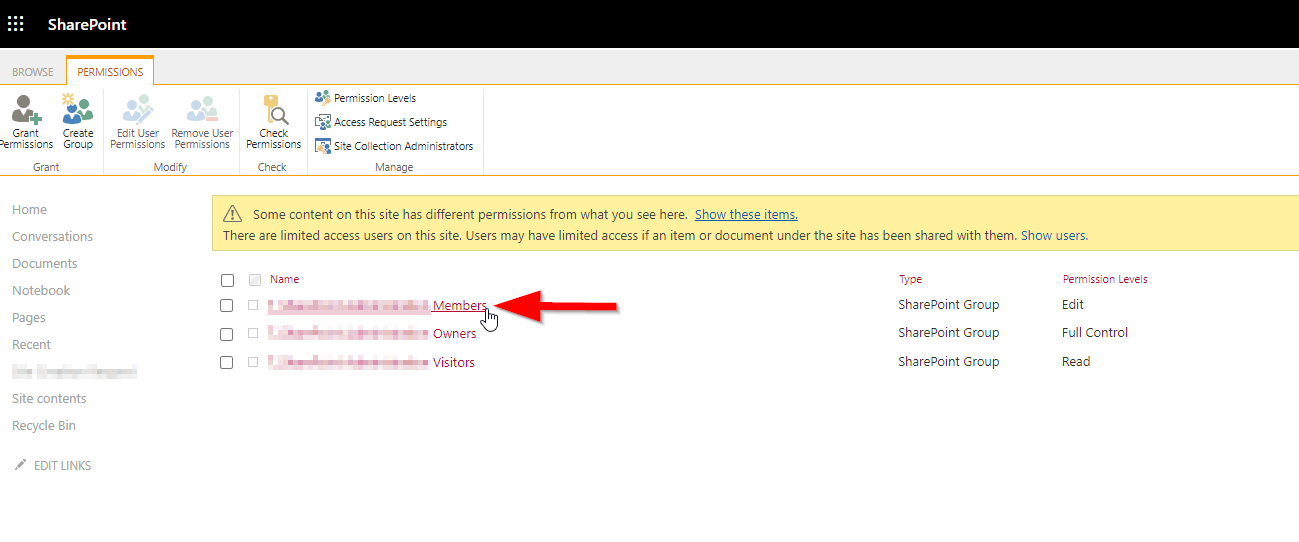
Three groups will be visible on this screen, Members, Owners, and Visitors. Click on the member's group name.
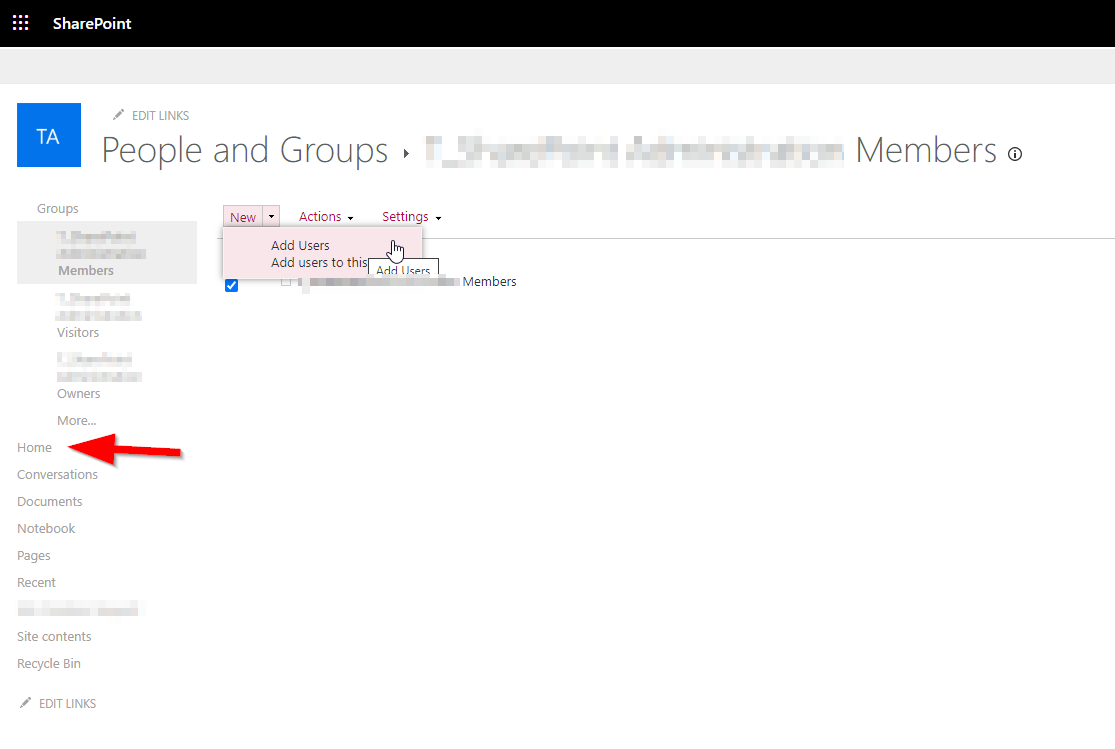
The Peoples and Groups Members page should look like this:
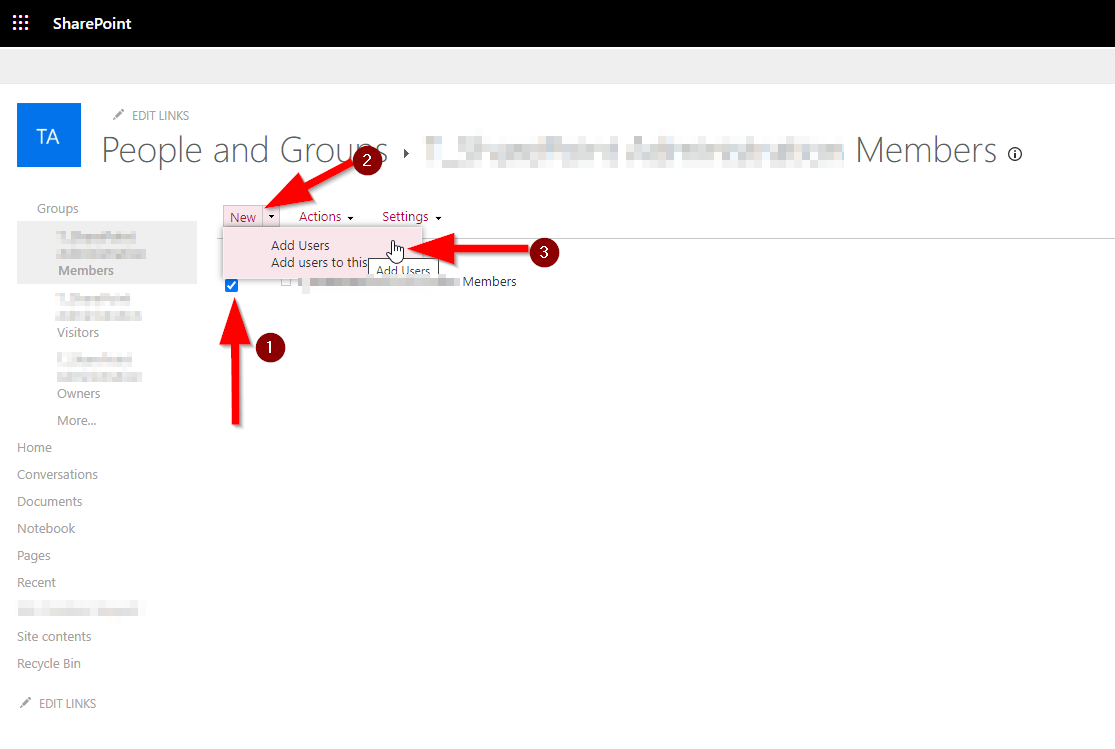
First, click on the check mark box on the left side of the group membership name, then click the "New" box, and finally select Add Users. This will open a window that looks like this:
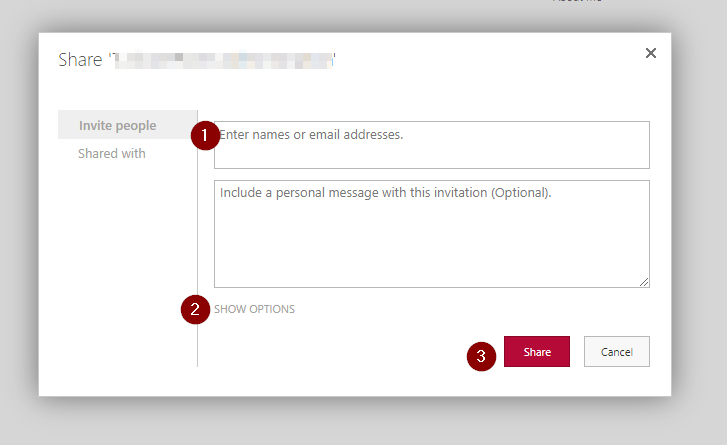
First, enter the valid email address of the user that should be added, select their name from the dropdown list. Next click "Show Options". An email invitation to the user can be disabled by unchecking the "Send an email invitation" checkbox. If all the users have been added to the name field, click the Share button.
The users now have permission to the portal site.
To return to the site's homepage, click on the Home button on the left side of the screen.
