Creating a Manual Session
Overview
This tutorial will walk you through using ScreenConnect on a Non-IWU machine and/or a Mac computer.
Steps
- Log into ScreenConnect
- Click on the "Support" button on the left side of the screen

- Click on the "Create +" button

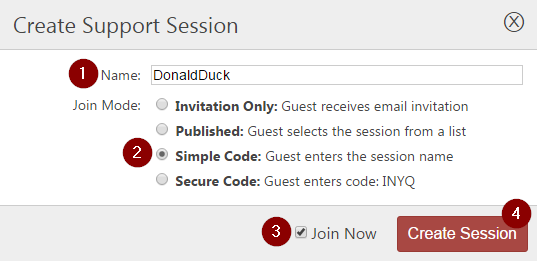
- On the popup:
- Enter the Session Name
- Make sure "Simple Code" is selected
- Check the "Join Now" box
- Click "Create Session"
- If it is your first time creating a session you'll be prompted to install the client. Click the "Download App"
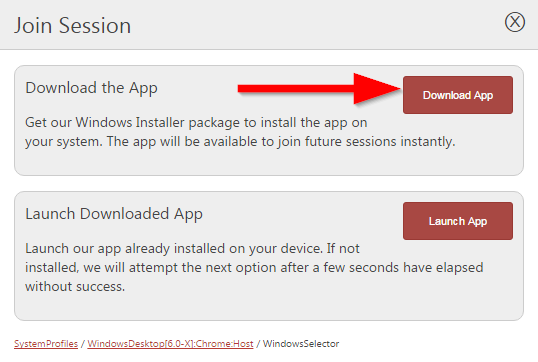
- Follow the onscreen instructions which will be tailored to the browser and/or OS you're using
- You should then be joined to your session which will present a black screen which says "Waiting for guest"
- Proceed to the "Have the Customer Connect" section below
Have the Customer Connect
- Have the customer visit https://remoteassist.indwes.edu (The https:// can be left off in most browsers)
- At the welcome screen have them type in the session name you created in step 4 above

- Have the customer then follow the on screen instructions which will be tailored to their OS and browser combination as shown below:

- The customer should then connect to your session and you should see their screen