How to take a Screenshot on a Mac or PC
Overview
This article explains how to take a screenshot (full screen or just a section) and then how to attach that to an email or a document. This is useful for sending error messages when troubleshooting, or in building instructions for others to follow.
Taking a Screenshot
Click on the heading below to view the steps for either a MacOS device or a Windows device.
For a Windows Device
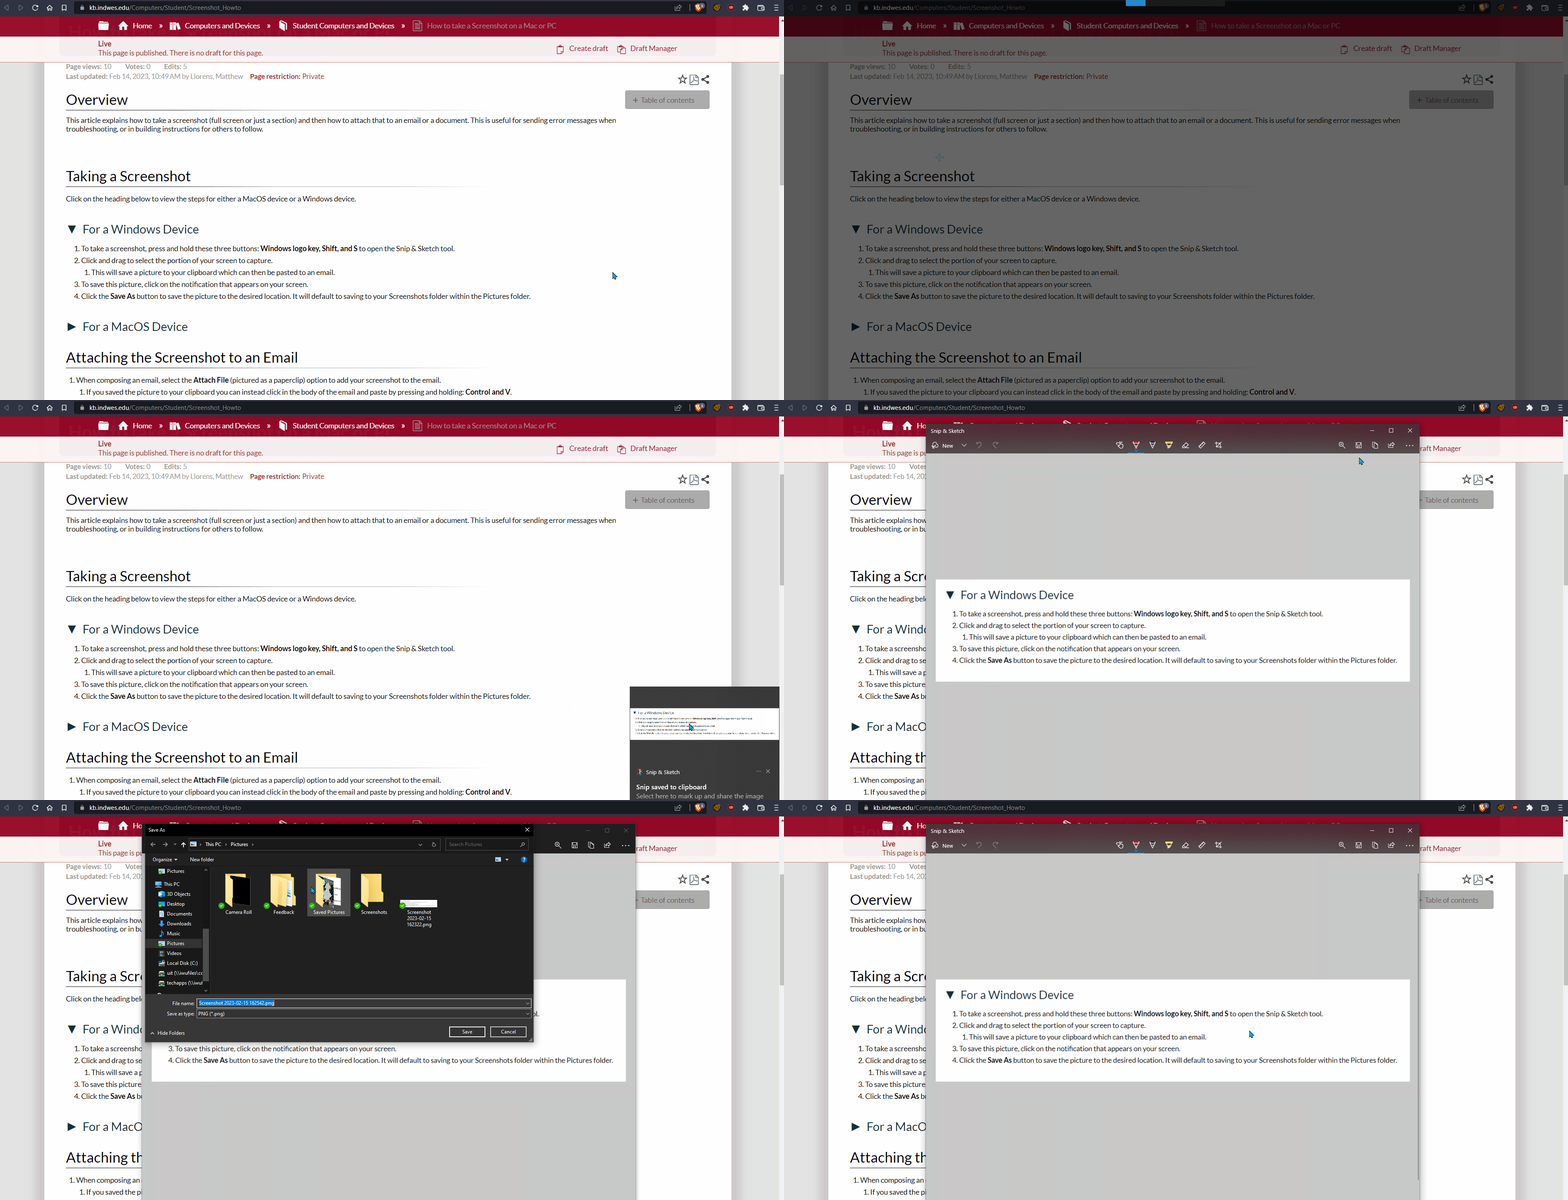
- To take a screenshot, press and hold these three buttons: Windows logo key, Shift, and S to open the Snip & Sketch tool.
- Click and drag to select the portion of your screen to capture.
- This will save a picture to your clipboard which can then be pasted to an email.
- To save this picture, click on the notification that appears on your screen.
- Click the Save As button to save the picture to the desired location. It will default to saving to your Screenshots folder within the Pictures folder.

For a MacOS Device
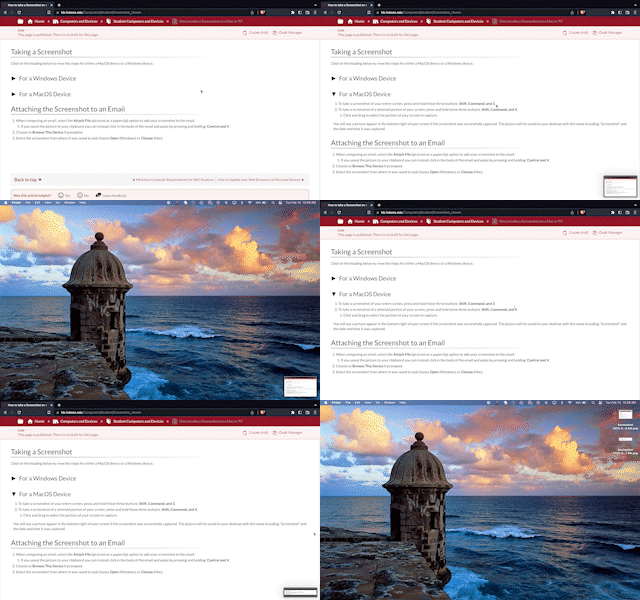
- To take a screenshot of your entire screen, press and hold these three buttons: Shift, Command, and 3.
- To take a screenshot of a selected portion of your screen, press and hold these three buttons: Shift, Command, and 4.
- Click and drag to select the portion of your screen to capture.
You will see a picture appear in the bottom right of your screen if the screenshot was successfully captured. The picture will be saved to your desktop with the name including "Screenshot" and the date and time it was captured.

Attaching the Screenshot to an Email
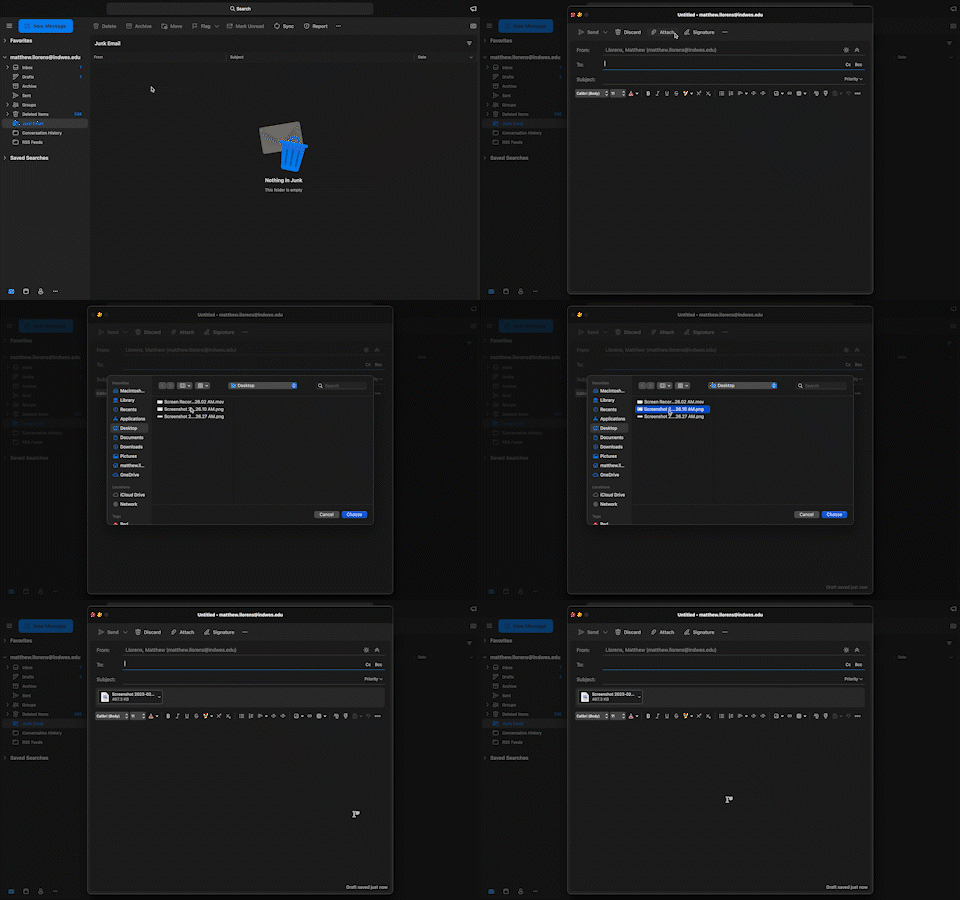
- When composing an email, select the Attach File (pictured as a paperclip) option to add your screenshot to the email.
- If you saved the picture to your clipboard you can instead click in the body of the email and paste by pressing and holding: Control and V.
- Choose to Browse This Device if prompted.
- Select the screenshot from where it was saved to and choose Open (Windows) or Choose (Mac).

