How to Create or Modify a Quiz Submission View
Goal
After completing this how-to you will have knowledge needed to create a new or modify an existing submission view in a quiz. For other guides on the Quizzes tool, review the Quizzes topic page.
Navigation
Modifying the Default View
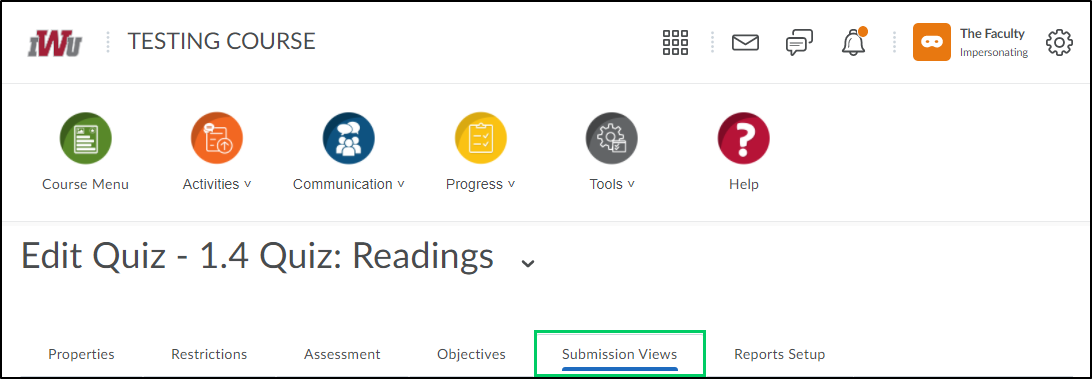
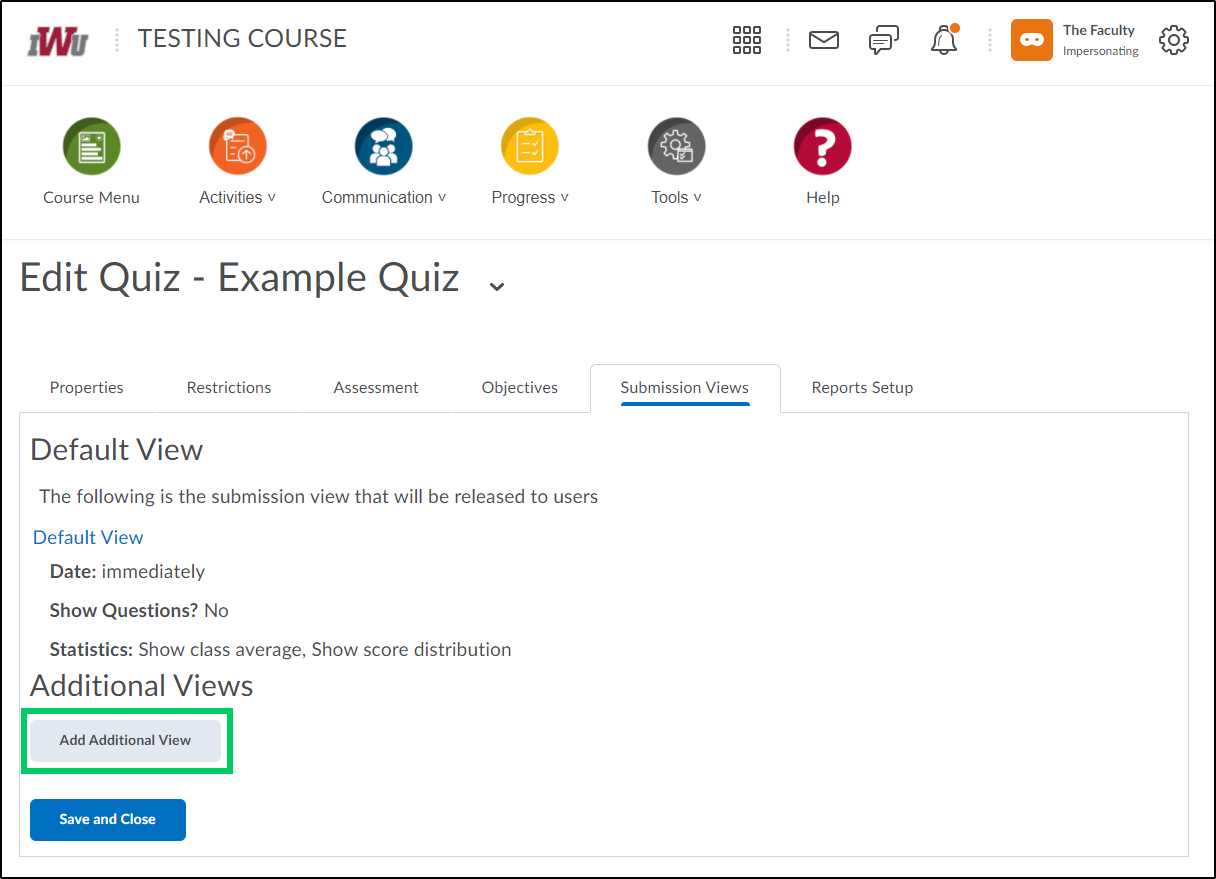
1. Navigate to the "Submission Views" tab within a new quiz or an existing quiz.
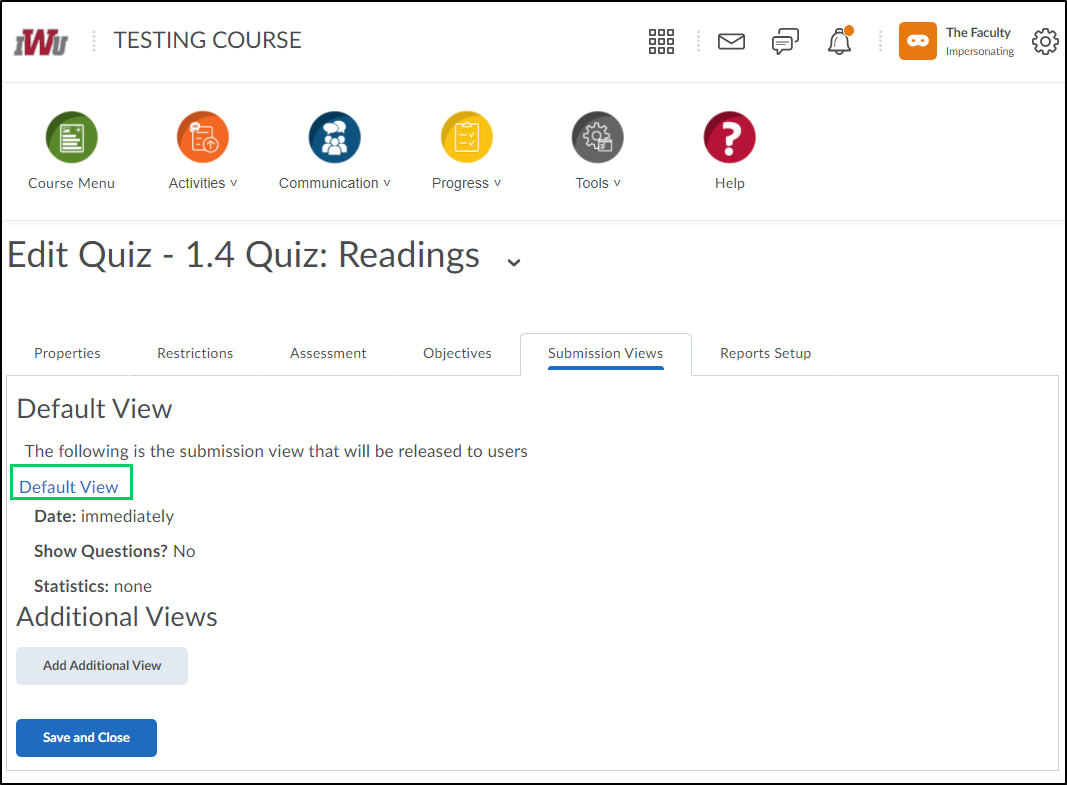
2. To modify the default view, select the "Default View" link.
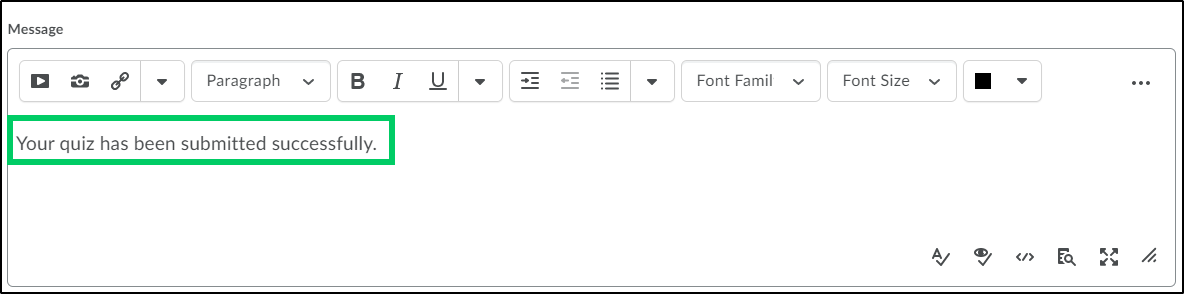
3. In the "Message" HTML editor, additions or edits can be made to the standard language that students see when they submit their quiz.
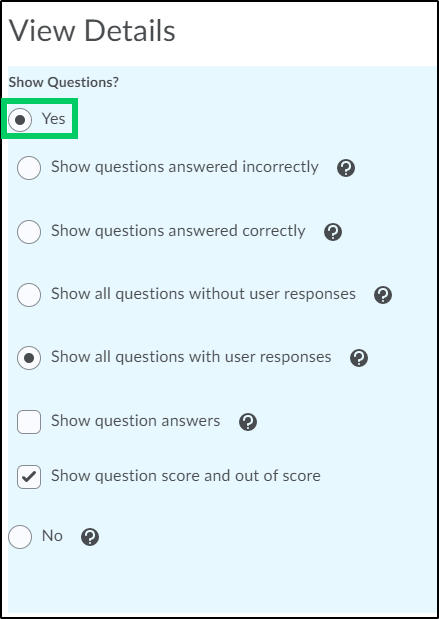
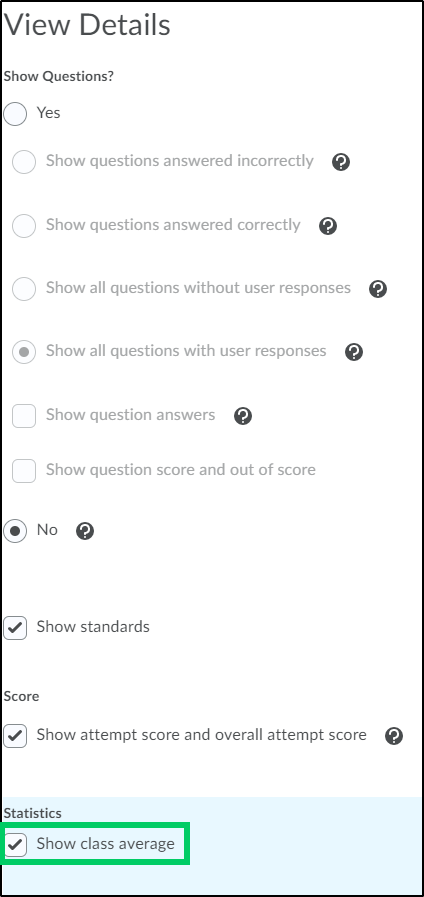
4. In the "Show Questions?" section, determine whether you want the questions to show and how you want them to show after the student has completed the quiz.
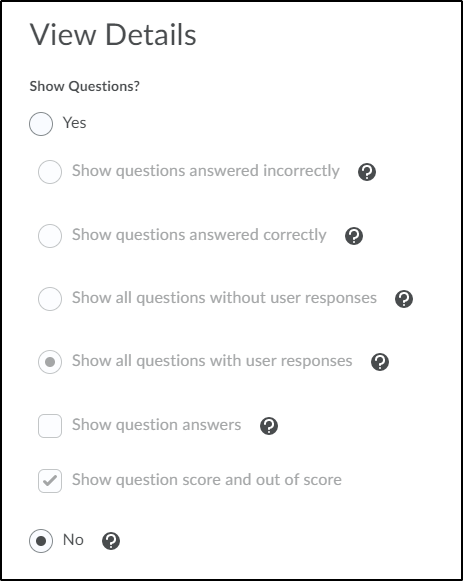
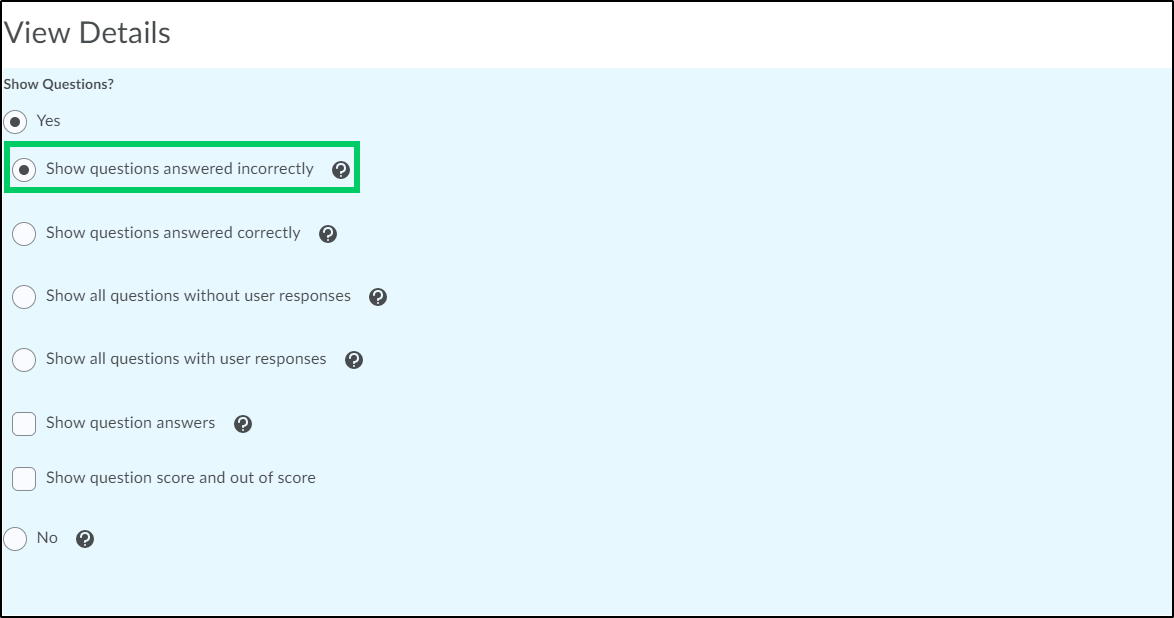
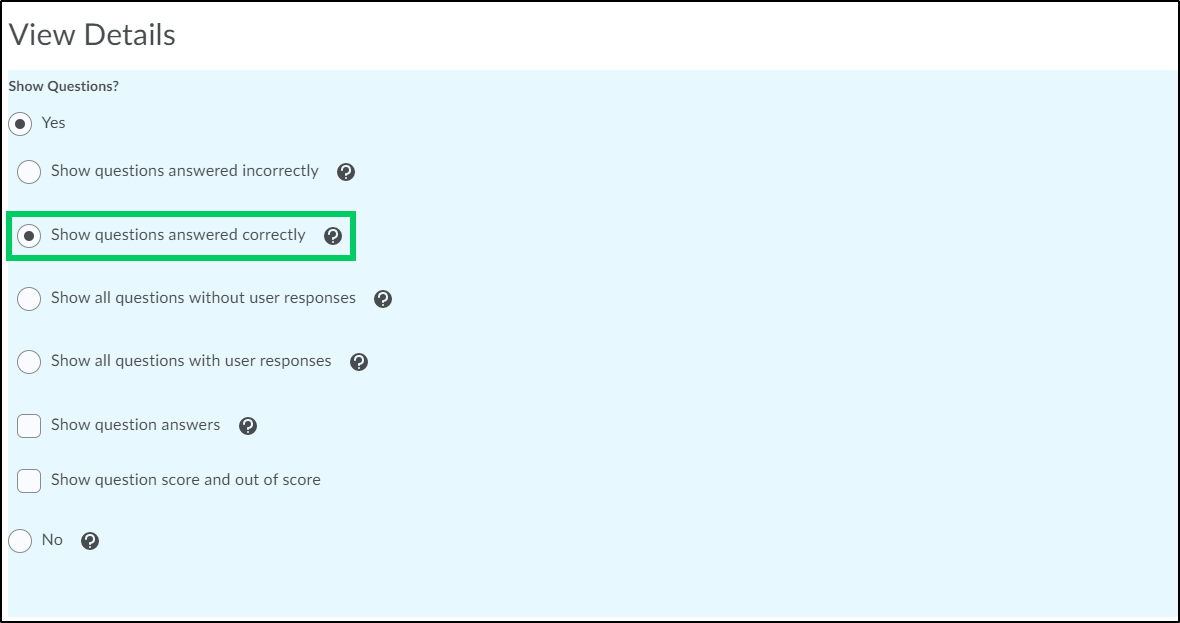
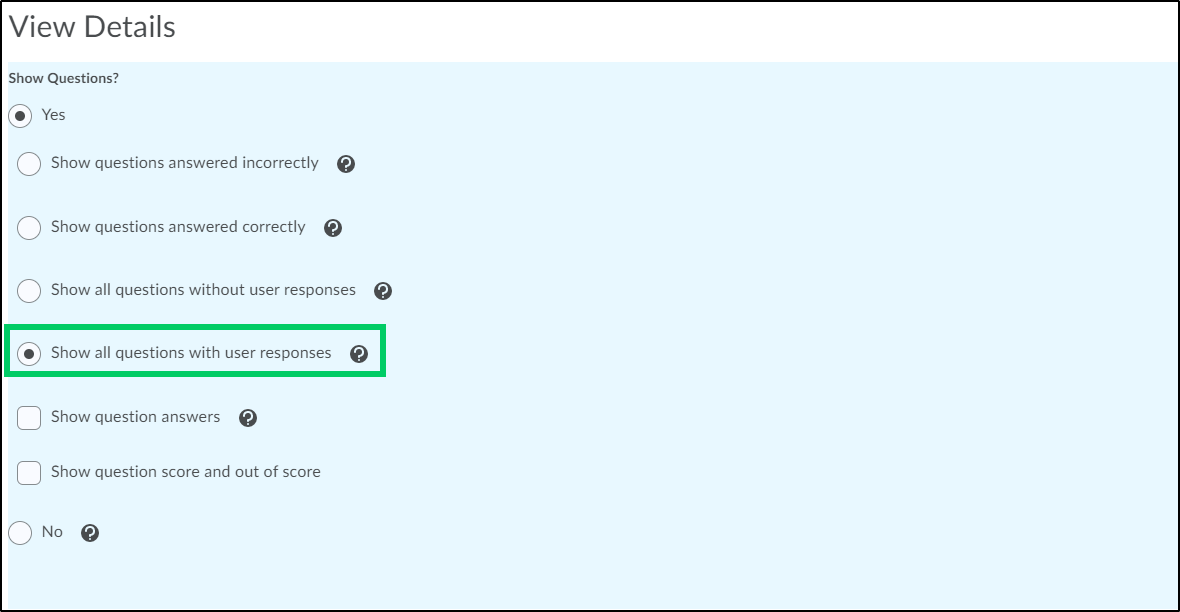
4a. Selecting the "Yes" radio button will allow the questions to show to the student upon completion of the quiz. Only one radio button under "Yes" can be chosen.
i. Selecting "Show questions answered incorrectly" will display graded questions with a point value of 0.
ii. Selecting "Show questions answered correctly" will display graded questions with a point value greater than 0.
iii. Selecting "Show all questions without user responses" will display questions that the student did not respond to.

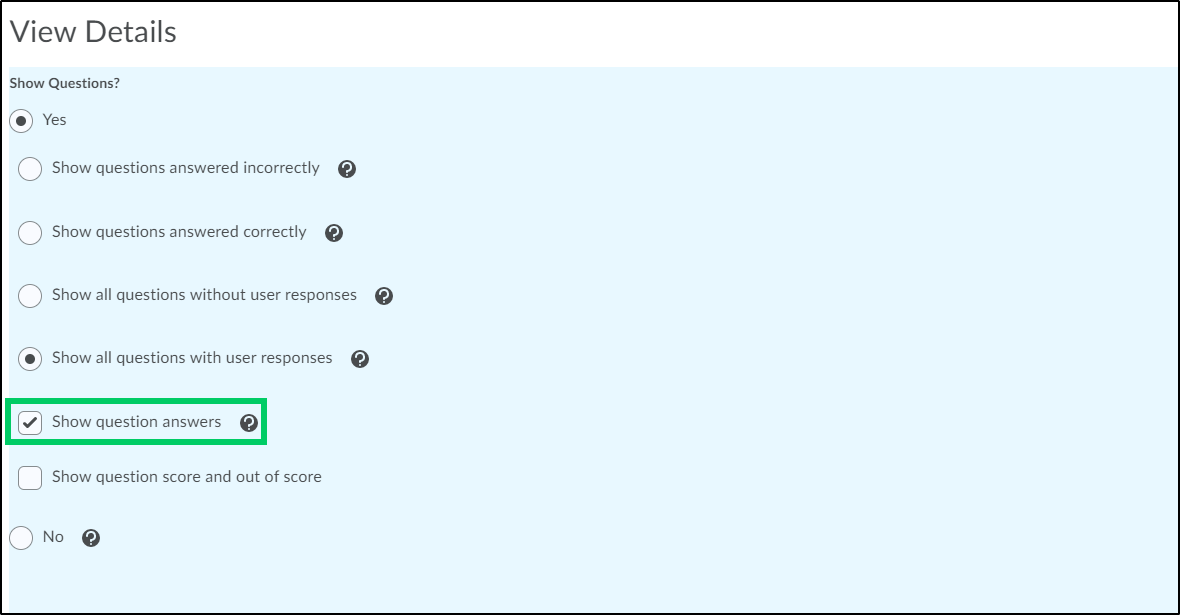
iv. Selecting "Show all questions with user responses" will display all quiz questions that the student responded to.
4b. Selecting the "Show question answers" checkbox will display the correct answers for each question that is displayed based on the radio button chosen above.
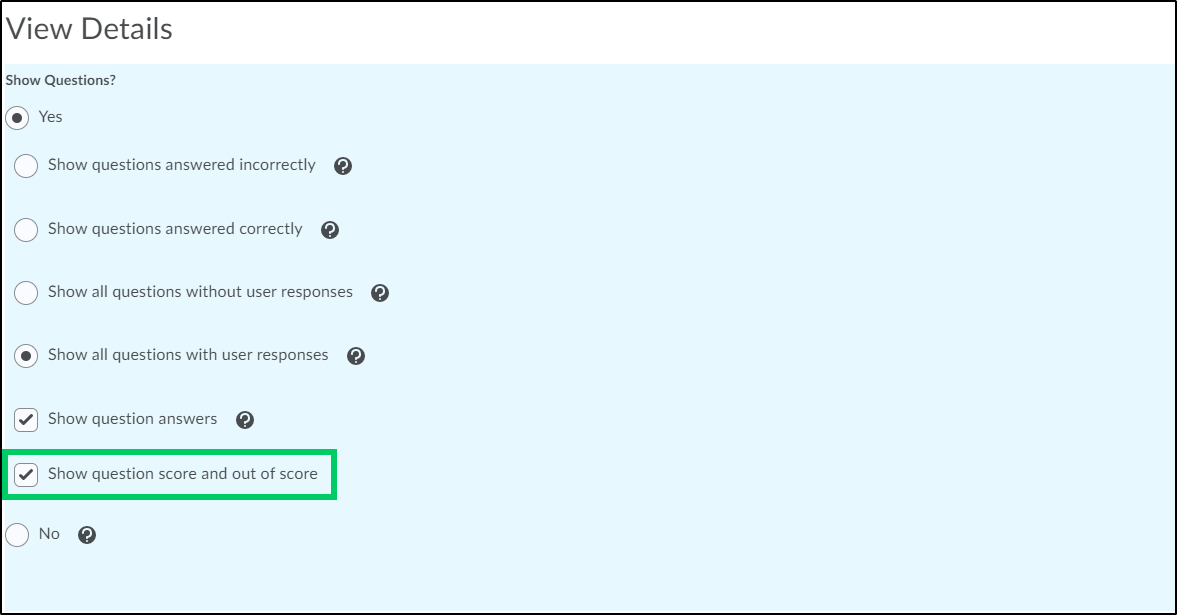
4c. Selecting the "Show question score and out of score" will show the score earned on the question and the total points possible.
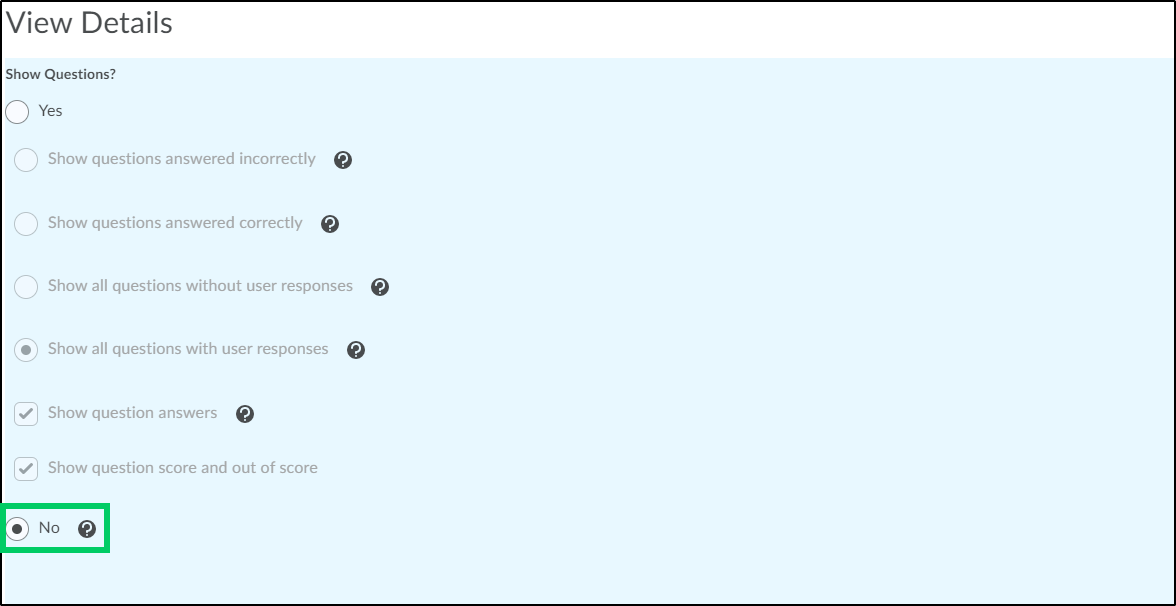
4d. Selecting "No" will prevent any of the questions from being displayed in the student's submission view.
5. In the Score section, selecting the "Show attempt score and overall attempt score" will allow students to see their score as soon as they submit their attempt. The score that is displayed is only what the system can auto-grade. Quizzes that contain quiz questions which may have multiple or varying answers will not be included in the score.
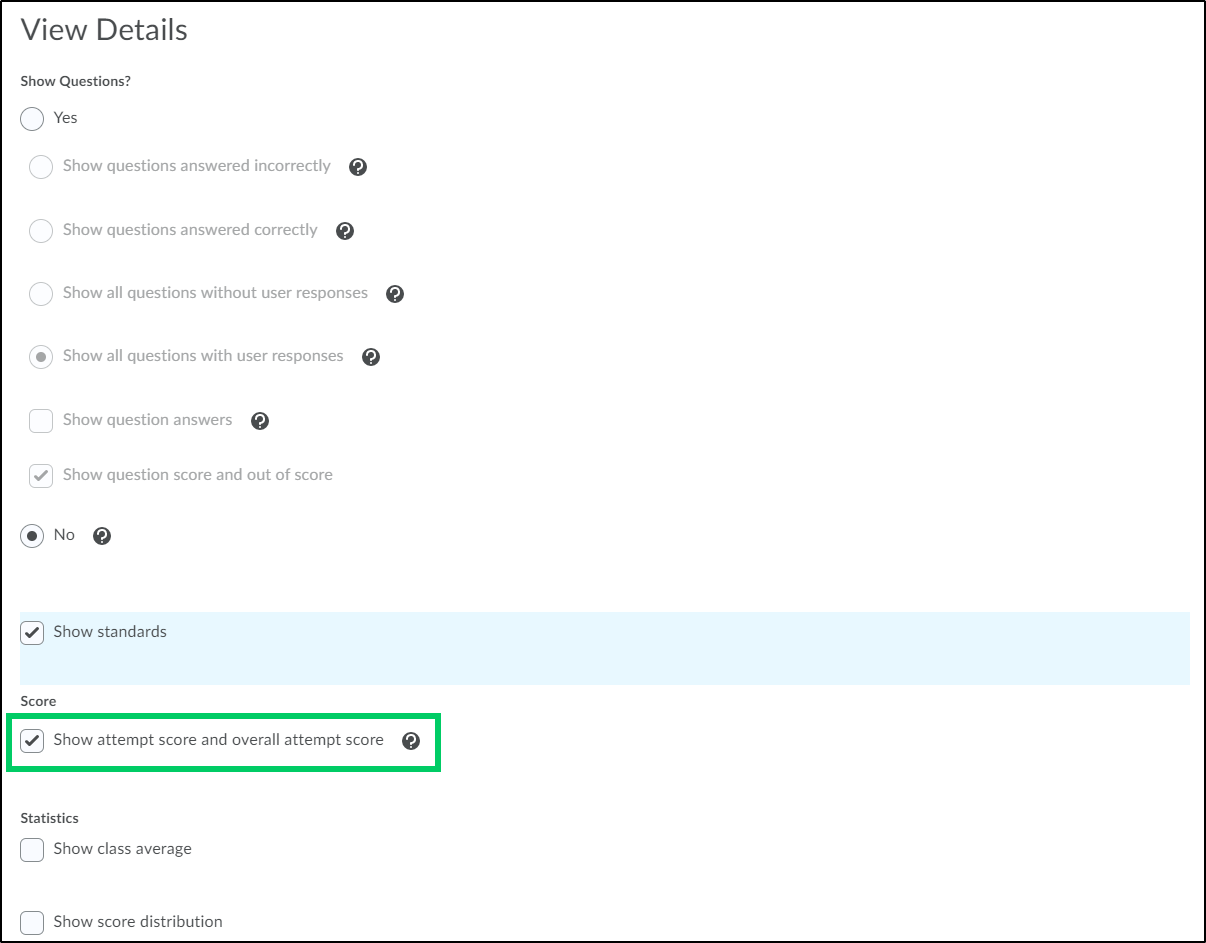
6. In the Statistics section, placing a checkmark in the "Show class average" will allow students to see the class average for the quiz.
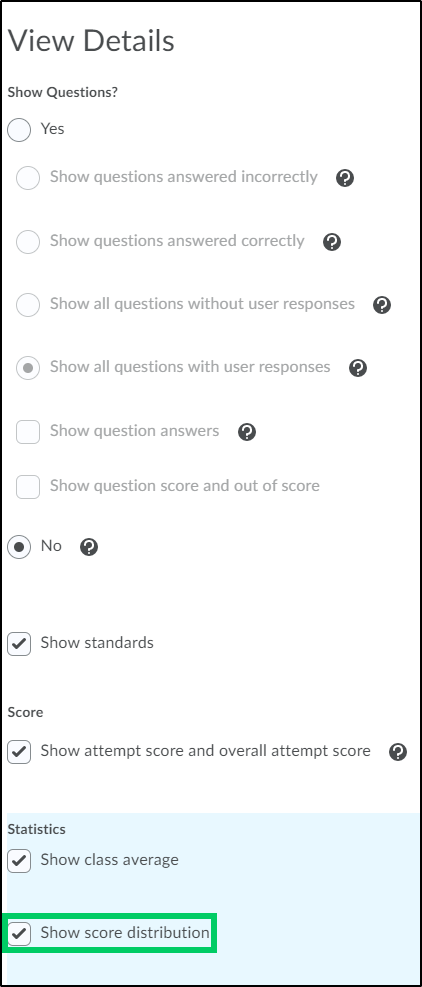
7. Selecting the "Show score distribution" will allow students to see the distribution of scores.
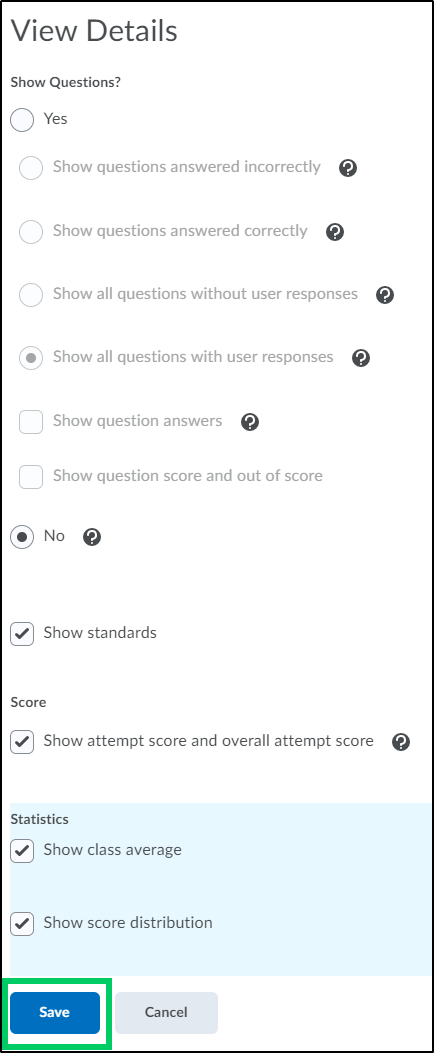
8. Select the "Save" button to apply the changes.
Adding an Additional View
1. After navigating to the "Submission Views" tab within a new quiz or an existing quiz, select the "Add Additional View" button. If the quiz has more than one attempt allowed, additional views can be specified for each attempt. If there is only one attempt allowed, the default view will automatically display. See the "Modifying the Default View" section within this guide to make changes/updates.
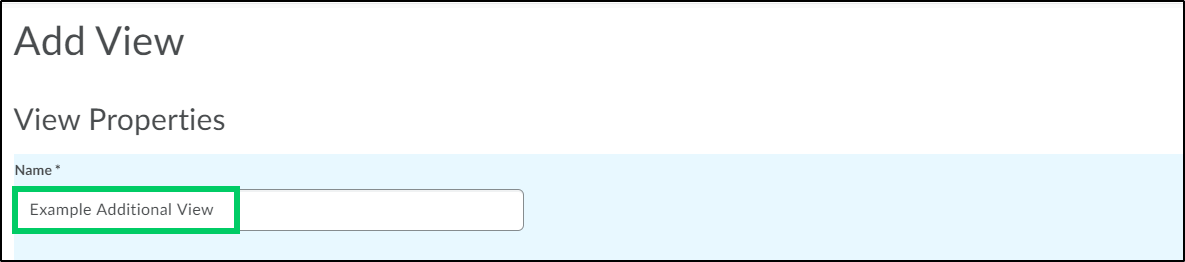
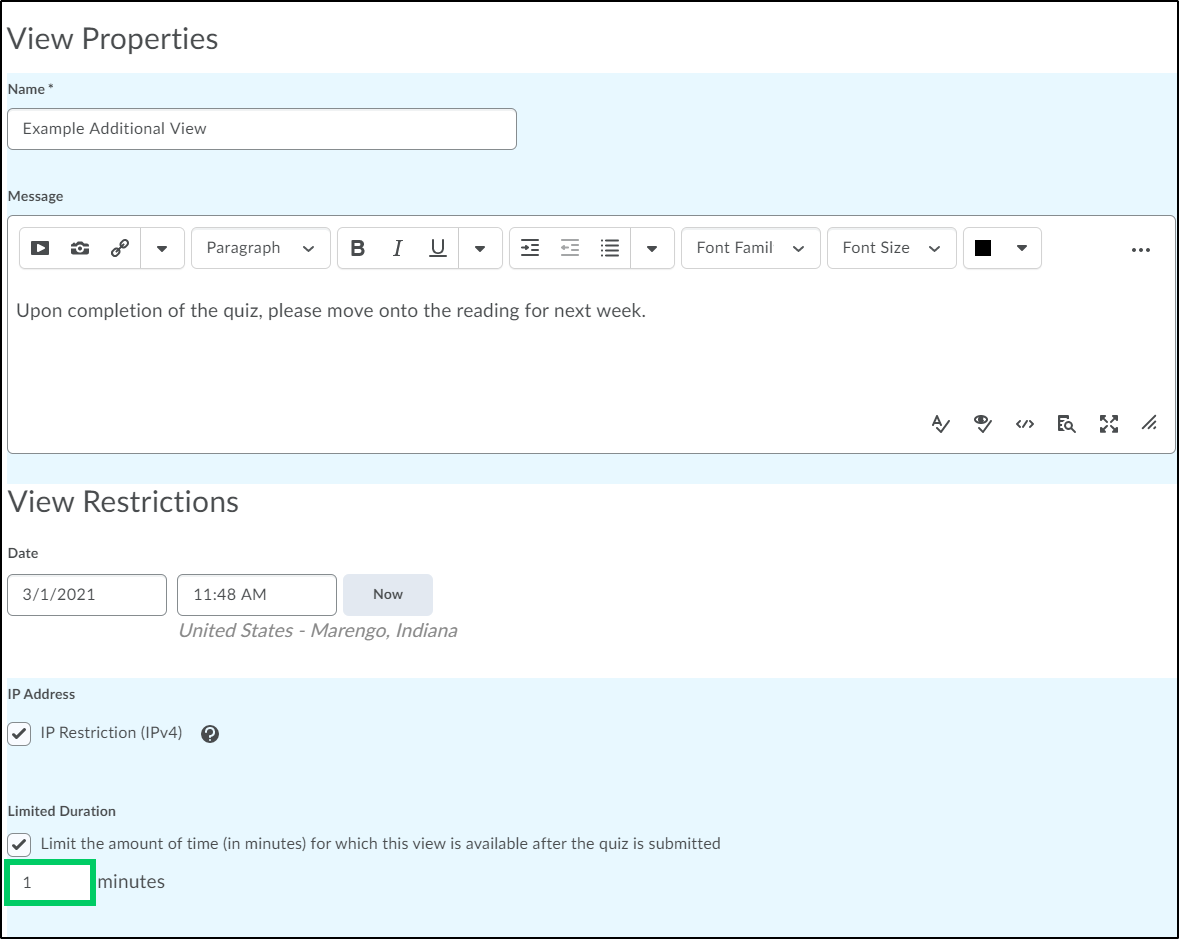
2. Within the View Properties section, in the "Name" field, enter a new name for the additional quiz submission view.
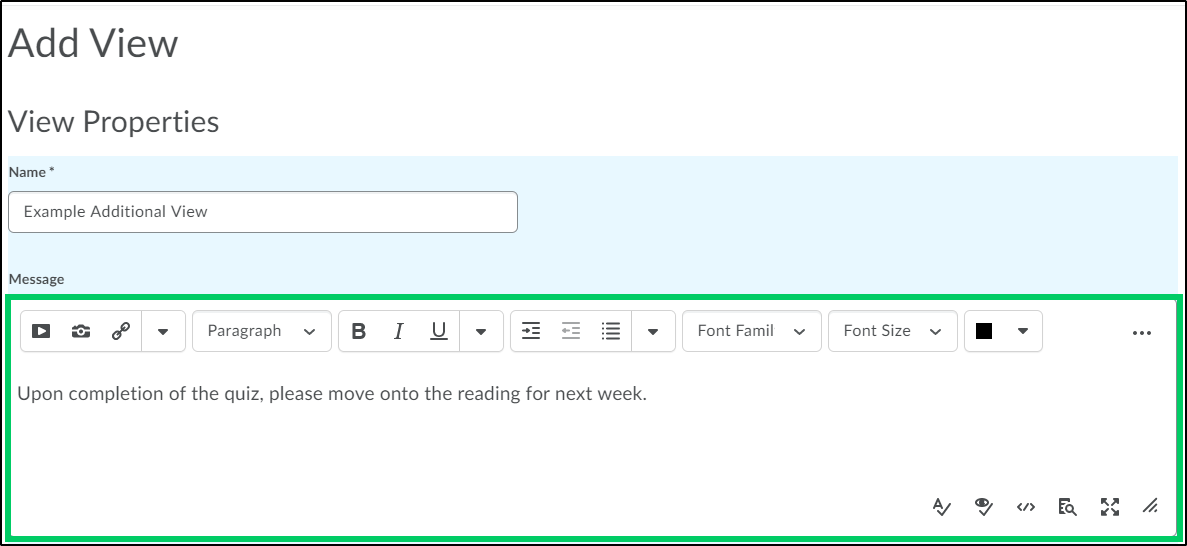
3. In the Message HTML editor, enter the text that you want displayed to the students upon submission of the quiz.
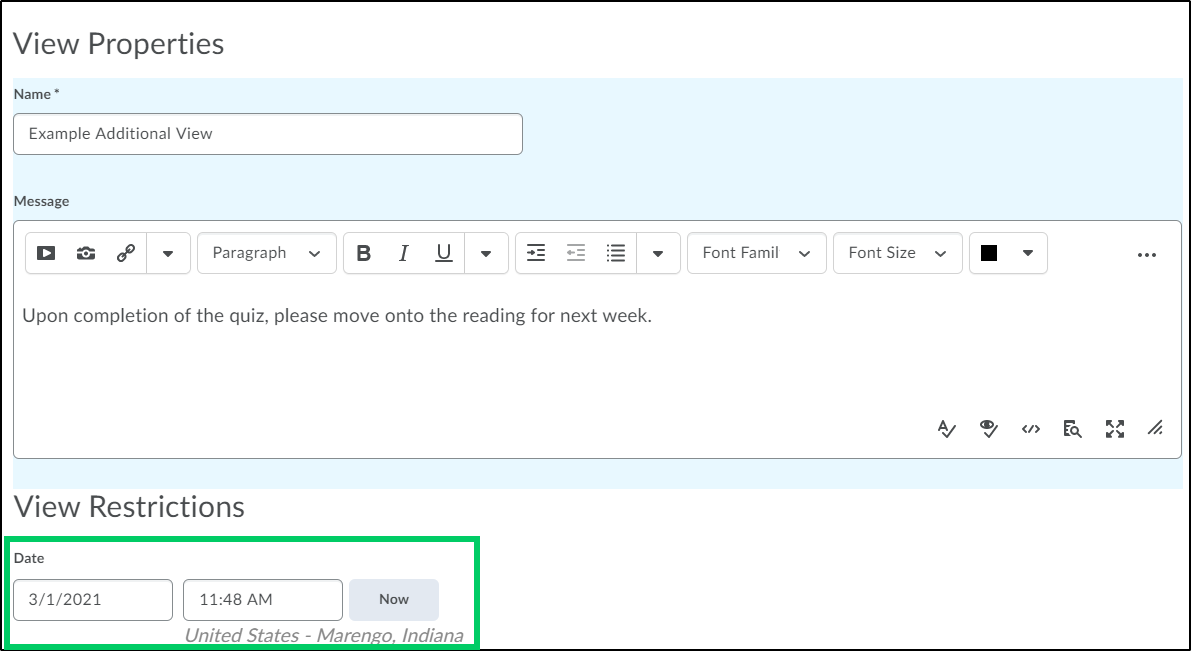
4. Within the View Restrictions section, enter a date of when the additional view will become available to students. This will default to current date and time. You would only want to set a date if you want to restrict when the additional view could be seen.
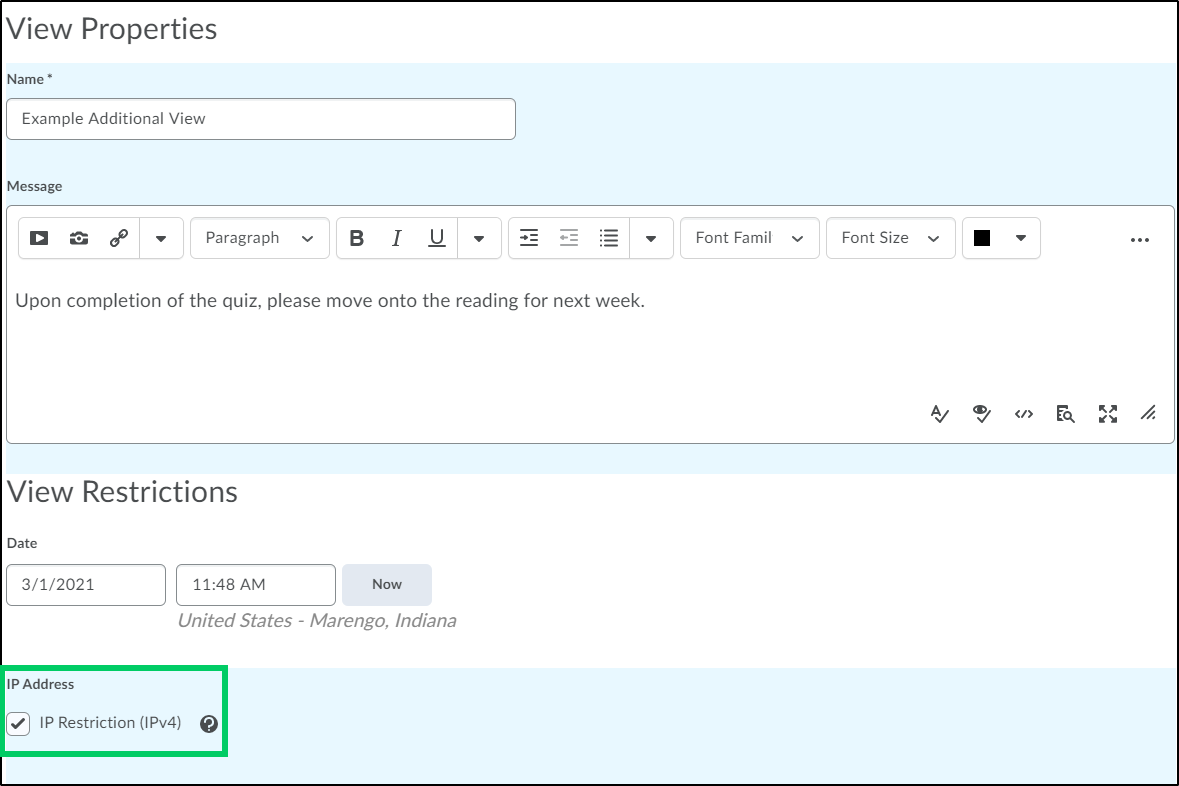
5. Placing the checkmark in the IP Restriction (IPv4) checkbox will apply the same IP address restrictions to the submission view page as used for quiz participation. **NOTE** It is recommended to leave this checkbox unchecked.
6. Placing a checkmark within the "Limited duration" checkbox will allow you to limit the number of minutes that the view is available after the quiz is submitted.
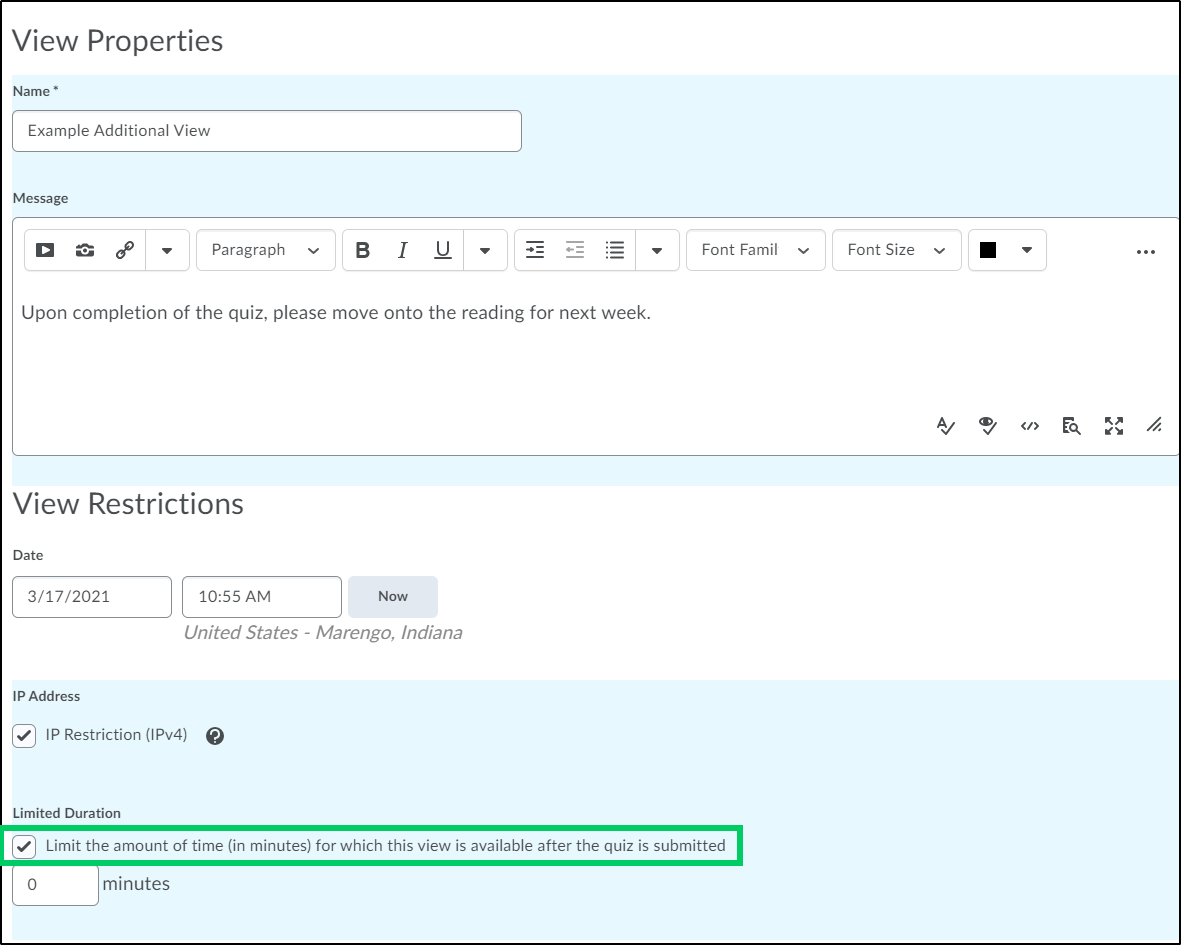
6a. After placing a checkmark in the limited duration checkbox, enter the number of minutes that the view will be available after the quiz is submitted.
7. Complete the setup of the additional view by making the appropriate choices in the View Details section as outlined in steps 4-8 in the "Modifying the Default View" section of this article.