Setup "Bookings with Me" - Allow Others to Book a Teams Meeting with You
Overview
What is Bookings with Me?
Bookings with me is a personalized offering of the Bookings Microsoft 365 offering. With Bookings with Me you can setup blocks of regular hours that you're available, and setup custom meeting "blocks" or types. You can publicize your bookings with me page, or provide a link to a specific booking in your email signature, or in an online class.
This allows others to schedule meetings with you in a means that you control. You can set things such as lead time (how far in advance folks must book a meeting with you) and buffer times (time required between meetings). Bookings will also prevent others from scheduling meetings during times you already have blocked off as busy either via other meeting invites, out of office statuses, or other appointments you keep in your outlook calendar.
Steps
First Step - Accessing your Bookings with Me page
- Sign in with your IWU email and password at https://outlook.office.com/bookwithme/me
Second Step - Setting up your Bookings with Me page
When you first visit your Bookings with Me page you'll find it pretty bare. You can dress up the page by adding a banner image as shown here, but this 100% optional:

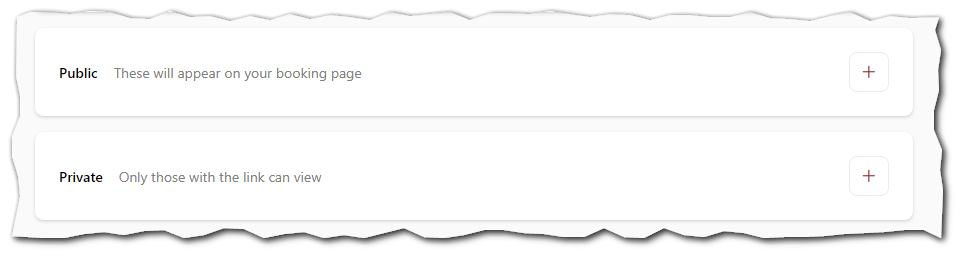
Private vs. Public Bookings
You can choose to have folks visit your bookings page where they'll see all available options that you setup under the public section. If you setup a booking type in the private section then folks will need the link for that particular booking type to be able to setup an appointment with you.
Creating your first booking type
In this example we'll create a Private booking type, meaning we'll share the link via an email, our outlook signature, faculty bio page, or in an online class in a discussion post or announcement.
- Click the + next to the booking type you'd like to create

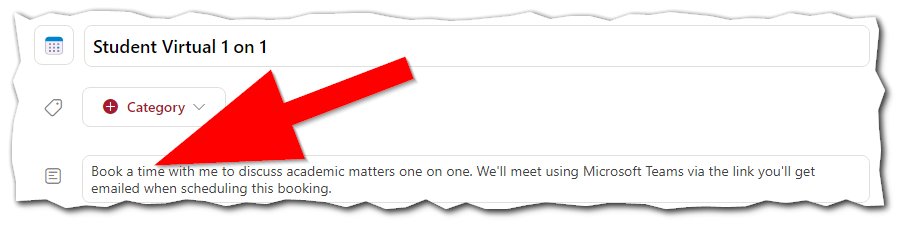
- Give your booking type a title. In this example we'll create a Student 1 on 1

- Then provide a description that folks will see when they go to book a time with you
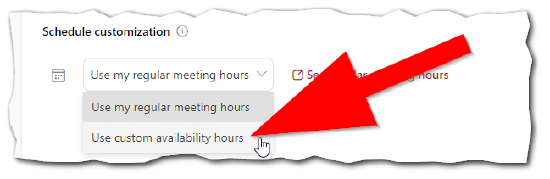
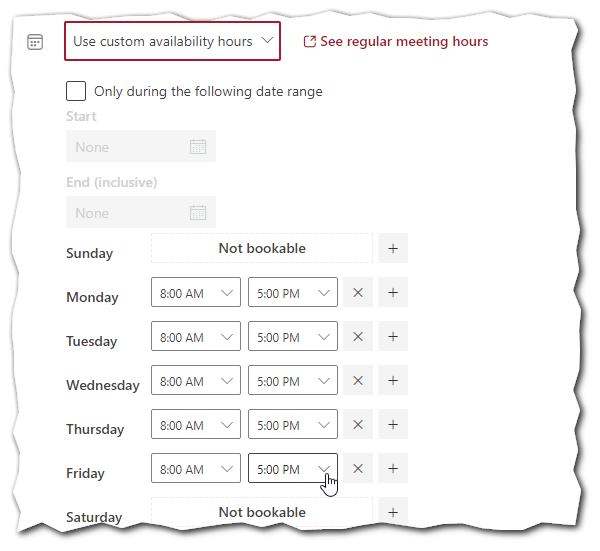
- Choose the hours you wish the booking to be available. You can use your regular meeting hours or setup custom availability. In this example we'll setup custom availability
- Then you may select the times that this particular booking should be available
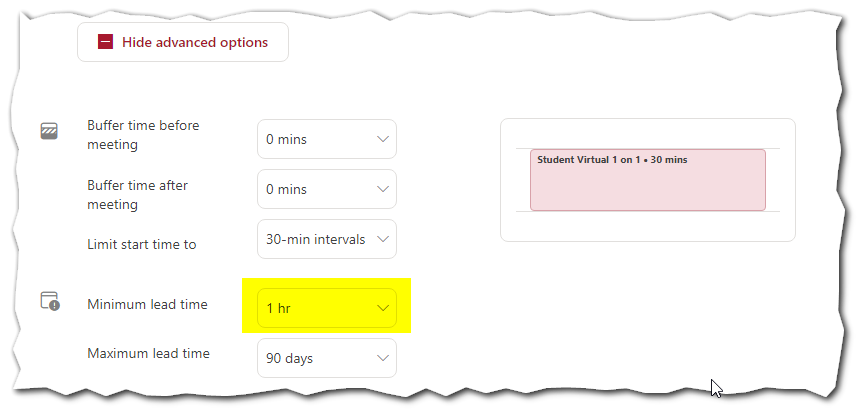
- Expand the Advanced options so you can set specific times that this booking can be utilized. Setting the Minimum lead time is a setting that is extremely helpful. We recommend using a setting of 24 hours to ensure you have time to see the invite come in a full day in advance, but your use case may vary.
- Click Save at the top of the page

Third Step - Sharing your Private Booking
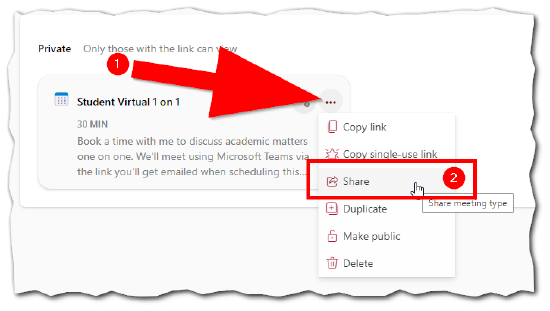
With a private booking made, you may now grab a link to share either in your email signature, or in an online class etc.
- Click the three dot menu in the upper right corner of your booking and select share
 Single-use links:
A single use link is useful if you want to include the link in an email to a single individual but dont want them to be able to forward the link to others after they've used the link. Do not use this option when posting a link in an online class, or your email signature etc. as it will only work for the first person who clicks and uses it. - Click on the Copy to Clipboard button as shown here
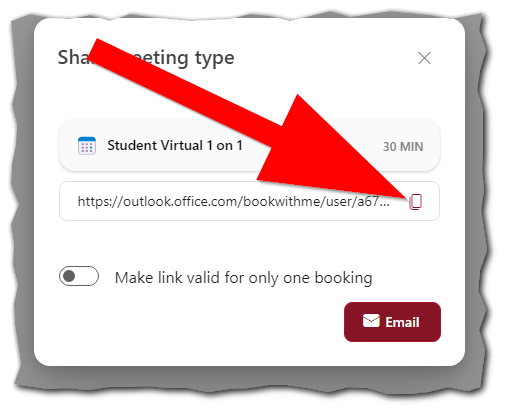
You can now paste this link into your outlook email signature, your faculty bio page, or an online course. You're able to create multiple booking types if you have multiple different types of meetings you wish to let others schedule with you.
What others see when clicking the link
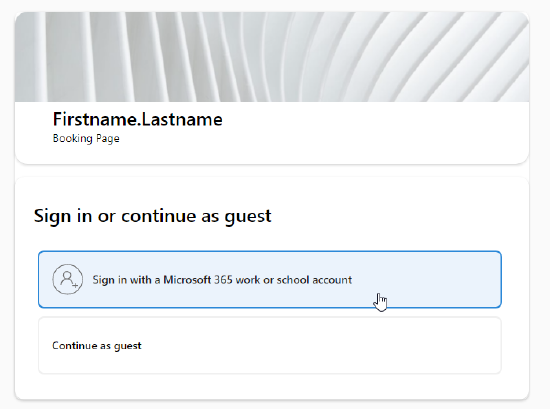
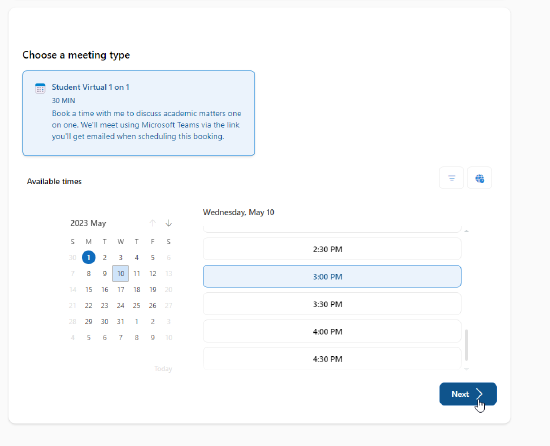
Using the example created in the steps above, here is what someone would see when clicking on the link from on online class (Brightspace) or other site/page:
- First they'll be prompted to sign in or continue as guest if they aren't already signed in
- Then they'll be able to select a day and time to book using the parameters you configured when setting up your booking
- If the person is not signed in, they'll need to supply their name and email
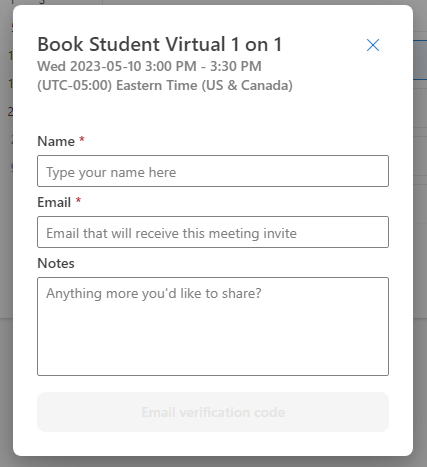
- Thats it!