How to Enroll Users into Groups
Goal
After completing this how-to you will have knowledge needed to enroll users into existing groups. For information on creating new groups, see the "How to Create Groups" guide. For more information on other Brightspace Tools, see the Tools topic page.
Navigation
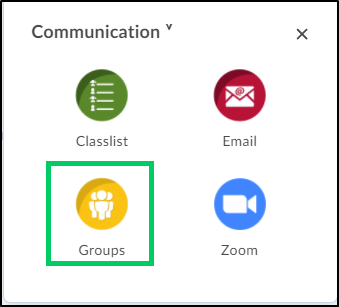
1. Navigate to the Groups tool by selecting the "Communication" icon from the course navbar.

2. From the "Communication" menu, select "Groups".
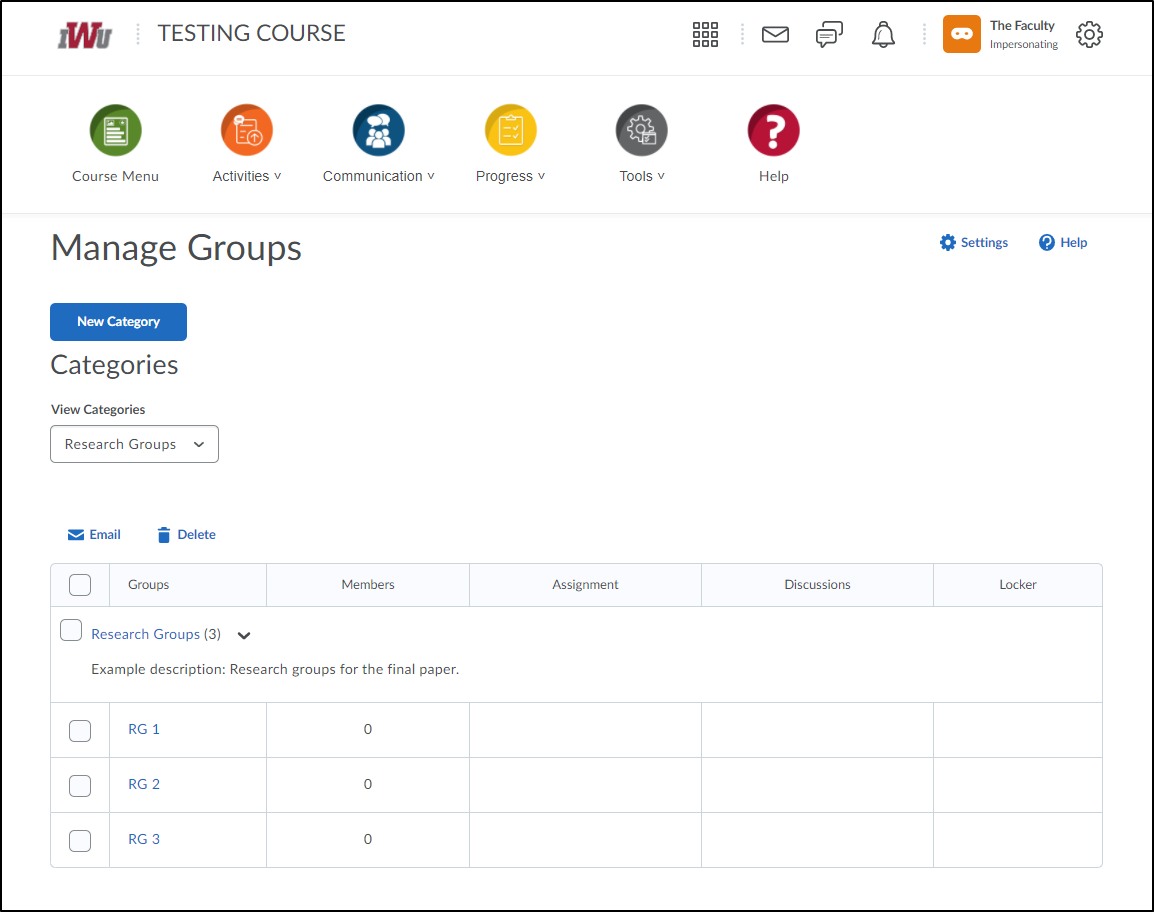
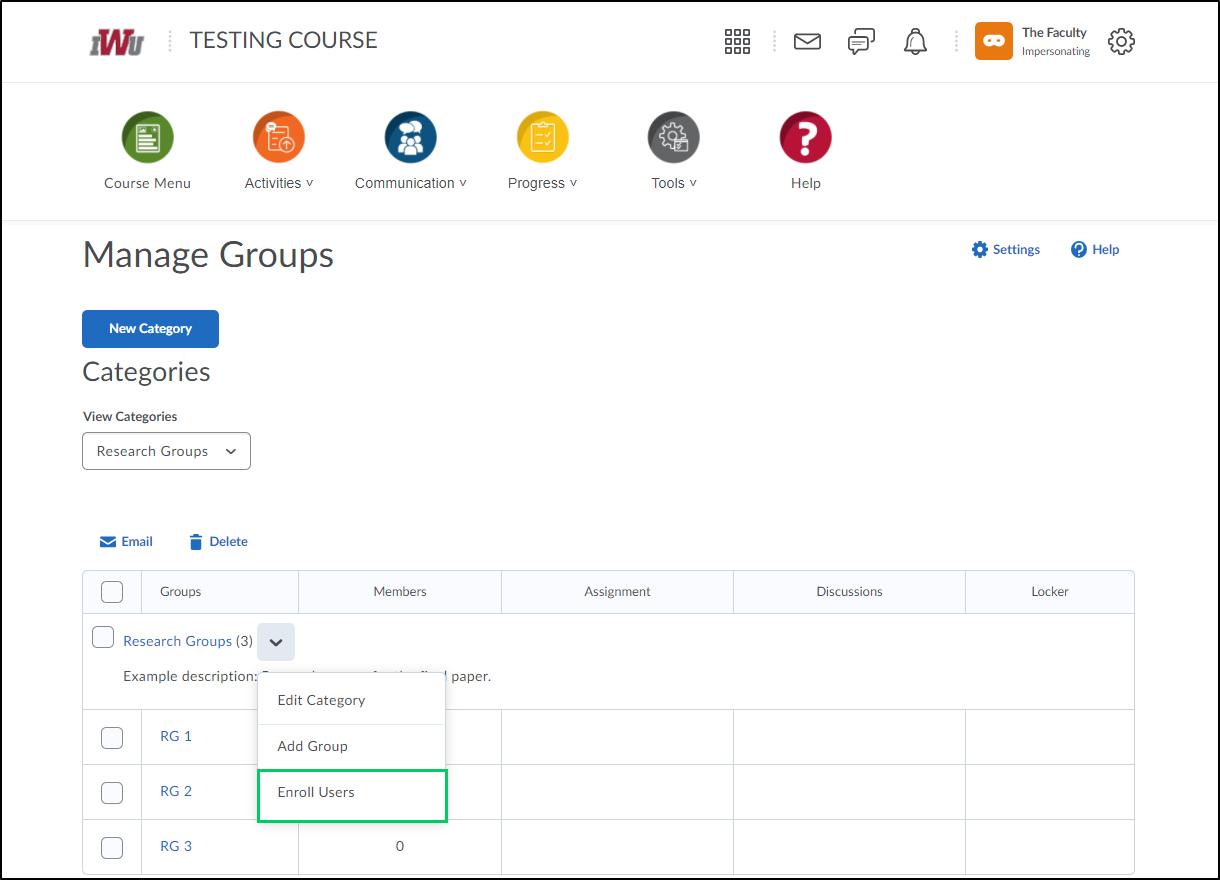
3. There are two options for enrolling users into existing groups.
Option 1
3a. Select the dropdown menu next to the Category name.
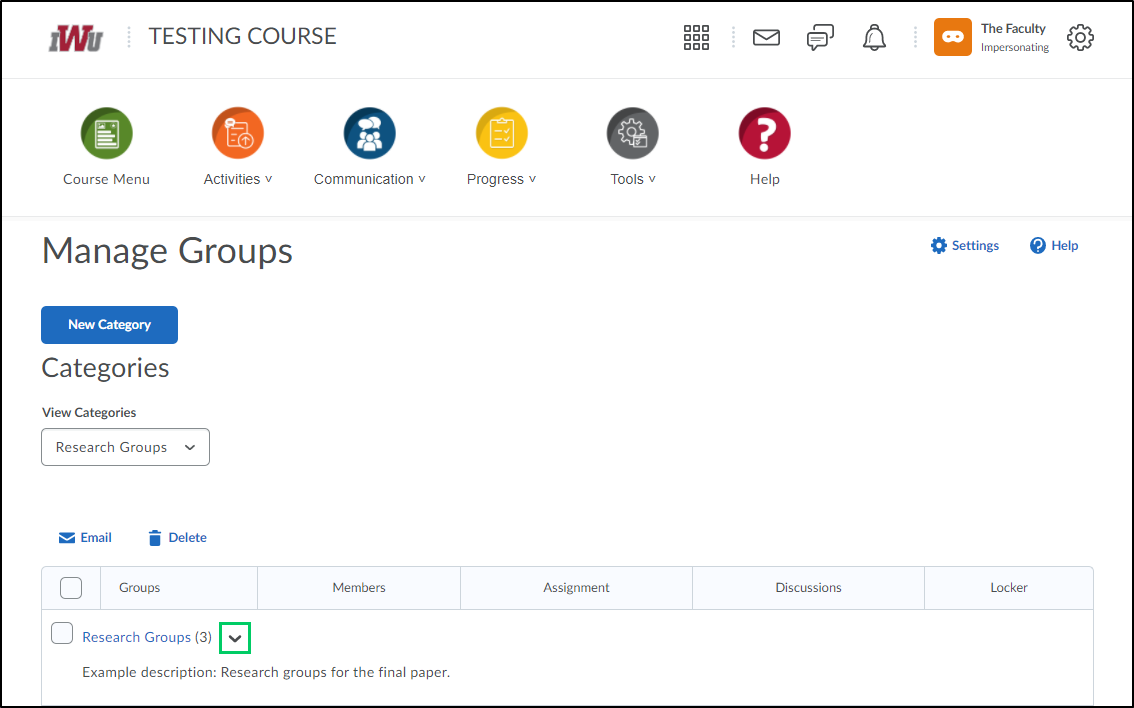
3b. From the dropdown menu, select "Enroll Users".
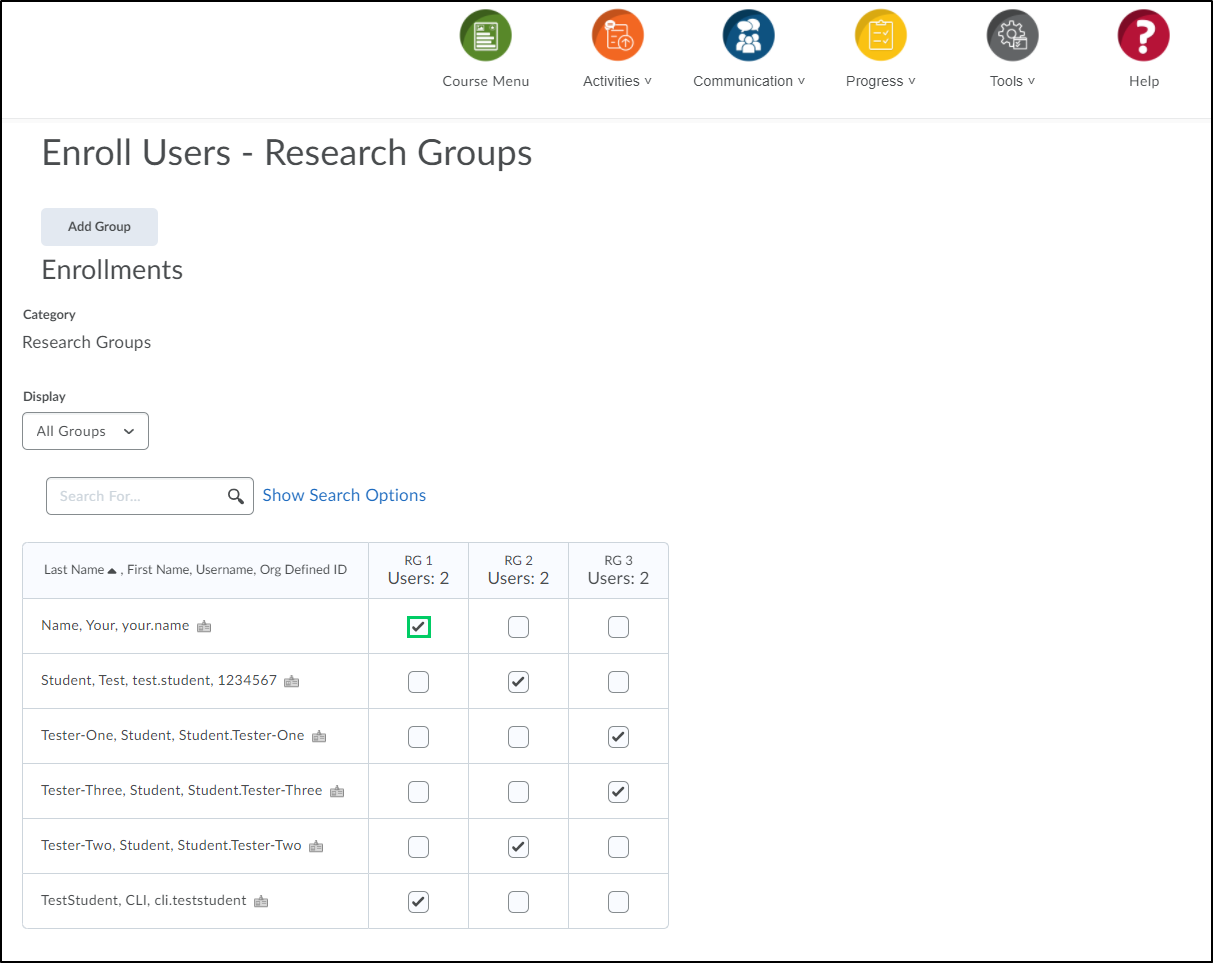
3c. For each user, place a checkmark in the checkbox under the appropriate group.
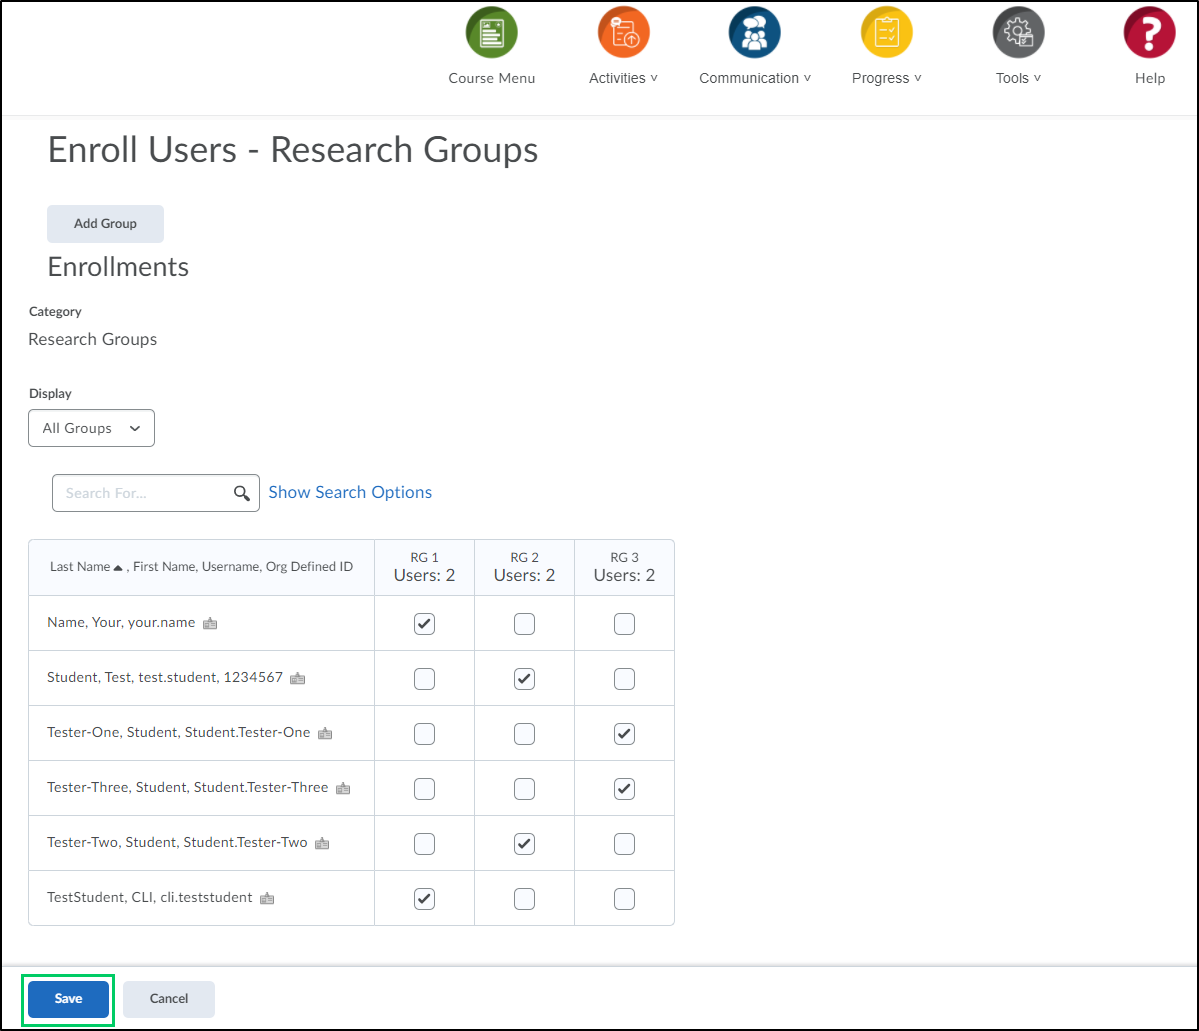
3d. Once all selections have been made, select the "Save" button.
Option 2
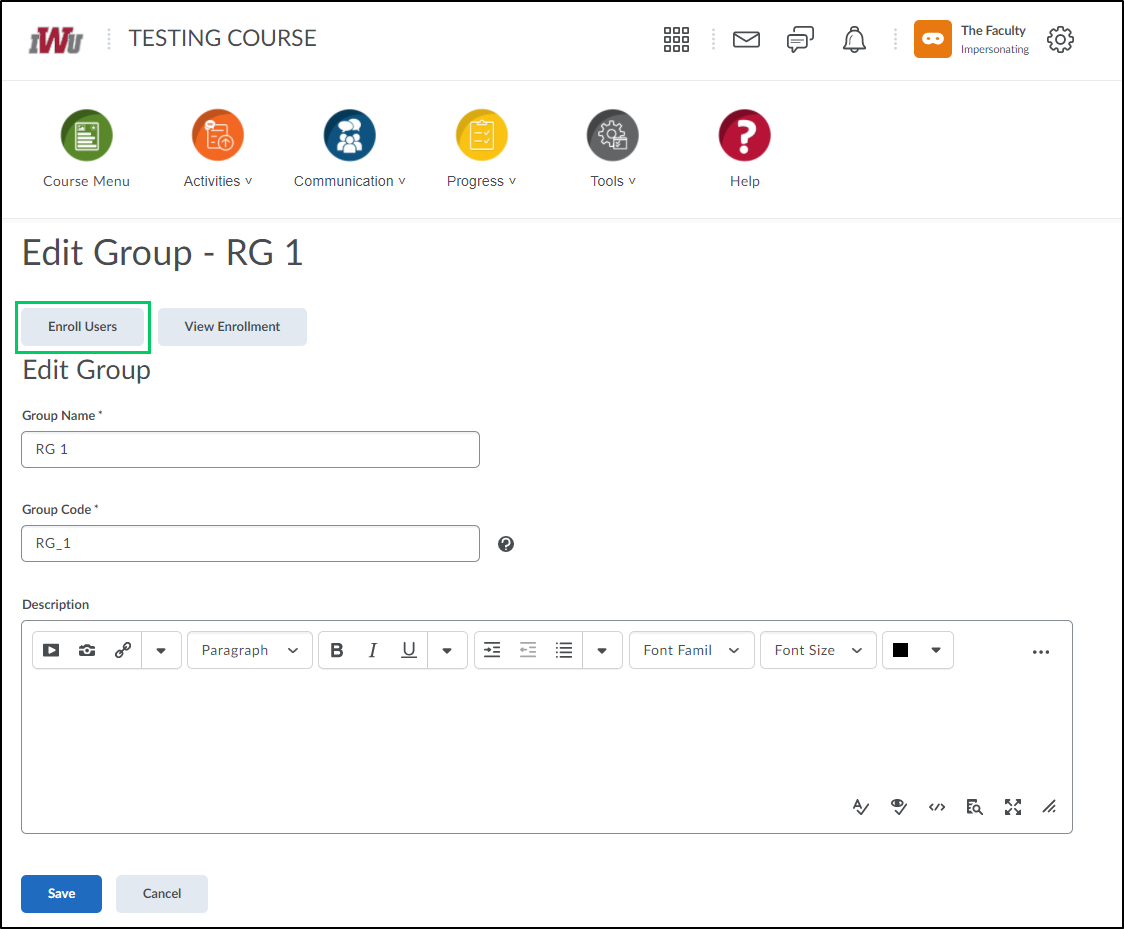
3e. Select the individual group link.
3f. Select the "Enroll Users" button.
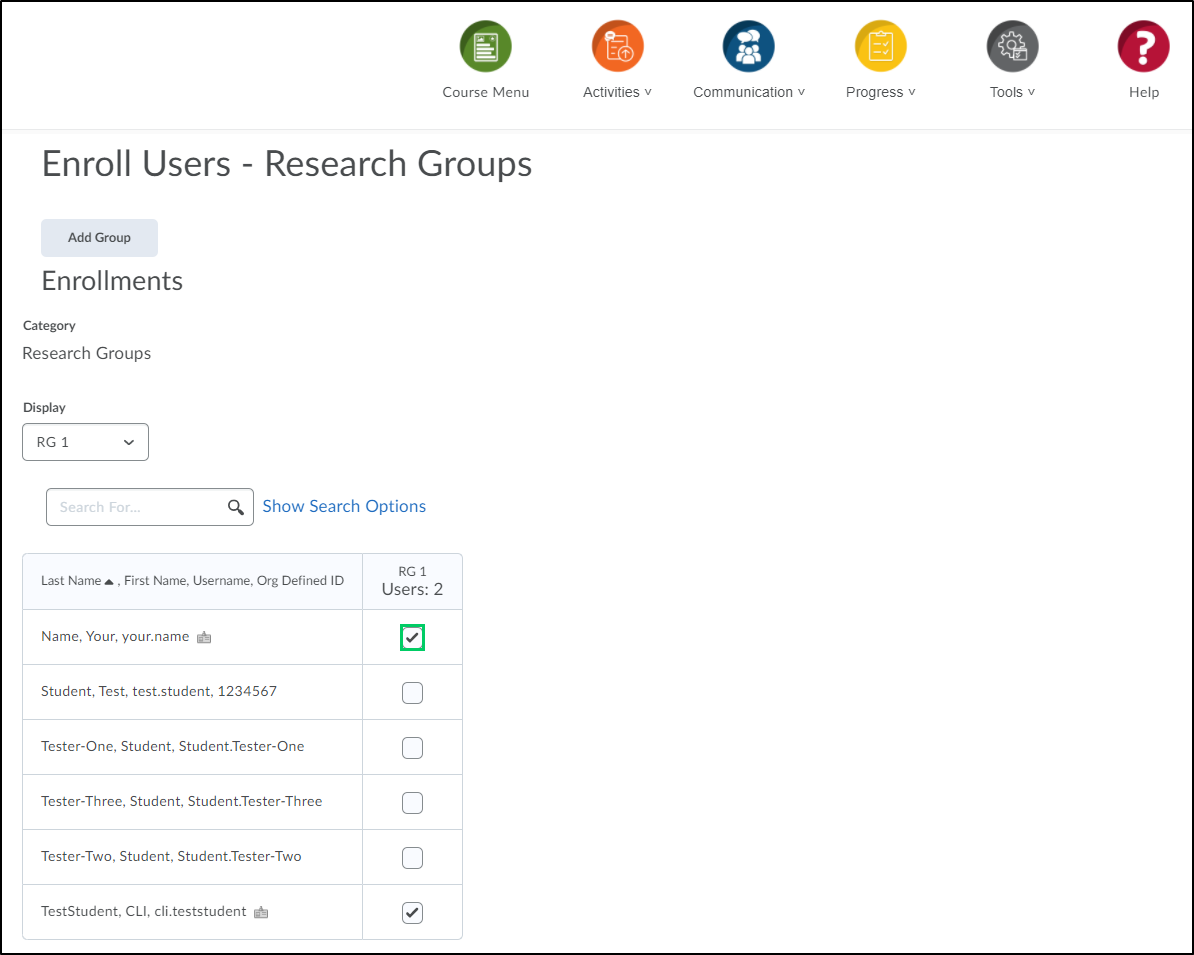
3g. Select all users to be enrolled into that group by selecting the checkbox next to the user's name.
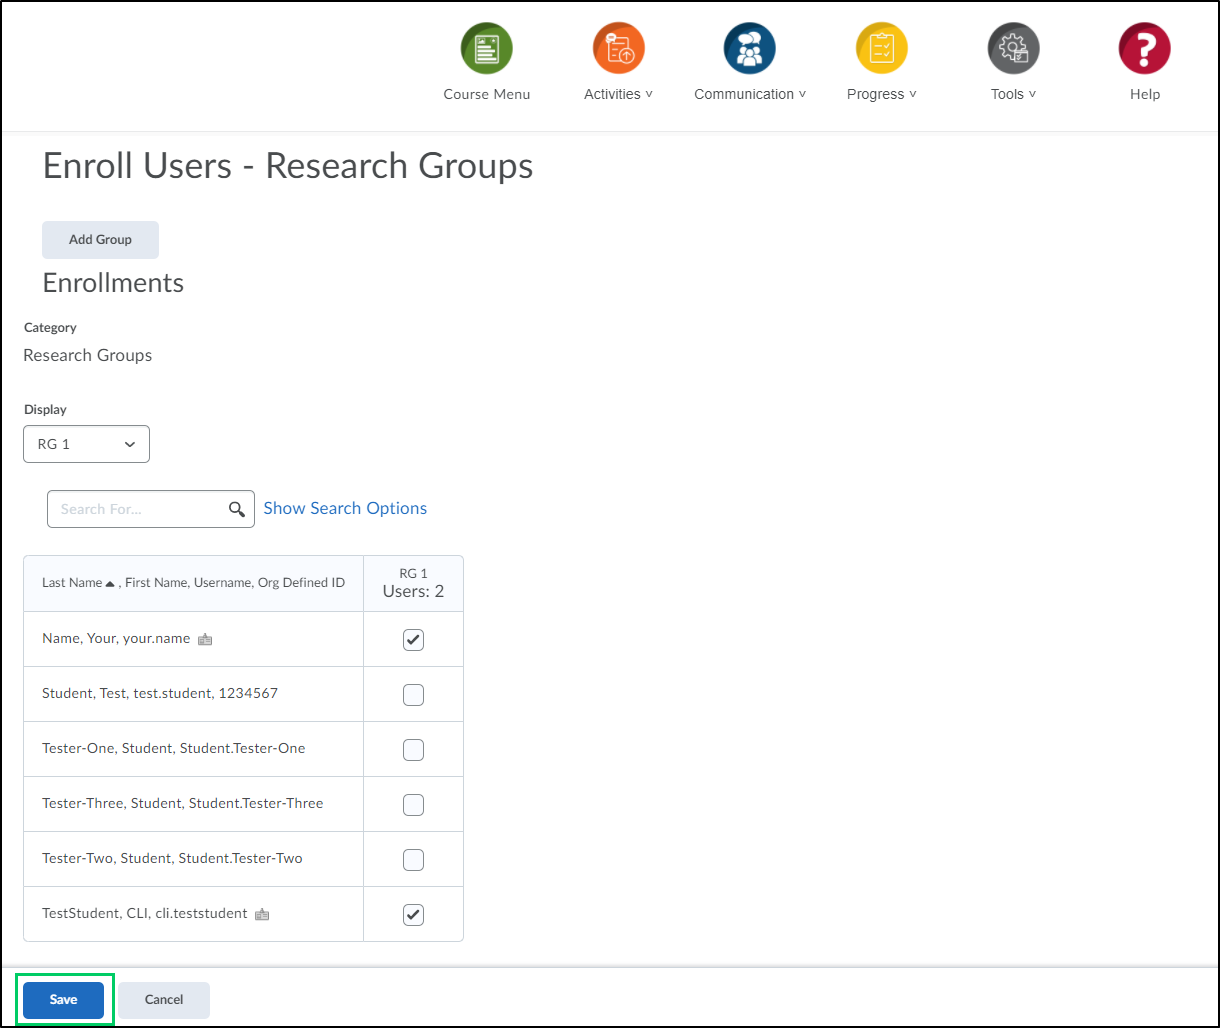
3h. Once all users have been chosen for that specific group, select the "Save" button. Repeat steps 3e through 3h until all users have been enrolled into a group.
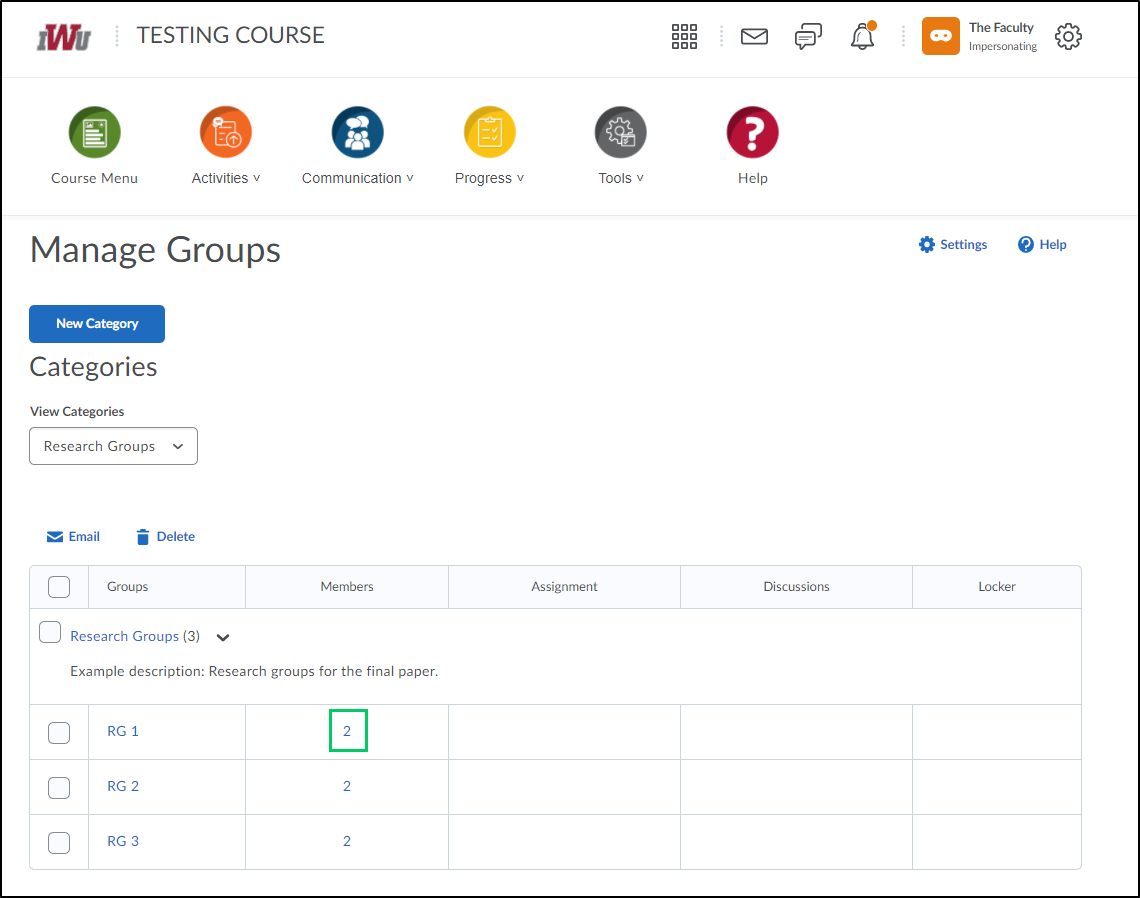
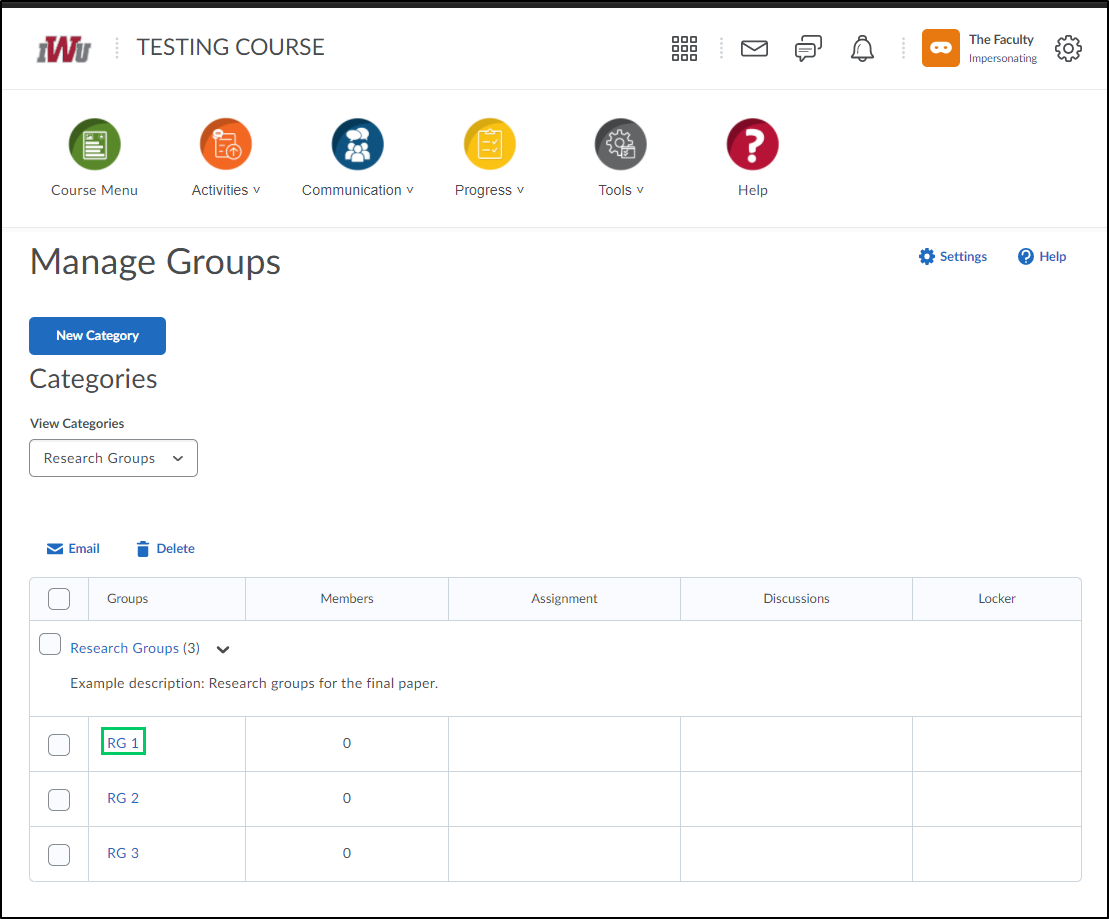
4. To view the users enrolled in a specific group, select the number located in the "Members" column of the Manage Groups page.