How to Create an Award
Goal
After completing this how-to you will have knowledge needed to create a new award within your course. Awards are based on any criteria determined by the instructor. They are meant to provide digital markers that represent accomplishment within and progression through a course. Awards are not indicative of a passing grade; awards can contribute to the type of work ethic that results in a passing grade. For more information on other Brightspace Tools, see the Tools topic page.
Navigation
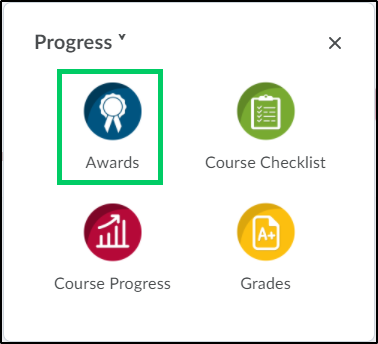
1. To create an award within your course, select "Progress" from the course navbar.

2. From the "Progress" menu, choose "Awards".
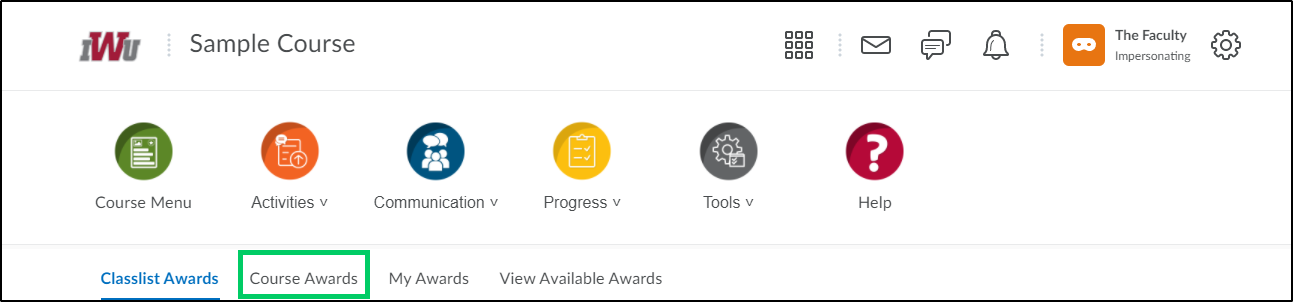
3. Choose the "Course Award" tab.
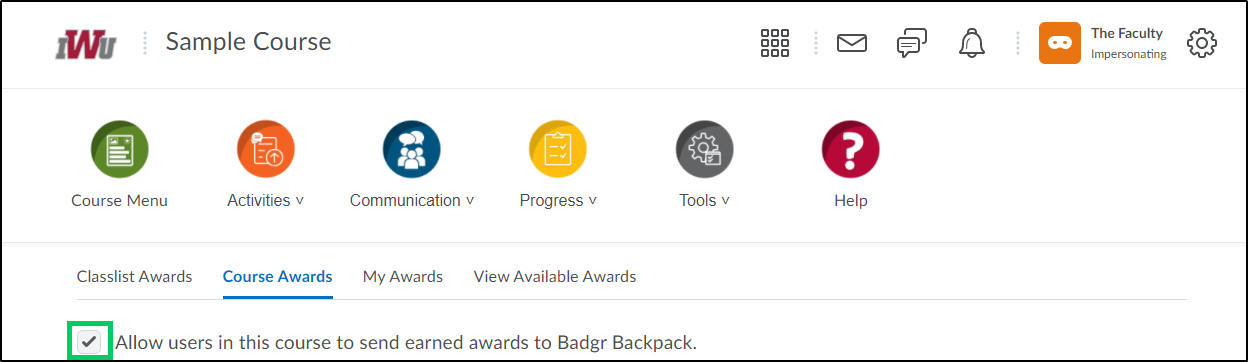
4. The checkbox to "Allow users in this course to send earned awards to Badgr Backpack will by default be checked. Select the checkbox to remove this option. Allowing users to send earned awards to Badgr Backpack will allow them to share the earned awards on various social media platforms as well as create and manage award collections.
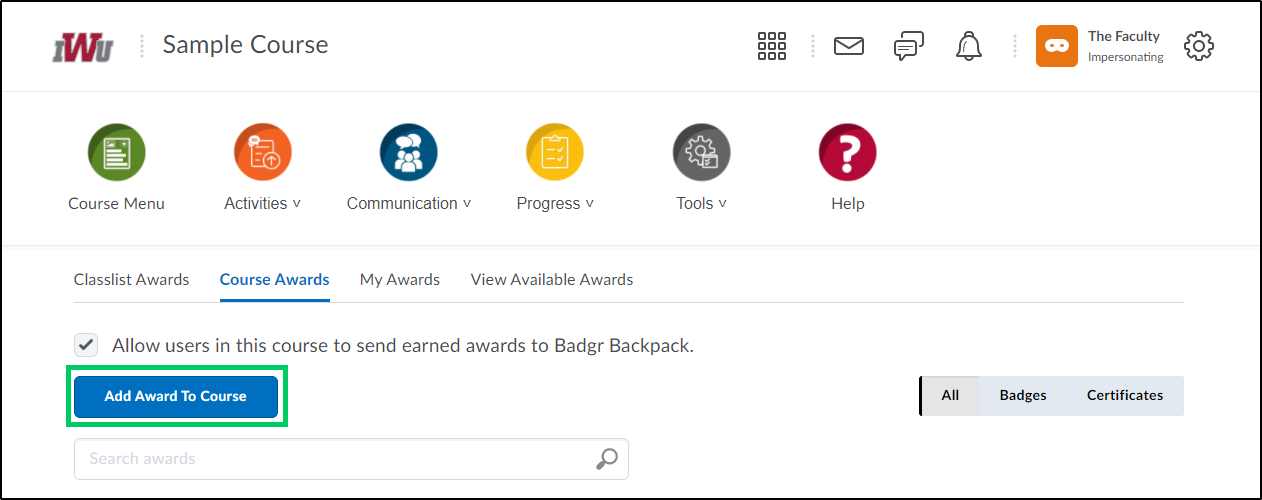
5. Select the "Add Award To Course" button.
6. Existing awards can be added to a course by selecting the checkbox next to the award and choosing "Add".
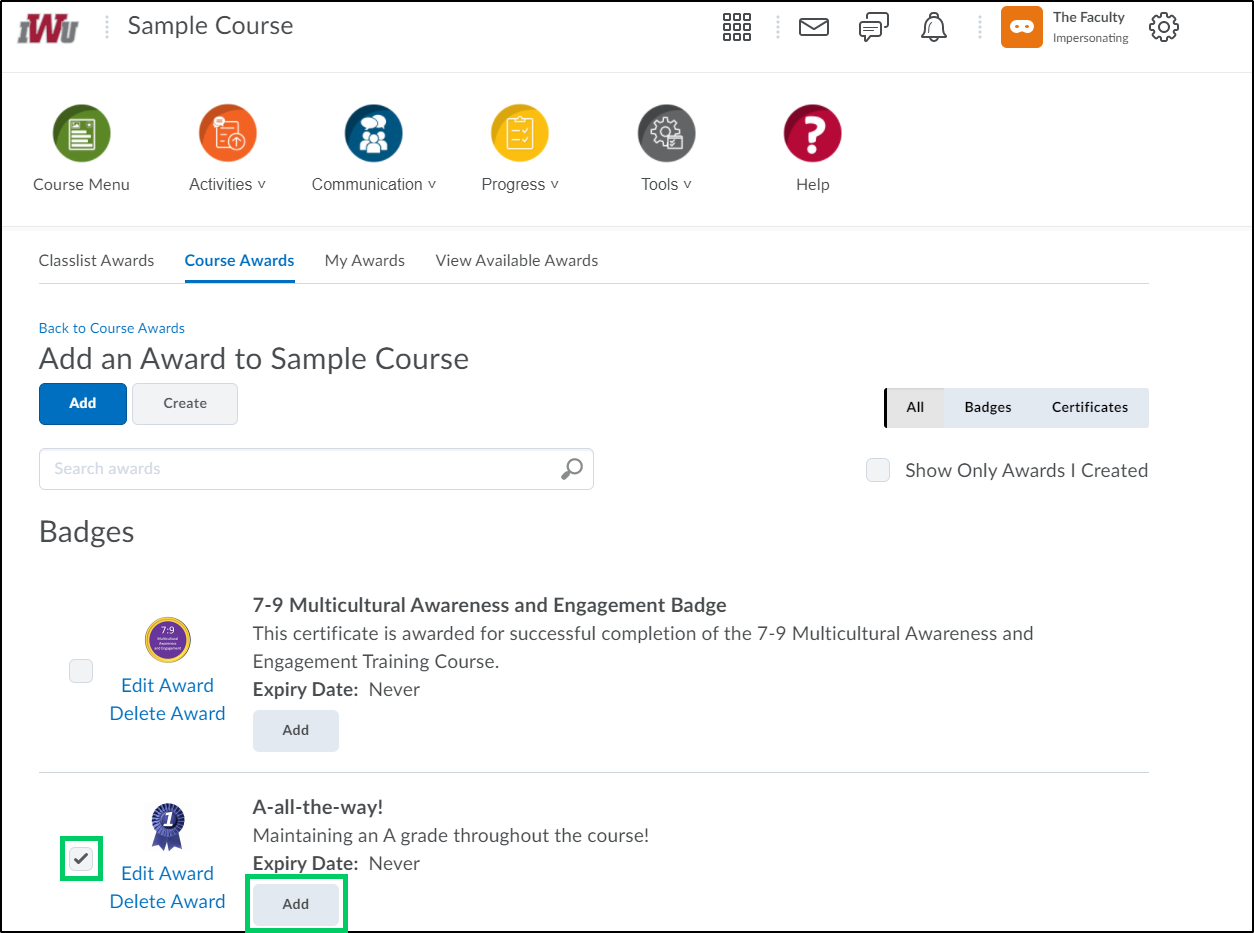
7. A new award can also be created by selecting the "Create" button.

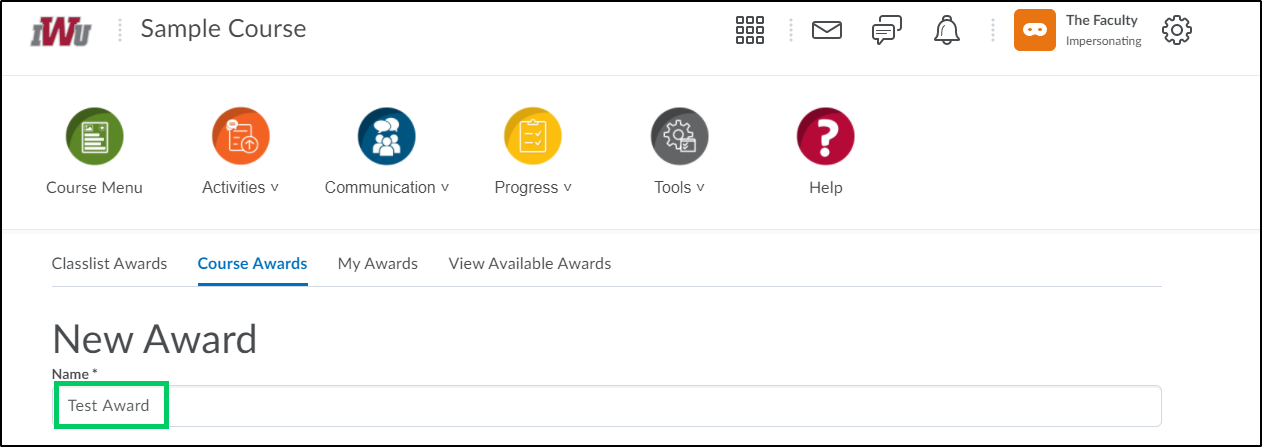
8. Type the name of the award into the "Name" field.
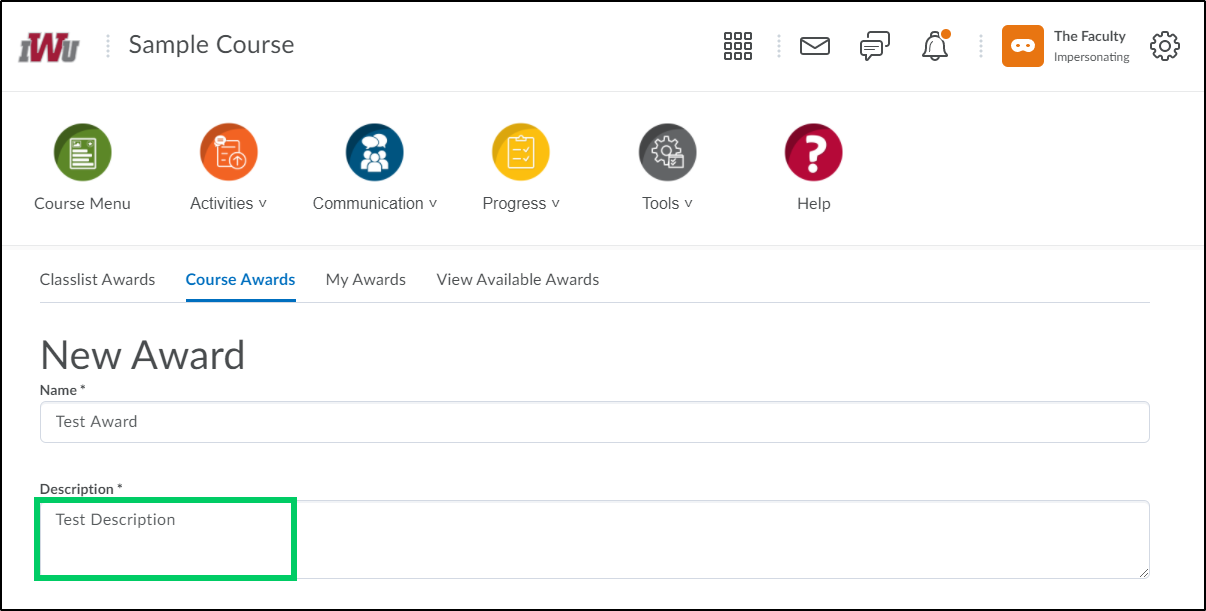
9. Add a description into the "Description" field that outlines the criteria for earning the award.
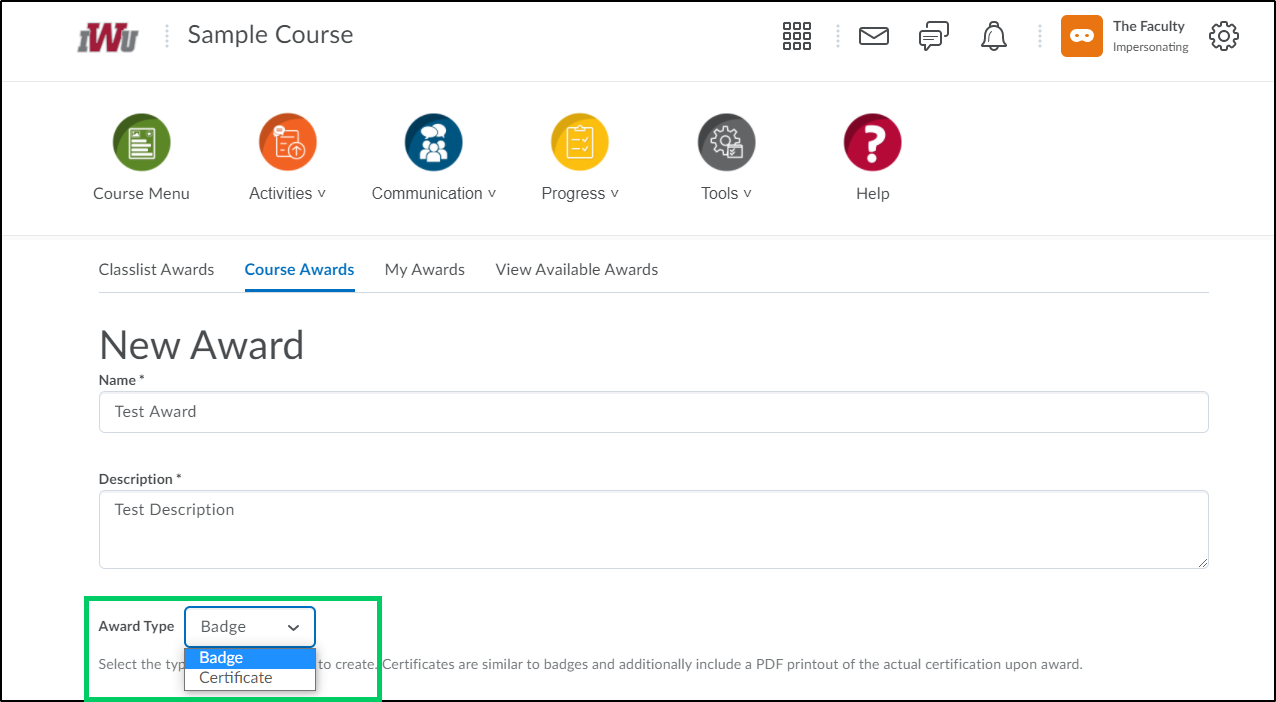
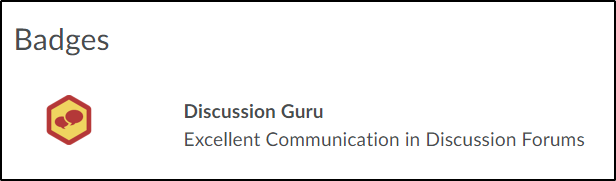
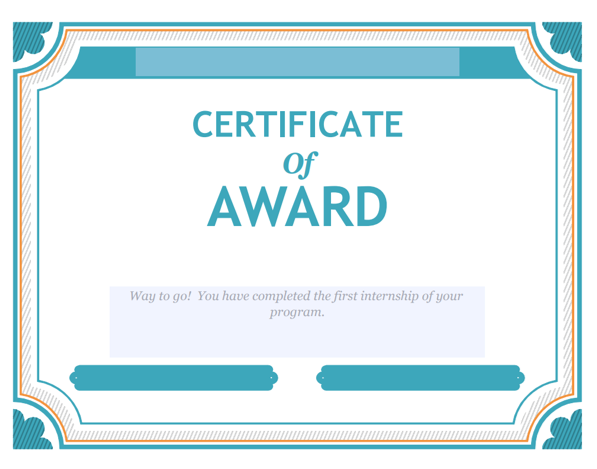
10. The "Award Type" dropdown will default Badge. You may also choose "Certificate". Badges recognize the achievements of your students. Certificates recognize completion and other achievements.
Badges
Certificates
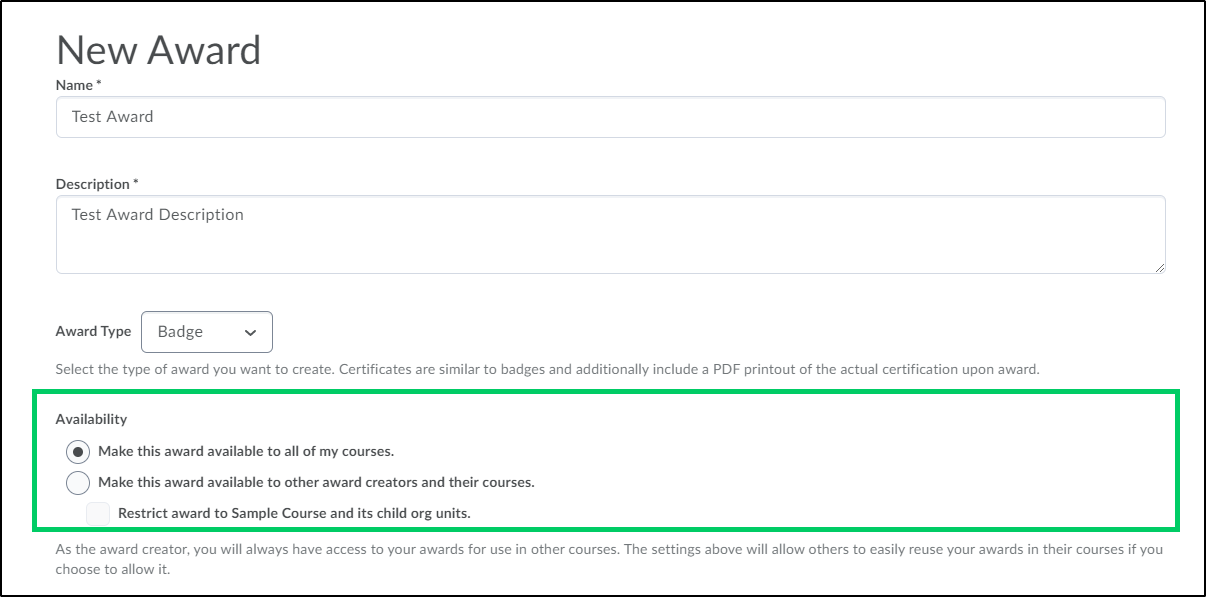
11. In the "Availability" section, you can decide whether to make the award available to all of your courses or allow other award creators the opportunity to utilize the award. You can make a choice by selecting one of the two radio buttons. You may also limit the use of the award to one specific course and any live course sections created of that course by selecting the "Restrict award" checkbox. As the award creator, you will always have access to your awards for use within your courses. The settings shown below will allow others to use the awards that you have created within their courses if you choose to allow it.
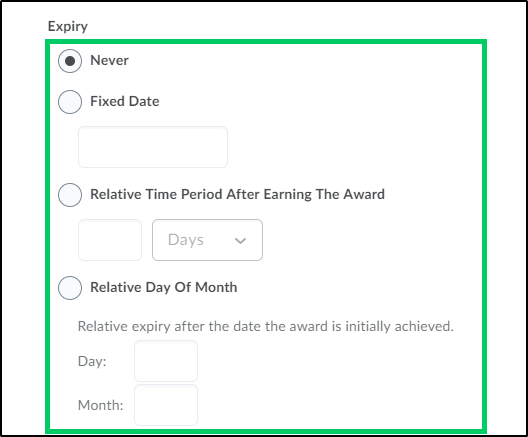
12. In the "Expiry" section, you can decide if and when you want the award to expire by selecting one of the radio buttons next to the desired selection. If the award will not expire, select Never. Examples of awards that never expire are certificates of merit for passing a course, or badges for perfect attendance. If the award will expire on a specific date, select Fixed date. Examples of awards that will expire on a specific date are certifications for a skill that must be renewed, such as first aid training. If the award will expire on a day relative to the day the award was granted, select Relative Day of the Month. Examples of awards that expire on a relative date are badges for Learner of the Week or having achieved 100% on a test or assignment.
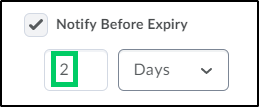
12a. In the "Expiry" section, you may also decide how many days before the award expires to notify you that it will be expiring by selecting the "Notify Before Expiry" and entering a selected number of days.
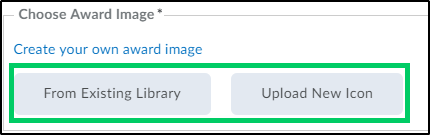
13. In the "Choose Award Image", you may choose to upload an image from the existing library or to upload a new image, by selecting one of the two buttons.
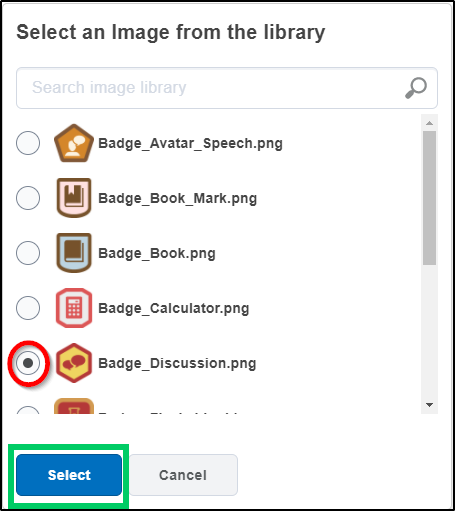
14a. If you choose "From Existing Library", an image library will appear. You may select an image by choosing the radio button next to the desired image and selecting the "Select" button.
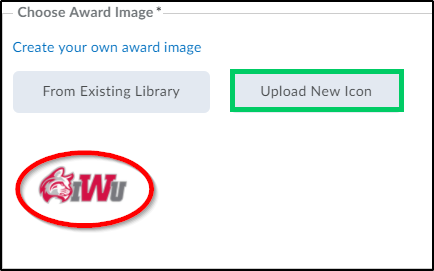
14b. If you choose "Upload New Icon", you will be given an opportunity to upload an image stored on your computer as the award image.
15. The "Issuer Information" will pre-populate but can be updated to reflect the information of the award creator.

16. Once all award information has been entered, select the "Save and Close" or "Save" button to save the award.