NCMC 134 Worship Lab
Display
The Worship Lab has a fully equipped teaching station, sound system, and display. A projector displays the image at the front of the room
- Ceiling Mounted Projector
- Projects onto Electric Screen
- the screen appears after you turn the system on, and retracts when you turn off the system
- the screen blocks access to the double door at the front of the room
- For optimal results, please set your laptop's resolution to 1280x800 Aspect Ratio 16:10
Sources
The teaching station provides multiple sources which can be shown on the display:
- Desktop PC located in the rear of the classroom
- BluRay player - located in cabinet under whiteboard
- HDMI cable for a mobile device (Laptop, tablet or smart phone)
- one located at the front lectern
- one located at the the rear of the classroom
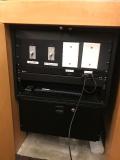
This room also has advanced video recording equipment available at the rear of the room.
Control
- Extron control Touch Panel, at the rear of the room
- Powering on the system will turn the projector on and lower the screen
- Powering off the system will turn the projector off and raise the screen
Note: the source selection options on the touch panel are not functioning currently, but the sources are selected by connecting devices to HDMI cables or turning on/off. See Instructions, below, for details.
Instructions
At the back of the room is a control touch panel, which is used to turn the projector on and off, raise and lower the screen.
All other source selection happens automatically.
Once the system is turned on, by pressing the power icon on the touch panel, the PC source will display on the screen. If it is in sleep mode, wiggle the mouse, or press a key on the keyboard to wake it. If it has been powered off, press the power button on the PC, found inside the teaching station.
If you prefer to use the Blu Ray player, open the cabinet doors behind the podium, and press either the Power or the Eject button (there are only 2 buttons) on the player, which powers it on. The BluRay image will appear on the screen automatically, as long as the system has been turned on. Turning off the BluRay player will cause the desktop PC to appear on the screen, as long as it is powered on and awake.
If you prefer to use a laptop, connect the provided HDMI cable to your laptop, either at the podium, or at the teaching station in the back of the room. This will cause the laptop image to automatically appear on the screen. Unplugging the laptop will cause the desktop PC to appear on the screen, as long as it is powered on and awake. If you need to change the volume, turn the volume knob on the panel inside the cabinet beneath the whiteboard. There is one knob for microphone volume, and another knob for all of the electronic sources (PCs, DVD, etc.).
Be sure to turn the system off (projector off and screen up) at the end of class, or when it is not being used.
For further instructions and assistance in using the advanced technology in this room, please call x2209

