How to record and share a video using Teams
Goal
The following article will show you how to record and share a video using the Teams Meeting function outside of an actual meeting with collaborators.
Setting up the "meeting"
The first thing you'll want to do is start a meeting with yourself. These steps are very similar to how you would create a real meeting with other coworkers, students, or collaborators.
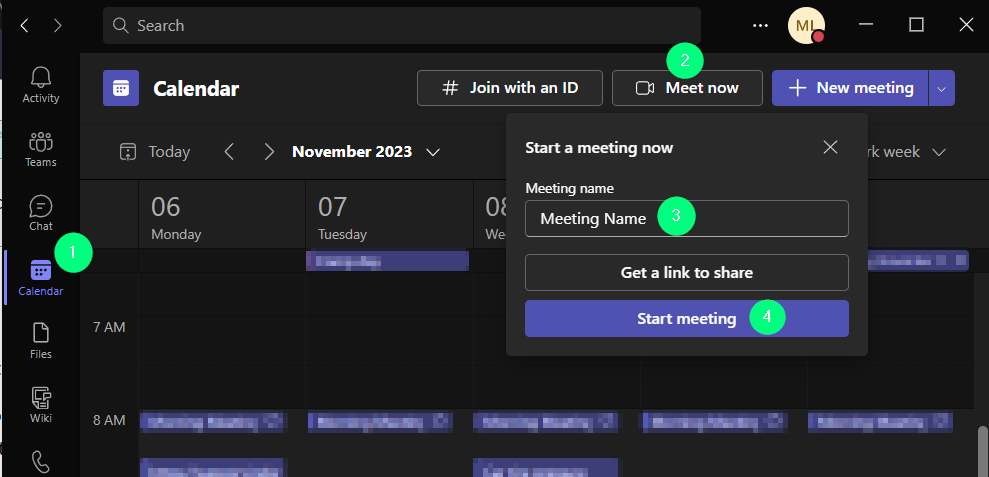
- Open the Teams desktop app.
- Go to your Calendar within Teams.
- Click Meet now. Create a name for the meeting if desired.
- Click Start Meeting.
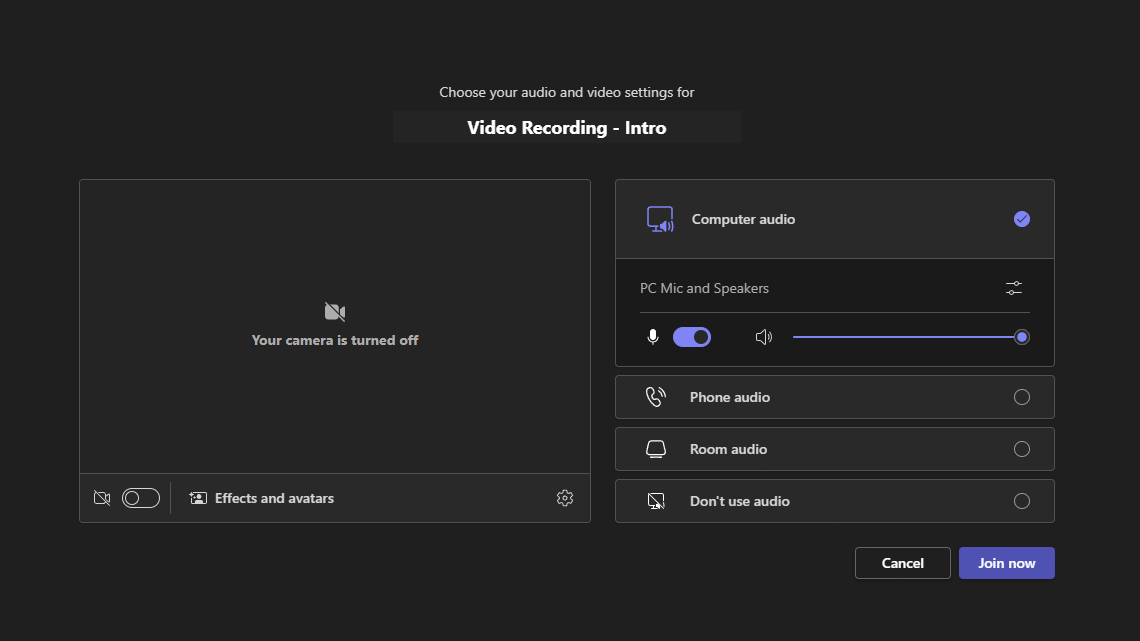
5. If desired, turn on Camera and adjust audio options. Then click Join now.
Recording the video
1. To start the recording, click More, Record and transcribe, and then Start recording.
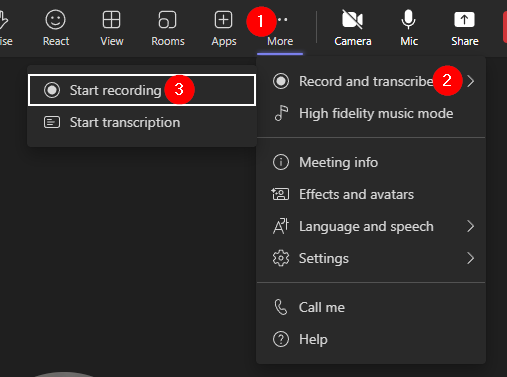
2. When finished recording, click More, Record and transcribe, and then Stop Recording.
3. Click Leave or End meeting (this will also stop the recording).
Sharing the recorded video
1. After recording the video, click chat on the left side of teams.
2. Click on the name of the meeting used for the recording.
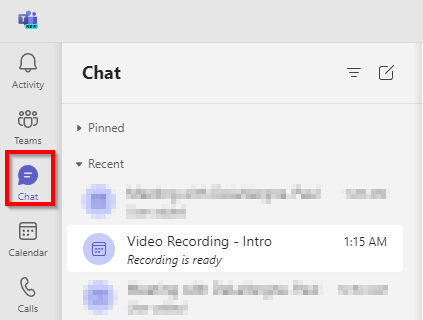
3. Click on the three dots and select Open in Stream.
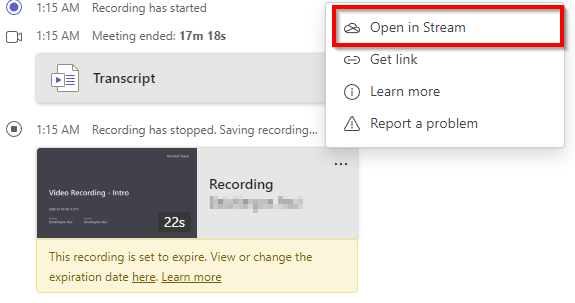
4. The recorded video will open in Microsoft Stream in a new browser window or tab. On the right side of the page click on Share.
It may take up to 20-25min. for the recording to sync to then be viewed in Microsoft Stream.
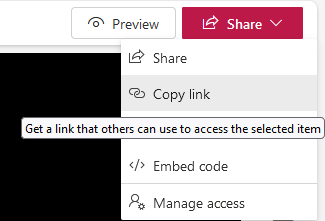
5. To copy a link that can be shared with others at IWU, click Copy link. This link can be posted in a discussion or sent via chat, email, etc.
