How to Create a Quiz
Goal
After completing this how-to you will have knowledge needed to create a quiz within the Activity tool. For other guides on the Quizzes tool, navigate to the Quizzes topic page.
Navigation
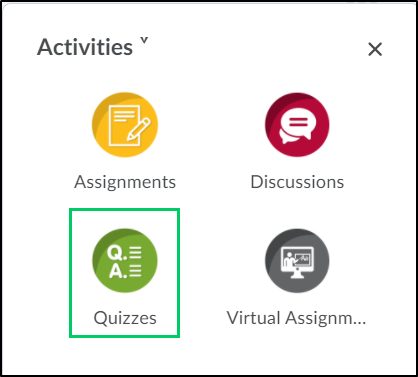
1. Select the "Activities" icon from the course navbar.

2. From the "Activities" menu, select "Quizzes".
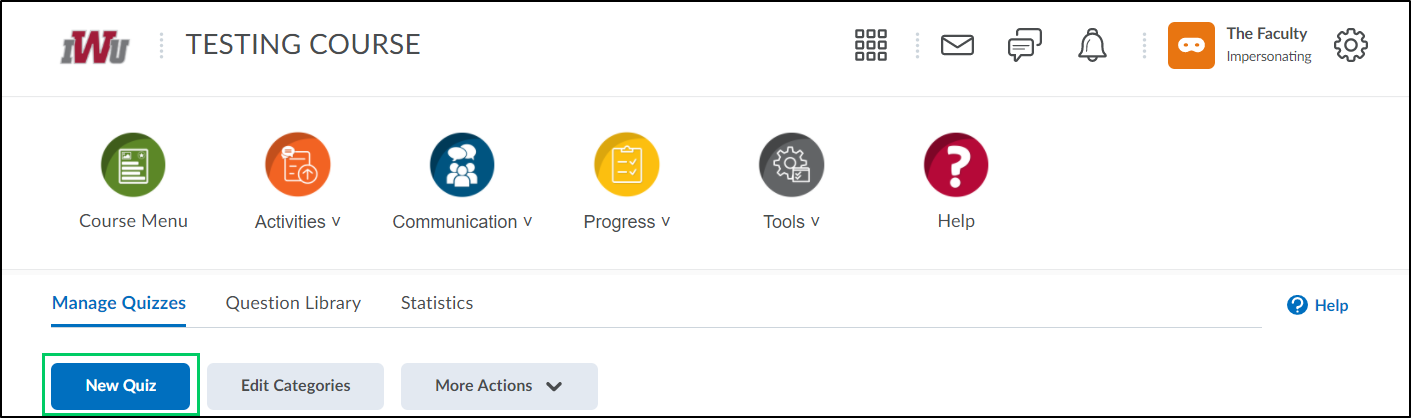
3. Select the "New Quiz" button.
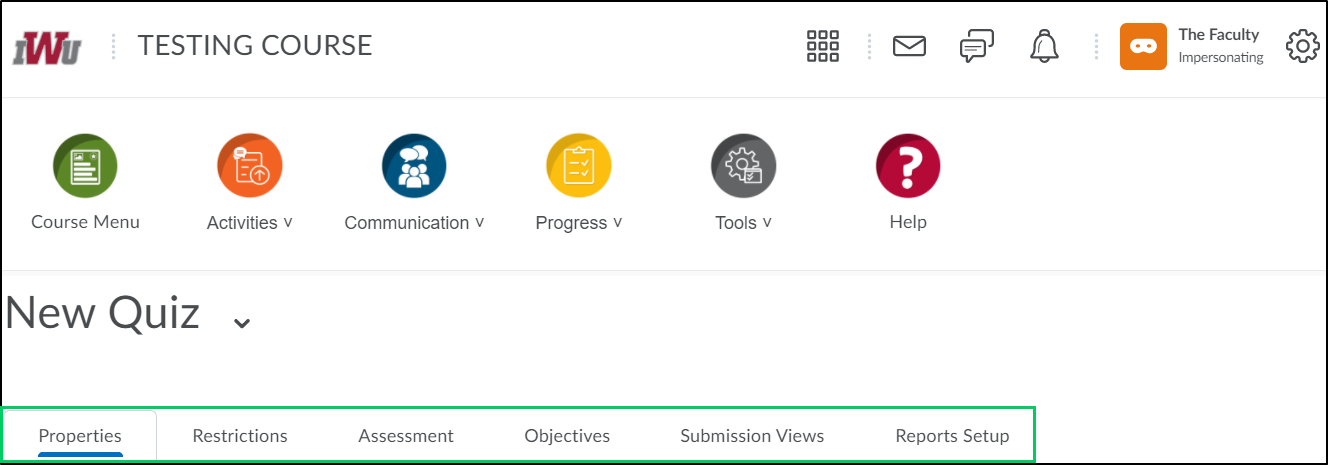
4. The "Properties" tab allows the faculty to set the general information for the quiz such as the name, category, and questions.
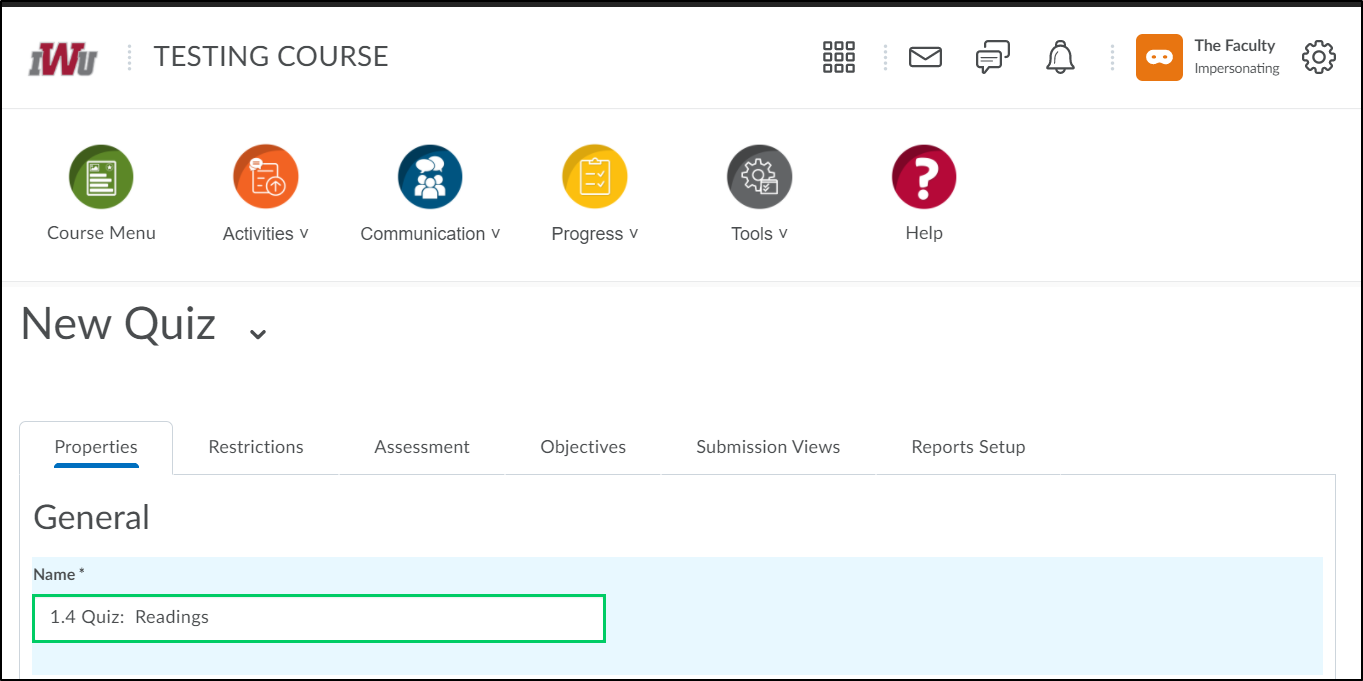
4a. Within the name field, enter a name for the quiz. This should match the title given to the quiz HTML page located within the Course Menu tool.
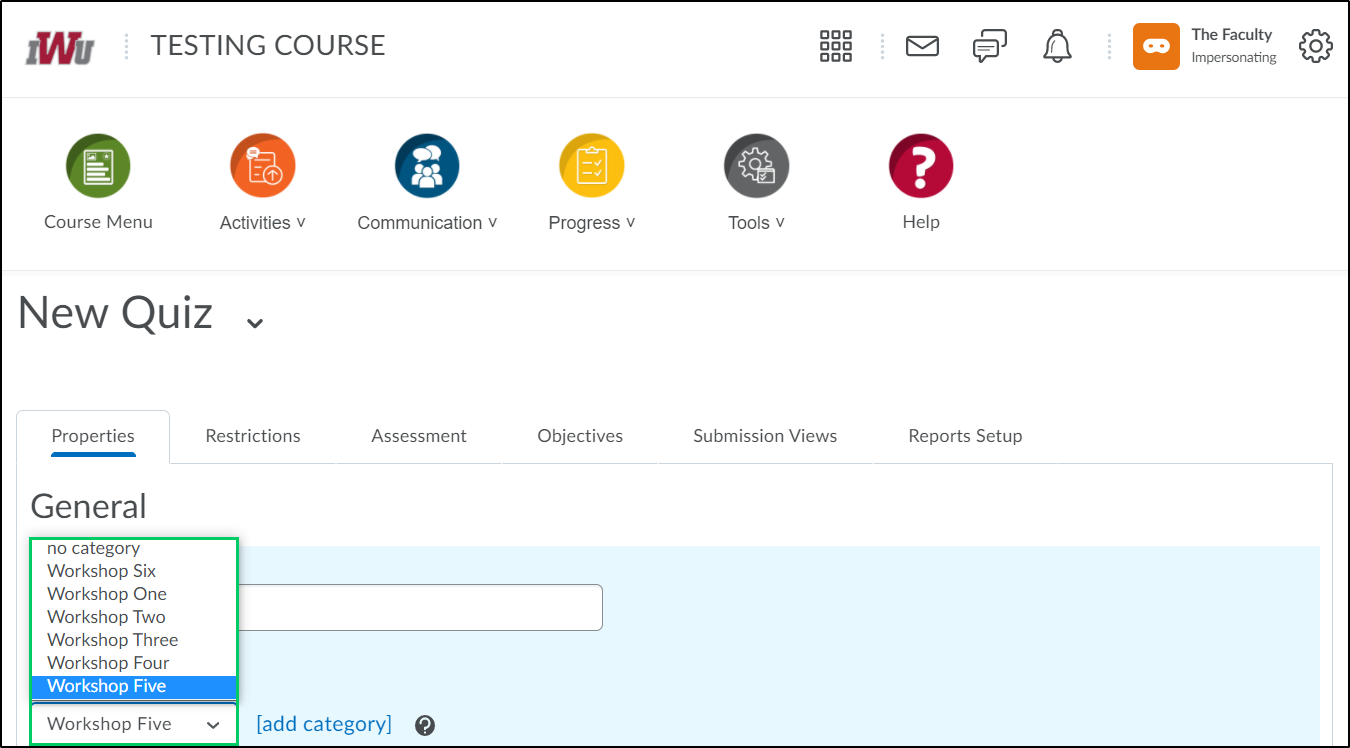
4b. In the "Category" dropdown menu, choose an existing or create a new category to display the quiz within. Associating a category with a quiz allows quizzes to be grouped in the quiz list page.
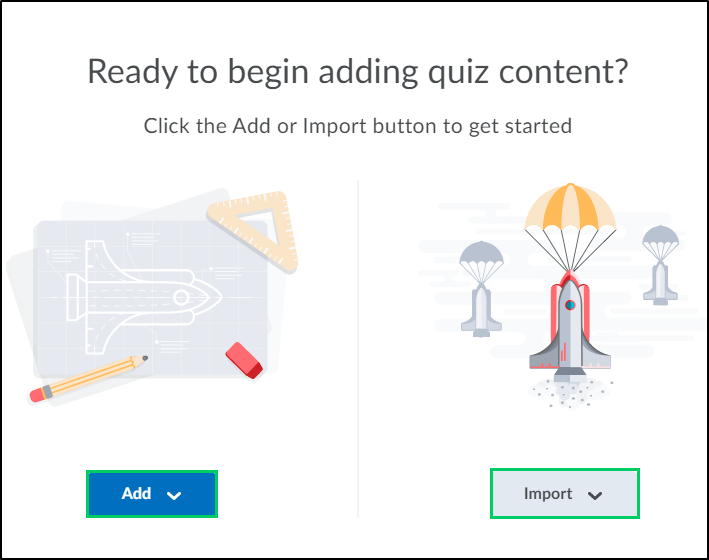
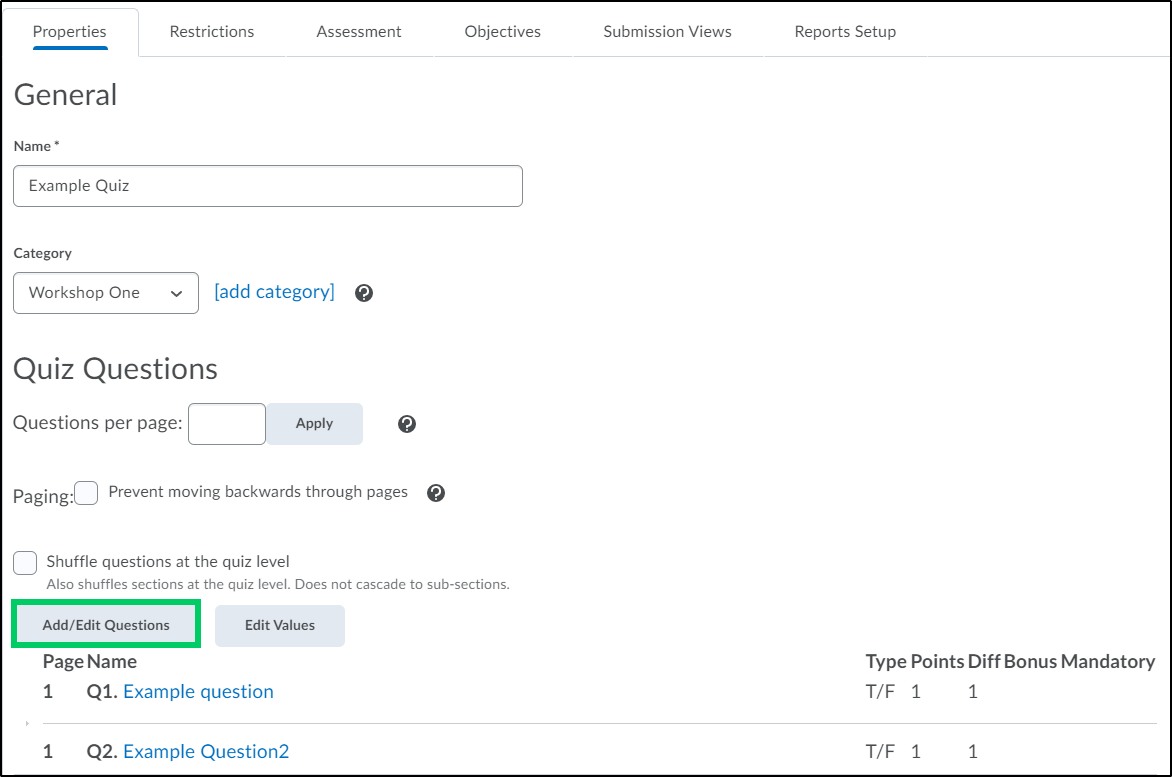
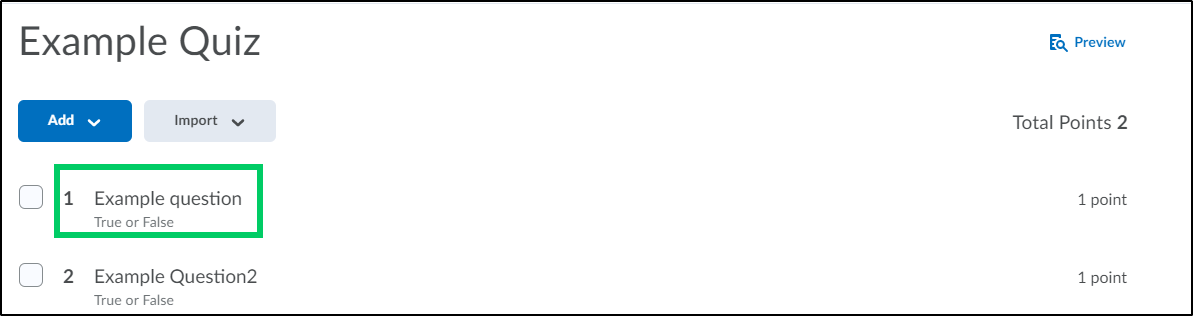
4c. Select the "Add/Edit Questions" button to add or edit quiz questions. The following types of questions can be incorporated into a quiz: True/False, Multiple Choice, Multi-Select, Written Response, Short Answer, Multi-Short Answer, Fill in the Blanks, Matching Question, and Ordering Question. For more information on quiz question types, see the related Brightspace Community article.

i. Faculty can "Add" questions or "Import" questions from another source. For details on how to import quiz questions, see the step-by-step instructions on "How to Import Quiz Questions".
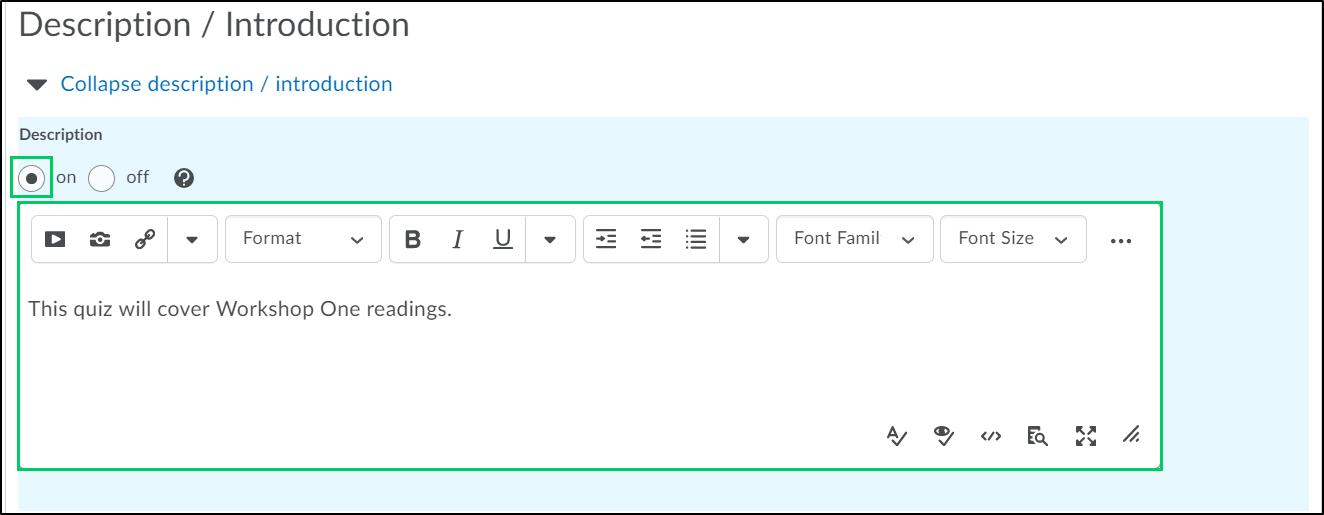
4d. Within the "Description/Introduction", faculty can add an optional description or introduction to the quiz by selecting the "On" radio button and adding content into the "Description" HTML editor. The description appears in the table of contents and tells students what the quiz is about before they enter the quiz. The overview of the quiz and quiz topics can help students determine if they are ready to take the quiz or if they need to review specific topics.
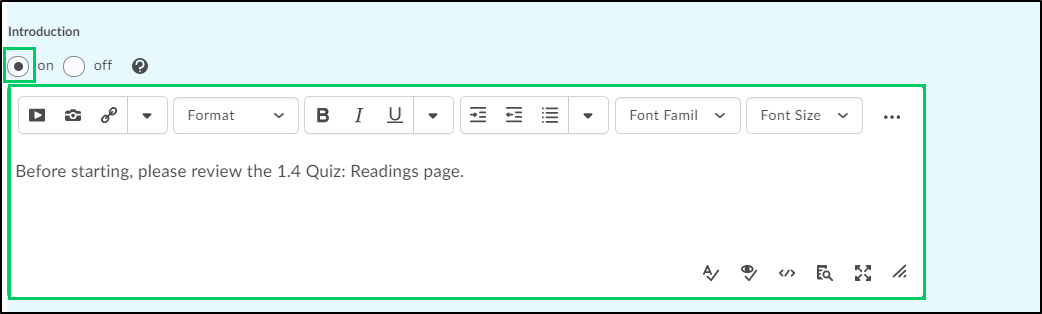
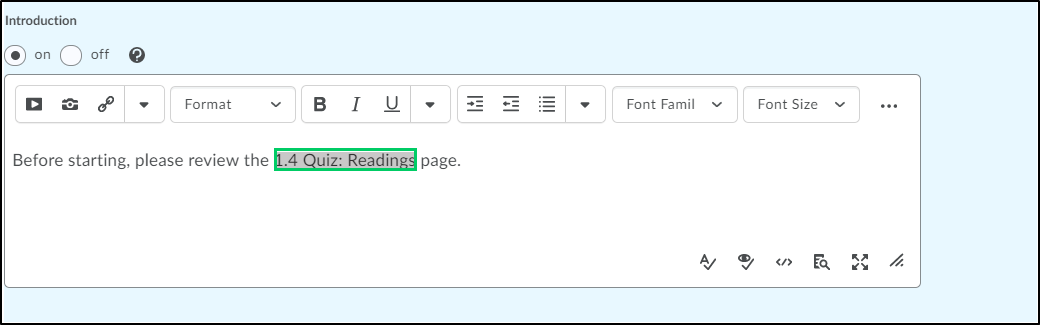
4e. Within the "Introduction", faculty should select the "On" radio button and add the following text into the Introduction HTML editor, "Before starting, please review the x.x Quiz page. The introduction appears on the main start page of a quiz.
i. Create a link to the quiz HTML page by selecting the quiz title and copying the text.
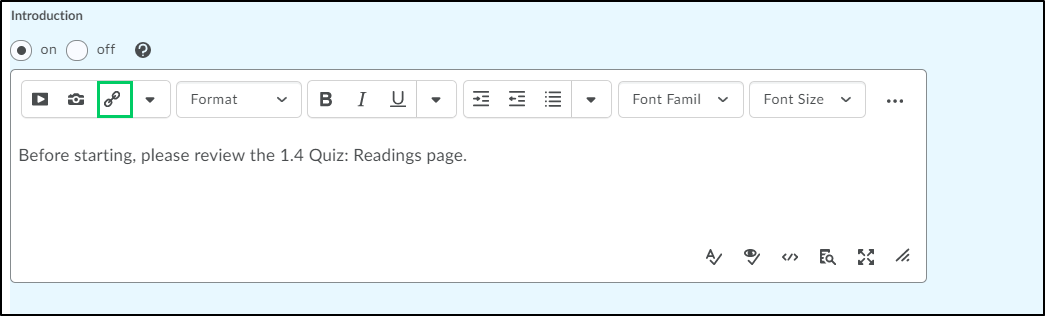
ii. Select the "Insert Quicklink" symbol.
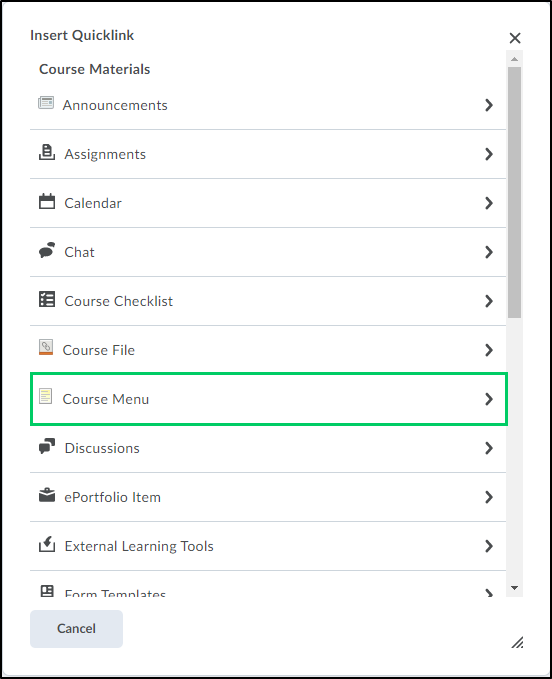
iii. From the "Insert Quicklink" pop-up box, select "Course Menu".
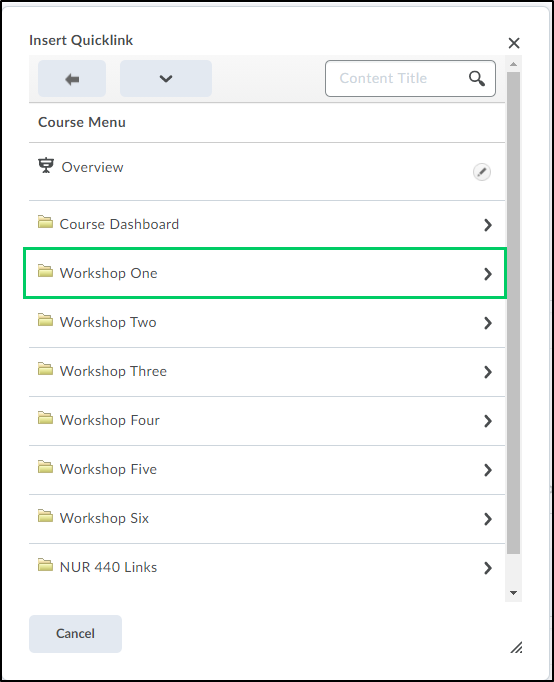
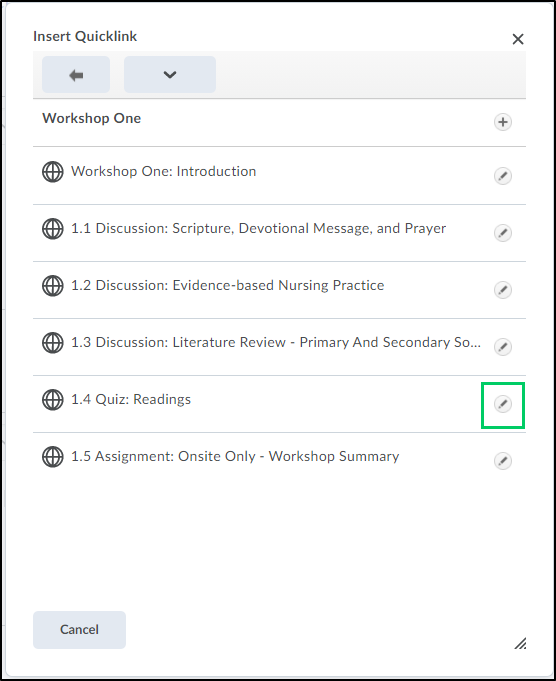
iv. Choose the Workshop/Module that the quiz lives within.
v. Choose the pencil icon next to the activity that relates to the quiz.
v. Paste the text previously copied above into the "HTML Properties Title" field.
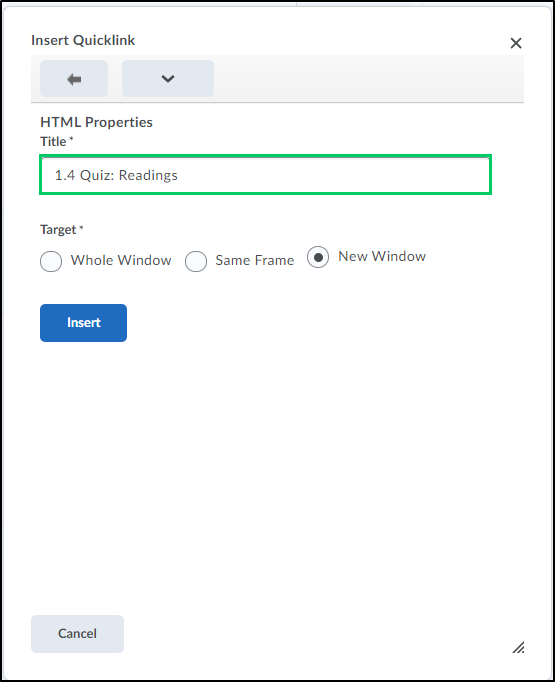
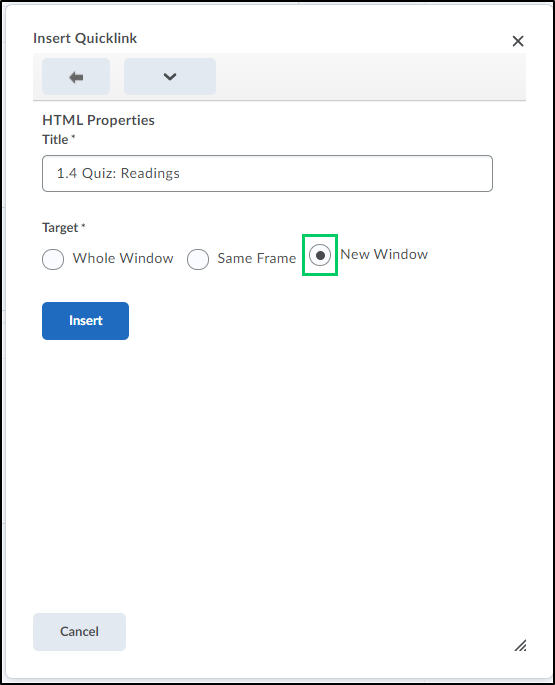
vi. Under the Target heading, select the radio button next to "New Window".
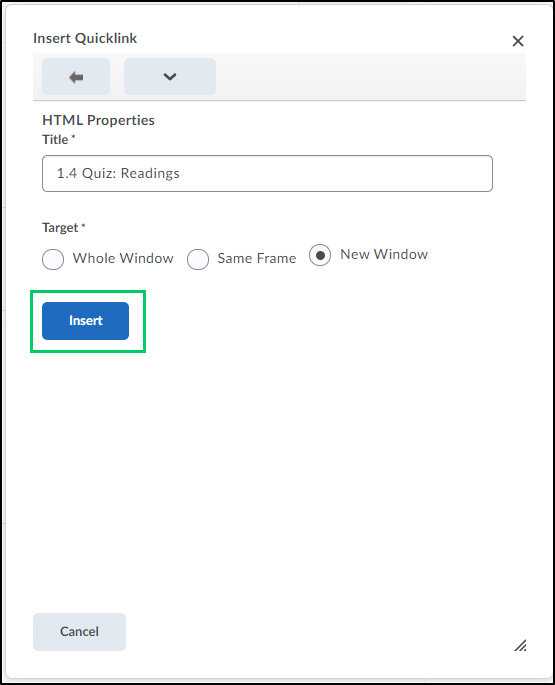
vii. Select the "Insert" button.
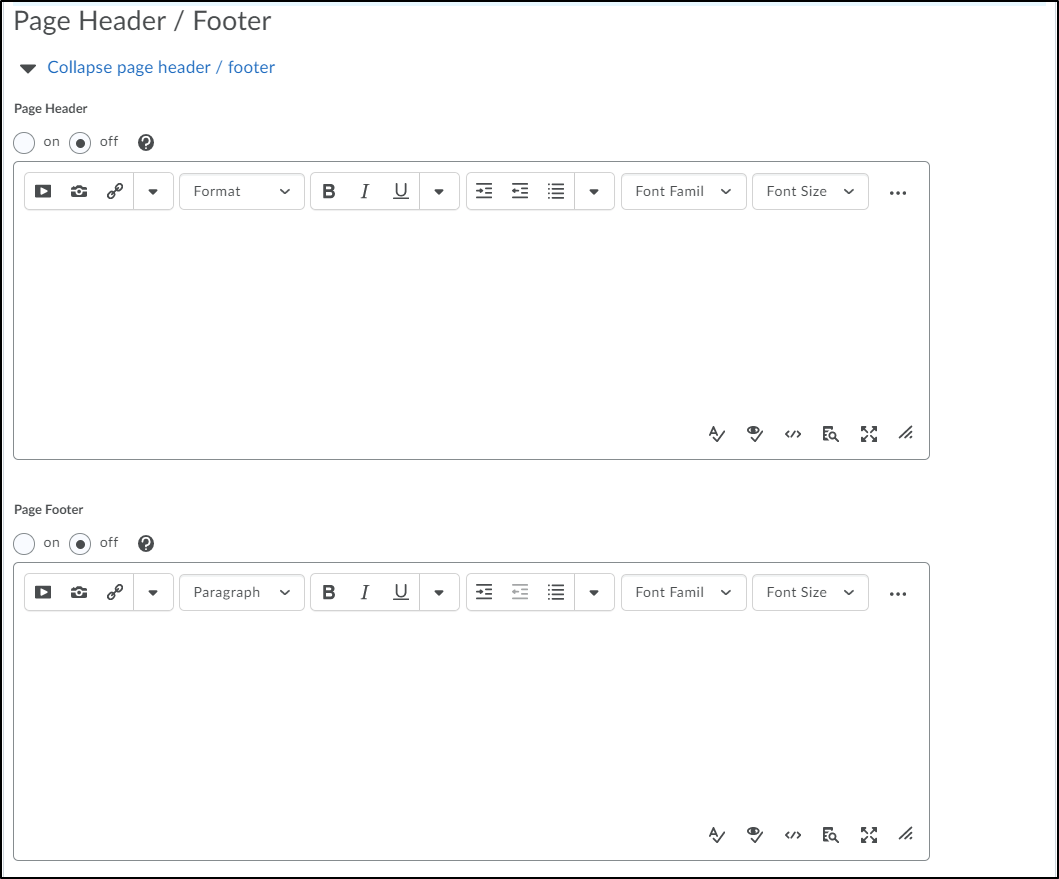
4f. Headers and Footers are optional, but can be included if turned on. The page header is shown at the top of every page in the quiz and the footer is shown at the bottom. These are helpful if the quiz is multiple pages and requires additional instructions or reminders throughout the quiz.
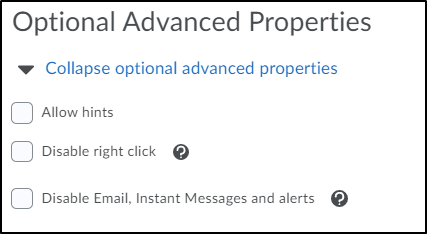
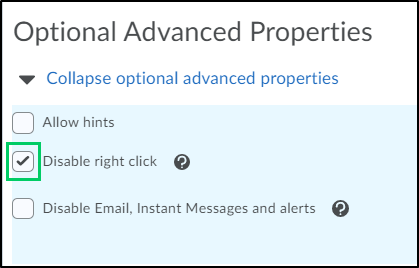
4g. Under the "Optional Advanced Properties" section, faculty can allow hints, disable right click, and disable email, instant messages, and alerts.
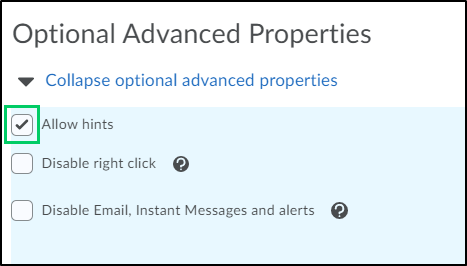
i. By placing a checkmark in the "Allow Hints" checkbox, faculty can allow hints which will assist students with answering quiz questions.
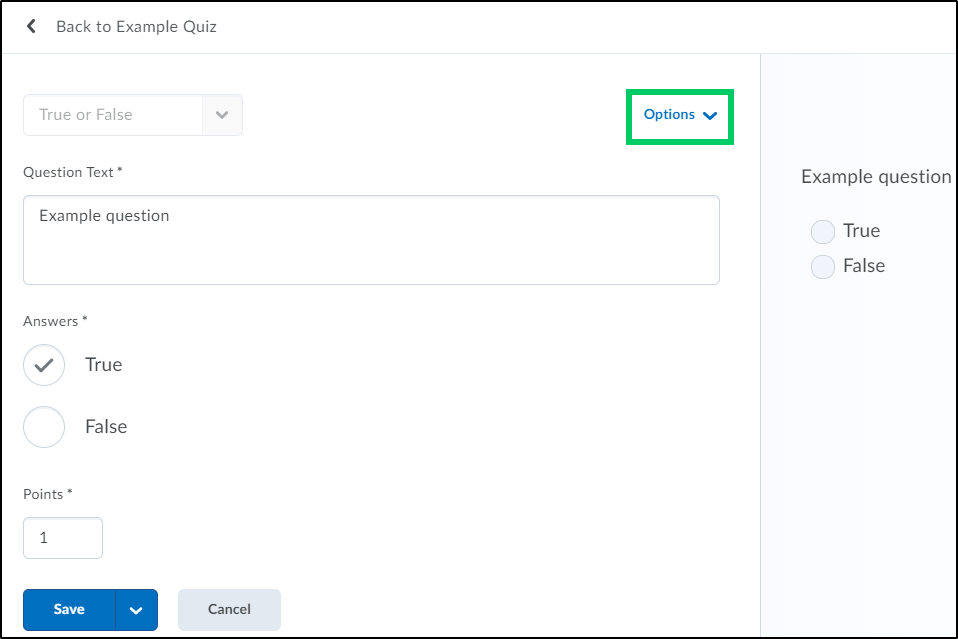
a. In order to add hints, select the "Add/Edit Questions" button.
b. Select the question to add a hint to.
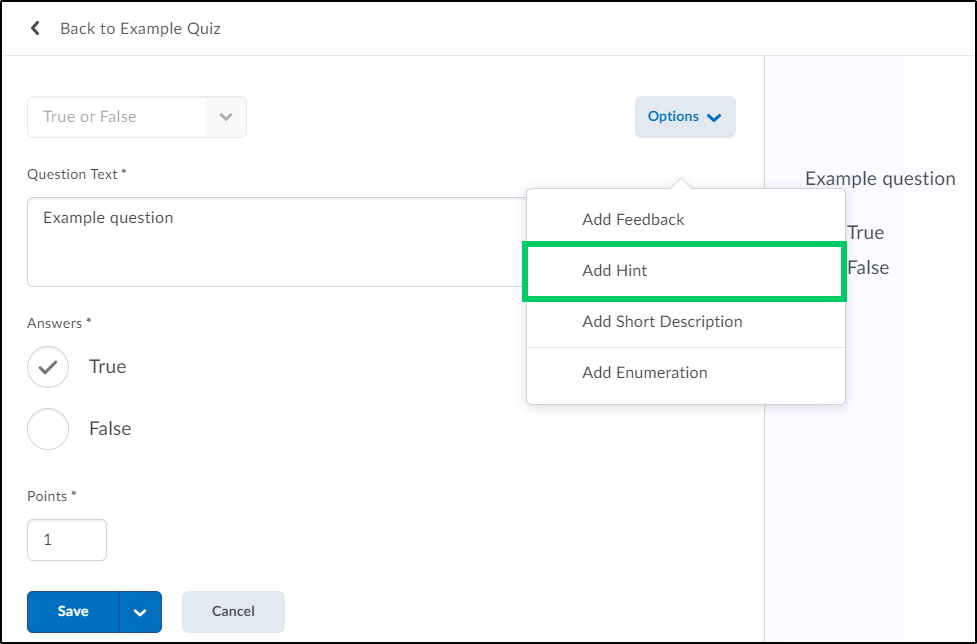
c. Select the "Options" dropdown menu.
d. From the Options menu, select "Add Hint".
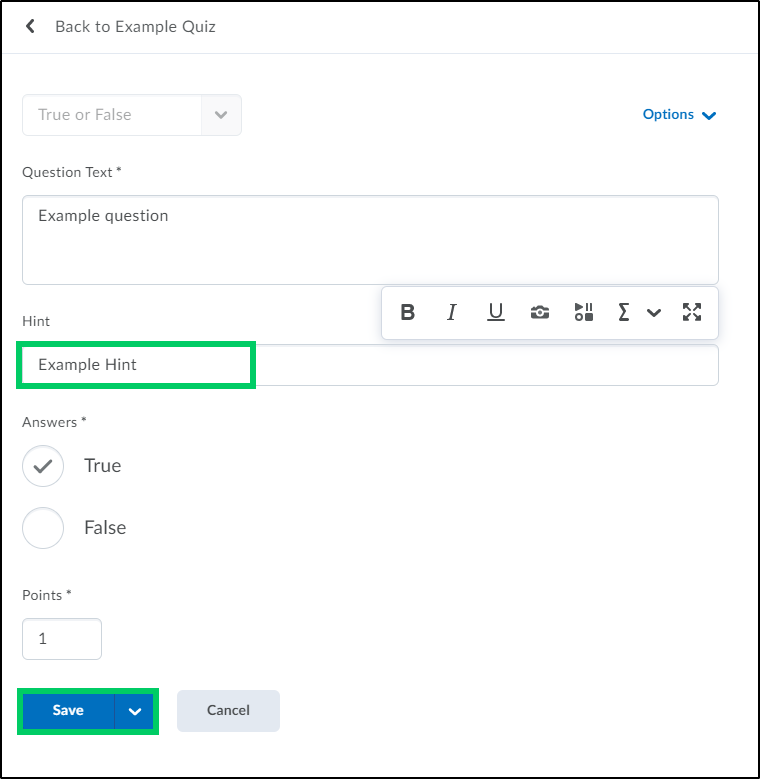
e. Add the hint text into the "Hint" field and select the "Save" button.
ii. By placing a checkmark in the "Disable right click" checkbox, faculty can prohibit students from printing quiz questions or copying the quiz question into a web browser by right-clicking on a question when taking a quiz.
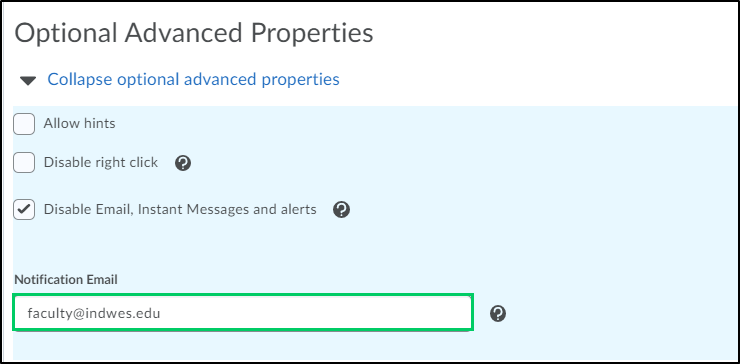
iii. By placing a checkmark in the "Disable Email, Instant Messages and alerts", faculty can disable the Email and Instant Messaging tool if they have a quiz attempt in progress.

iv. By placing an email address into the "Notification Email", faculty can receive an email notification anytime a user completes a quiz attempt.
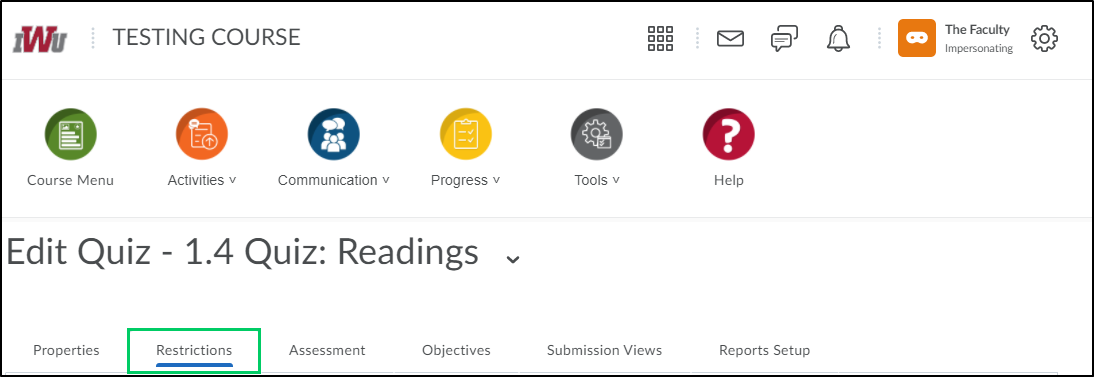
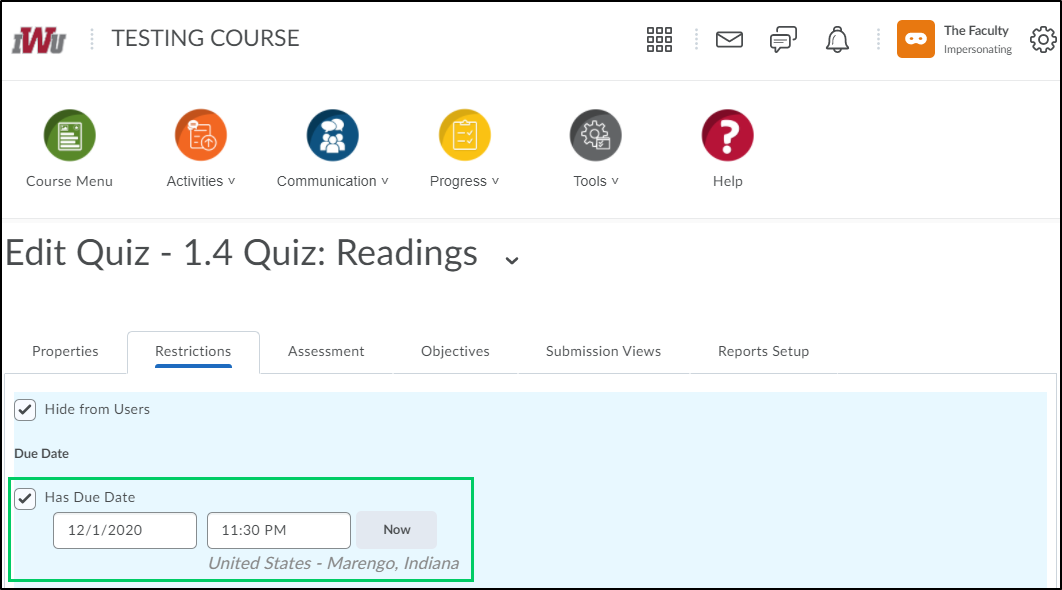
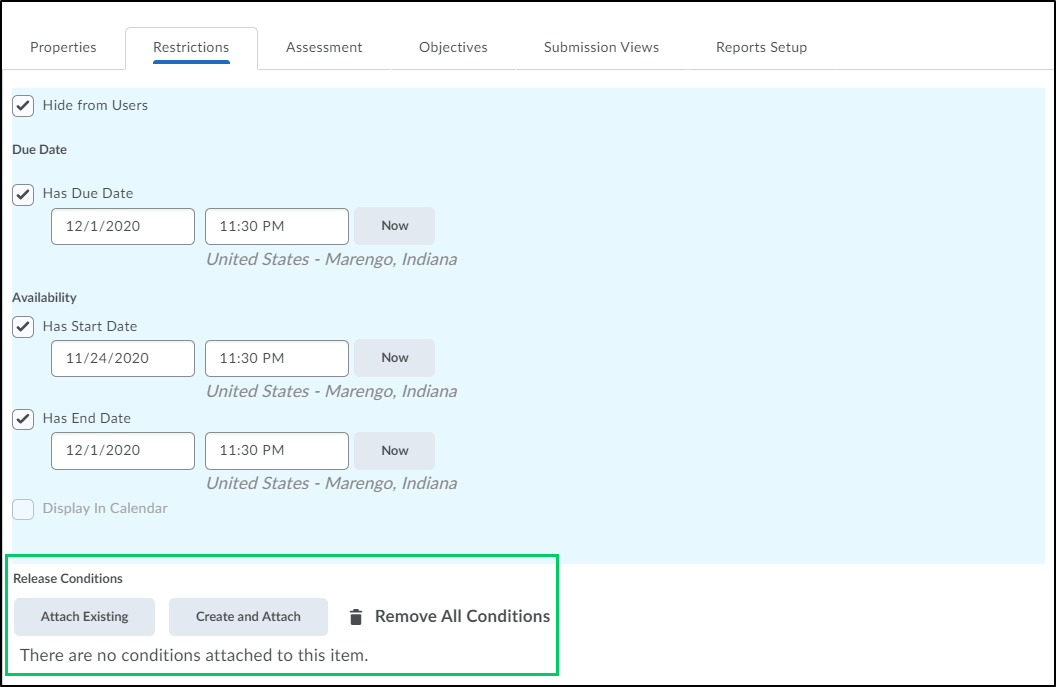
5. The "Restrictions" tab allows faculty to set limitations in regards to the visibility, due date, and time limit.
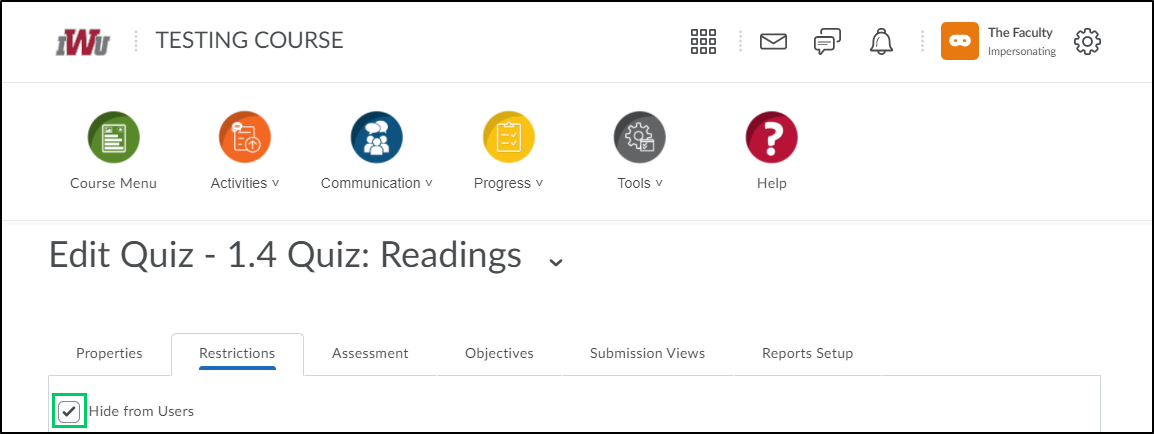
5a. By placing a checkmark in the "Hide from user" checkbox, faculty can make the quiz not visible to students.
5b. By placing a checkmark in the "Has Due Date" checkbox and placing a date and time in the appropriate fields, faculty can set a due date of when the quiz attempt is due. The due date is the date that the quiz is due, submissions to the quiz after this date may be considered late.
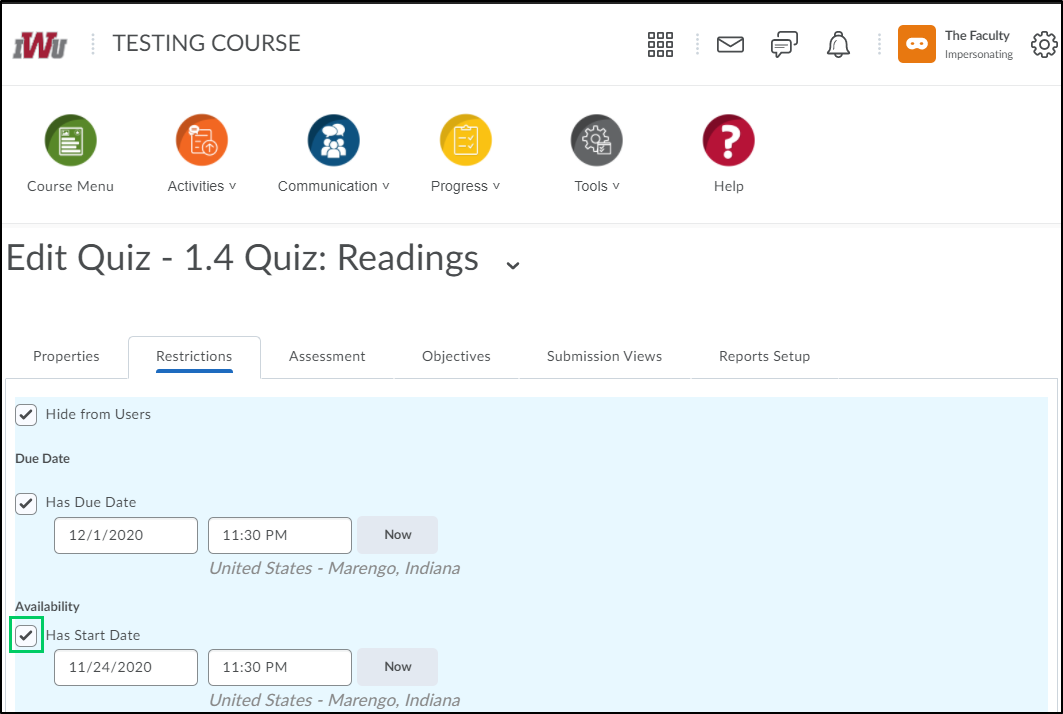
5c. By placing a checkmark in the "Has Start Date" checkbox and placing a date and time, faculty can set a date which the quiz would be made available to students to take. Regardless of the start date set, the quiz will still be visible to students in the Table of Contents but not accessible in the Quizzes tool until the set start date.
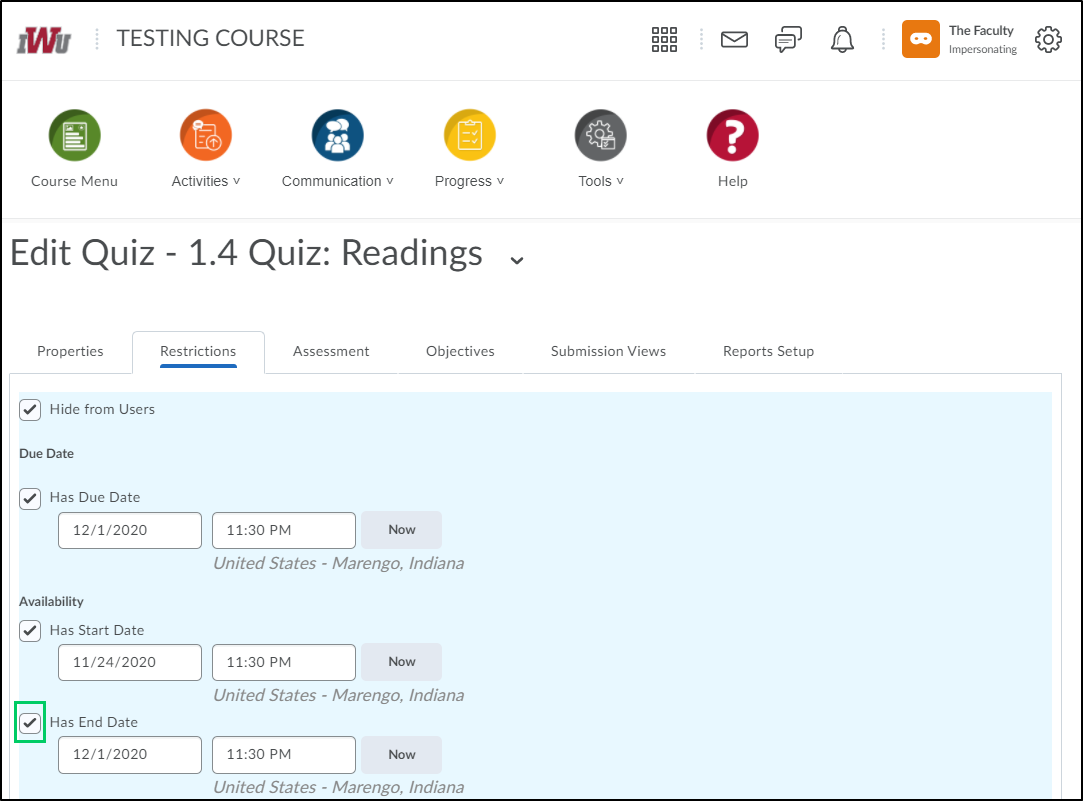
5d. By placing a checkmark in the "Has End Date" checkbox and placing a date and time, faculty can set a date which would end the availability of the quiz for students. Regardless of the end date set, the quiz will still be visible to students in the Table of Contents but not accessible in the Quizzes tool after the set end date.
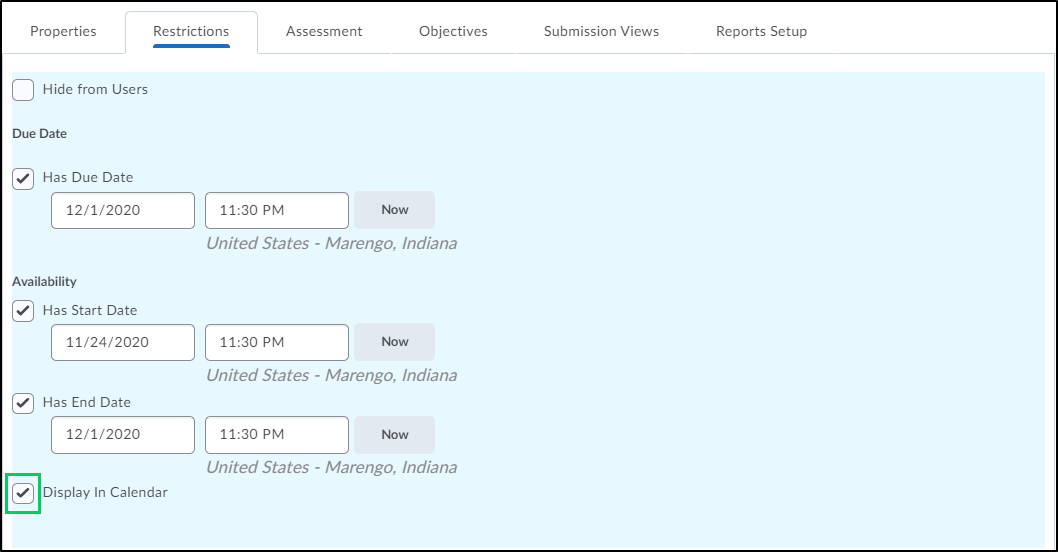
5e. Placing a checkmark within the "Display in Calendar" checkbox will push the quiz due date into the Calendar tool for students to review.
5f. In the "Release Conditions", faculty can set conditions that must be met before a learner can access the quiz. For more information on release conditions, access the Release Conditions guide.
5g. Within the "Timing" section, faculty can make the choice to set a Recommended Time Limit or an Enforced Time Limit. In special circumstances, faculty may also need to extend time for specific students. For more information on extending time, review the "How to Extend Time on a Quiz" guide.
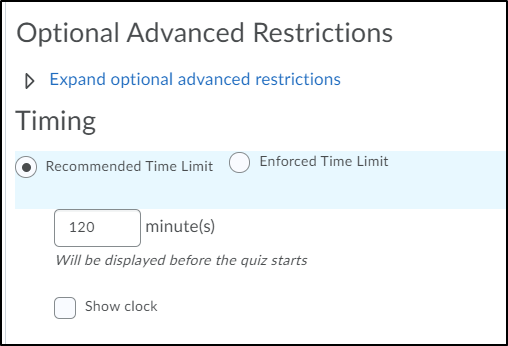
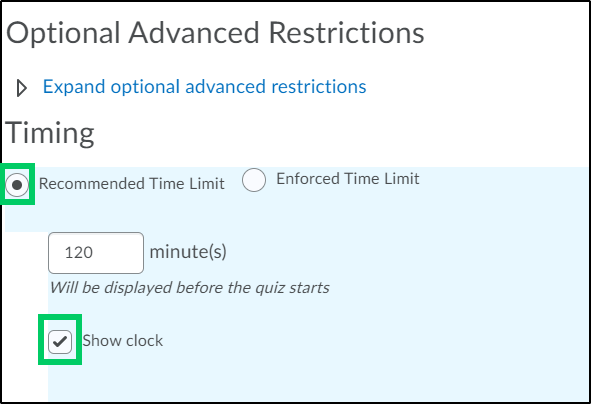
i. Selecting the radio button beside "Recommended Time Limit" allows faculty to place a specified number of minutes into the "Minutes" field that will reflect the amount of time that is recommended for a student to complete the quiz. Placing a checkmark in the "Show Clock" checkbox will allow the clock to be displayed while taking the quiz. Choosing the recommended time limit option will not prevent the student from continuing and submitting the quiz past the recommended time limit.
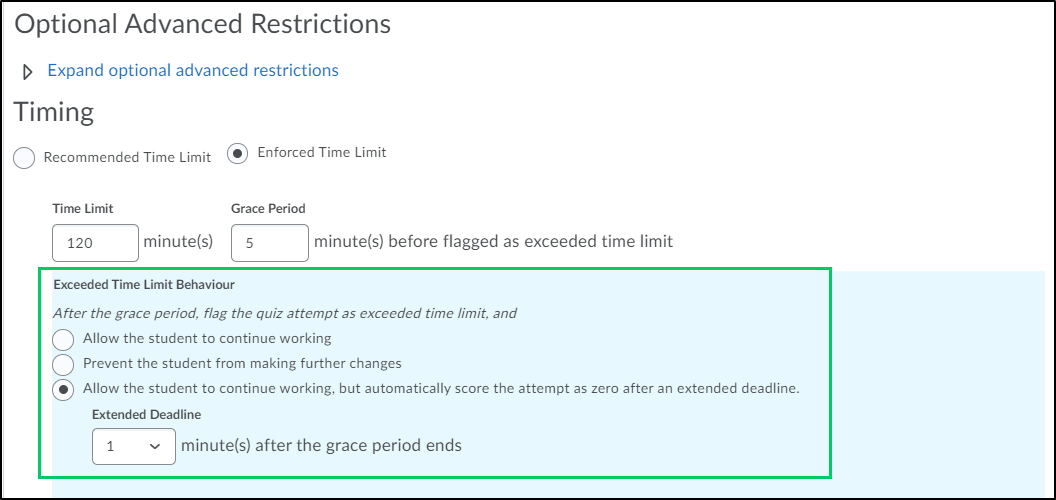
ii. Selecting the radio button beside "Enforced Time Limit" allows faculty to place a specified number of minutes into the "Minutes" field that will reflect the amount of time that a student has to complete the quiz. Faculty will also place a specified number of minutes into the "Grace Period" field. When the student enters the grace period, the time remaining will begin to flash alerting the student that they have a specified number of minutes to complete the quiz.
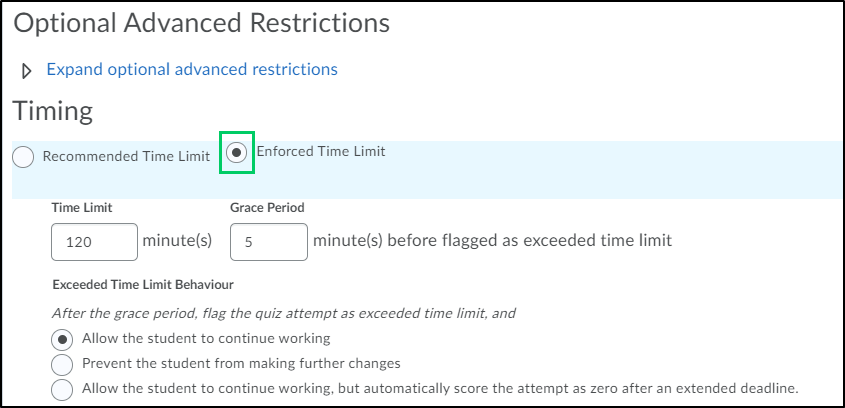
iii. Within the "Exceeded Time Limit Behaviour" section, faculty can determine what will happen when the student exceeds the allotted time. By selecting the appropriate radio button, faculty can allow students to continue working, prevent the student from making further changes, or allow the student to continue working, but automatically score the attempt as zero after an extended deadline which is determined by choosing the extended deadline after the grace period ends.
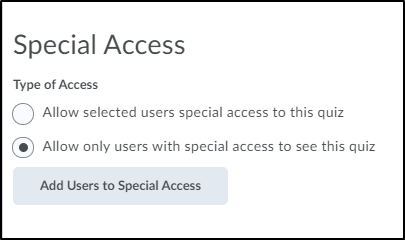
5h. Within the Special Access section, faculty can grant special quiz access to students by choosing the appropriate radio button. For more information on granting special access, refer to the guide on "How to Grant Special Access".
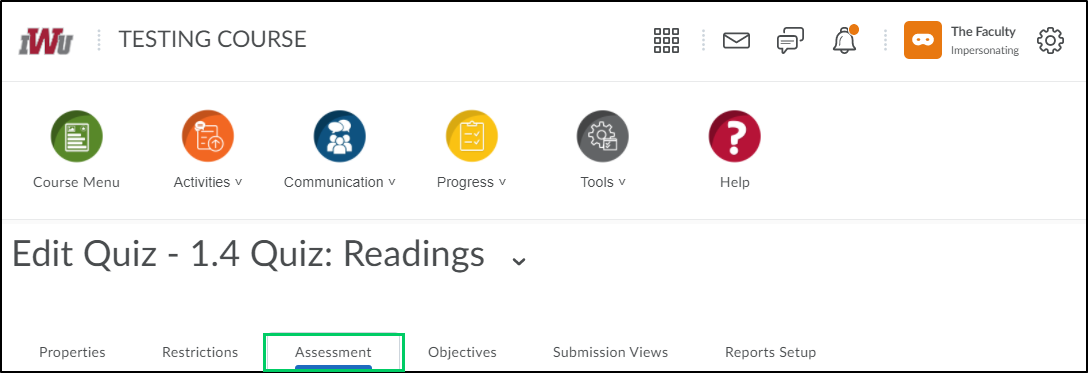
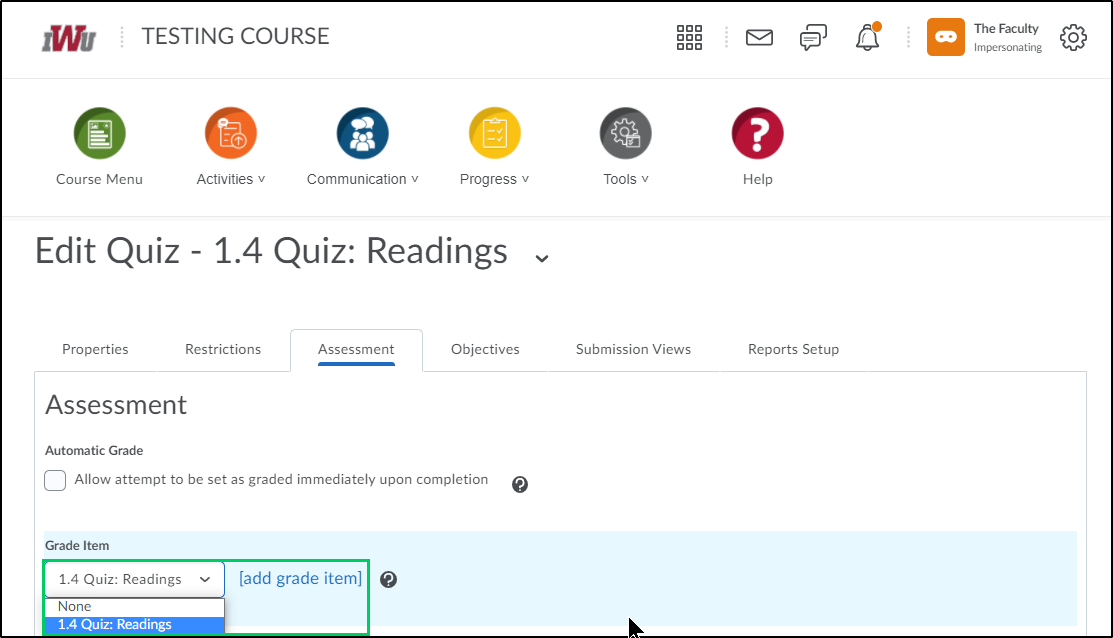
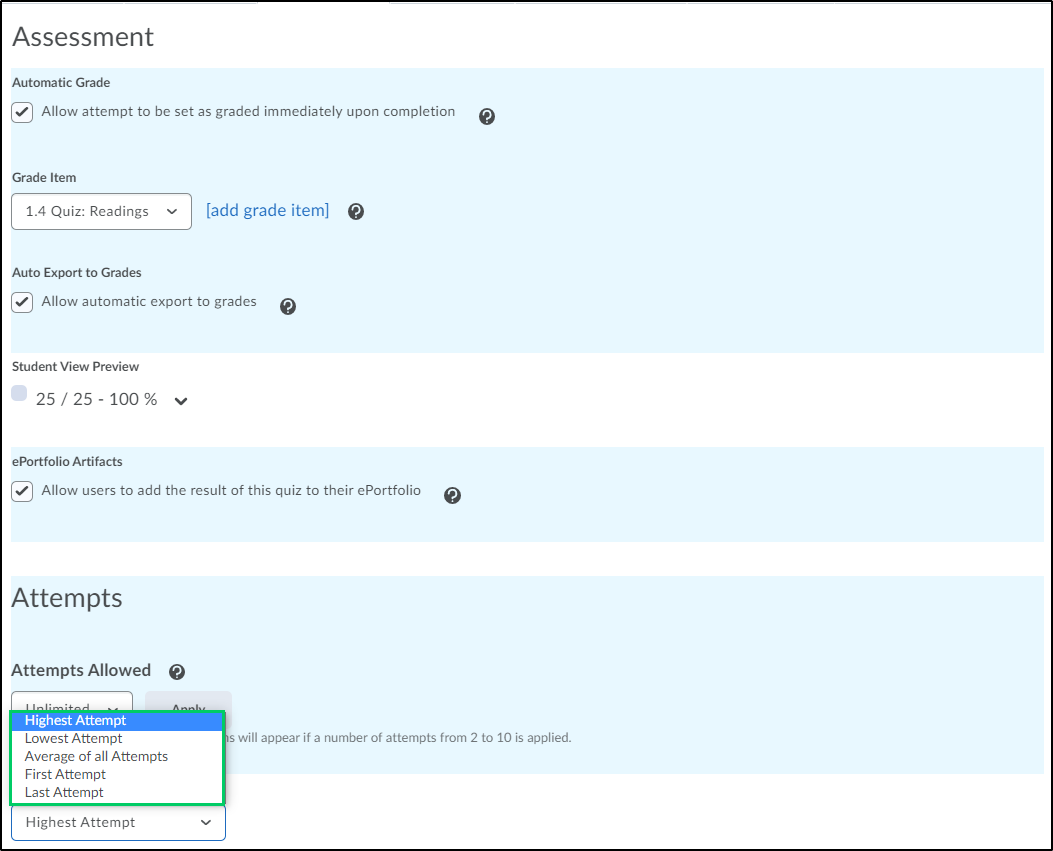
6. Within the "Assessment" tab, faculty can make grading and quiz attempt decisions.
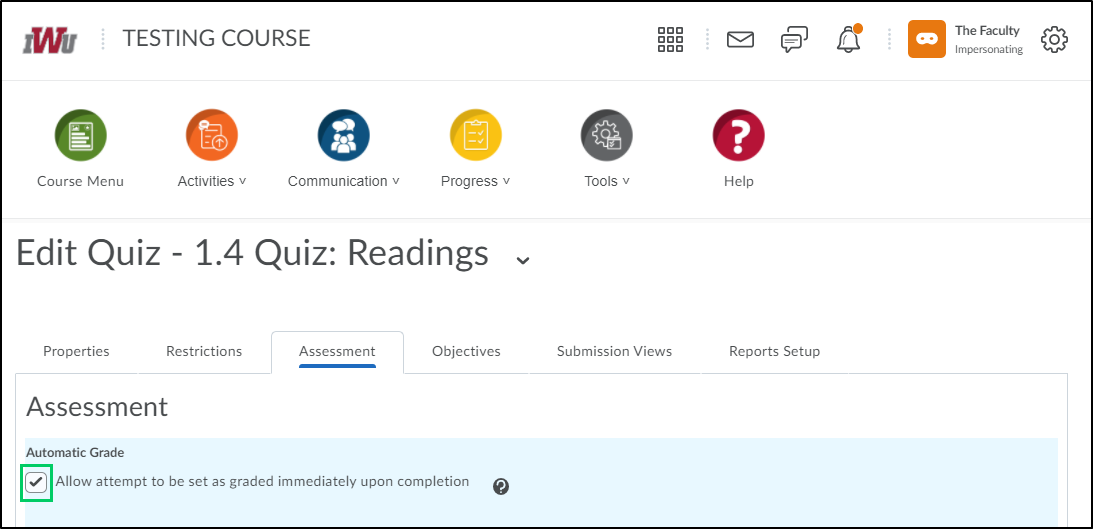
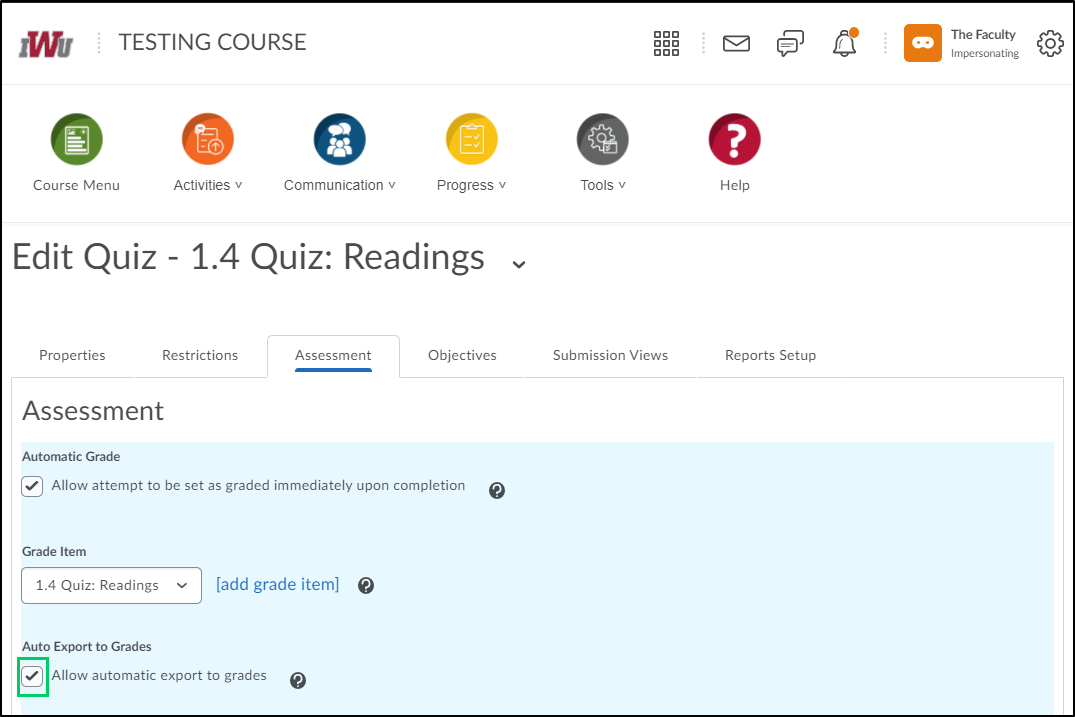
6a. By selecting the checkbox under "Automatic Grade", students will be able to see their quiz score as soon as their quiz attempt is submitted. **NOTE** The score displayed is only what the system can auto-grade. Written response questions will be marked as 0 until manually graded.
6b. In the "Grade Item" dropdown, the quiz can be related to an existing grade item. A new grade item can also be created to relate the quiz to. Associating a grade item with a quiz allows quiz results to be automatically linked to the Grades tool. **NOTE** Quizzes that contain all bonus questions will not be linked to the specified grade item. The score will need to be manually entered into the gradebook.
6c. When the "Allow automatic export to grades" checkbox is enabled, the system can send auto-graded attempt scores directly to the gradebook. This requires that a grade item is associated with the quiz.
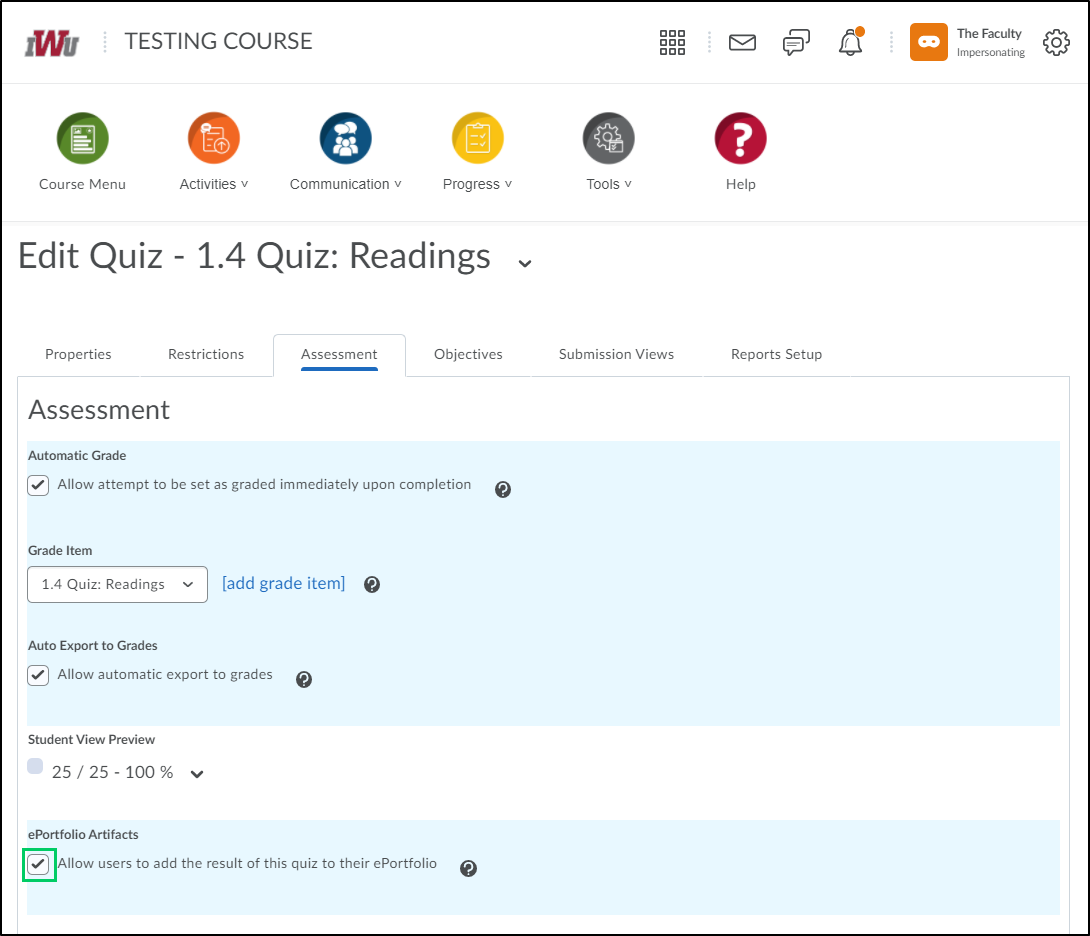
6d. Placing a checkmark in the "Allow users to add the result of this quiz to their ePortfolio" checkbox, will permit students to add their submission view of the quiz to their ePortfolio as a certified artifact.
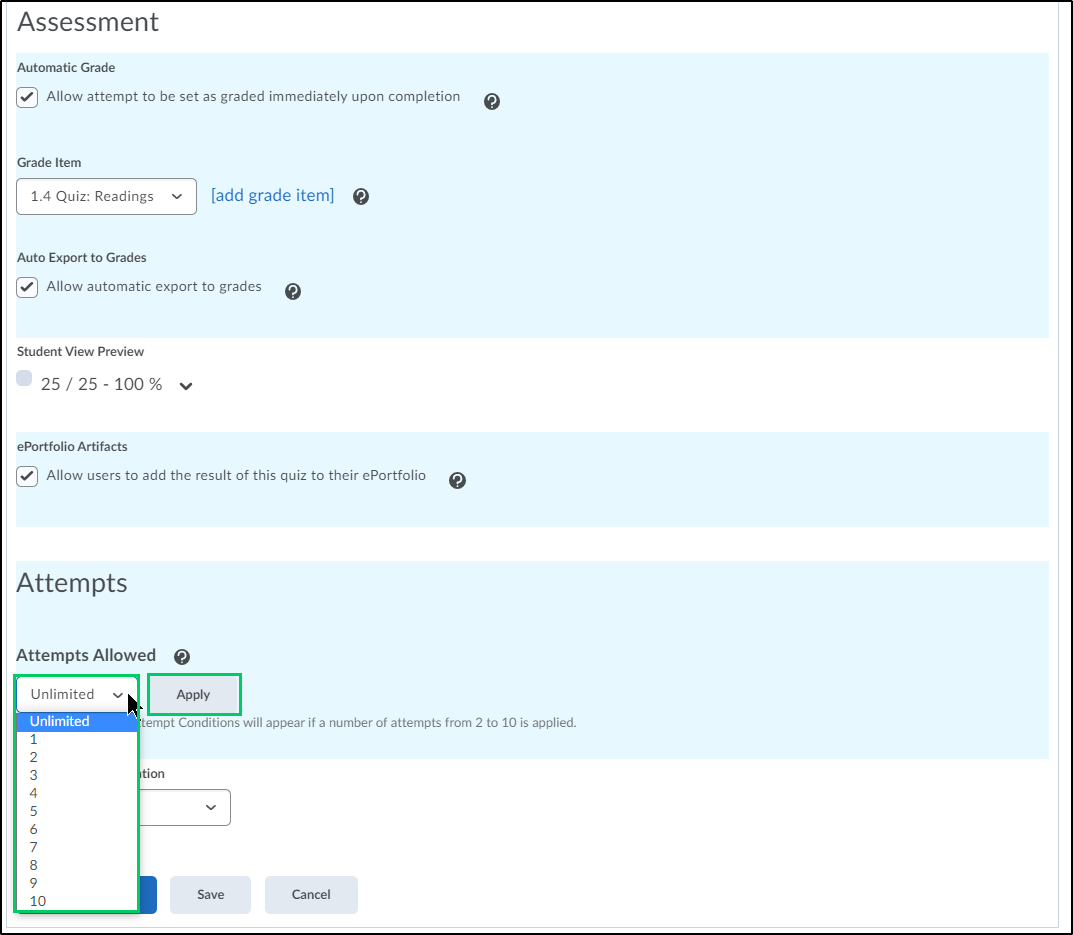
6e. To select the number of quiz attempts allowed for all students, choose a number from the dropdown menu and select the "Apply" button.
6f. To determine how the grade for the quiz will be calculated, select the appropriate option from the "Overall Grade Calculation" dropdown menu.
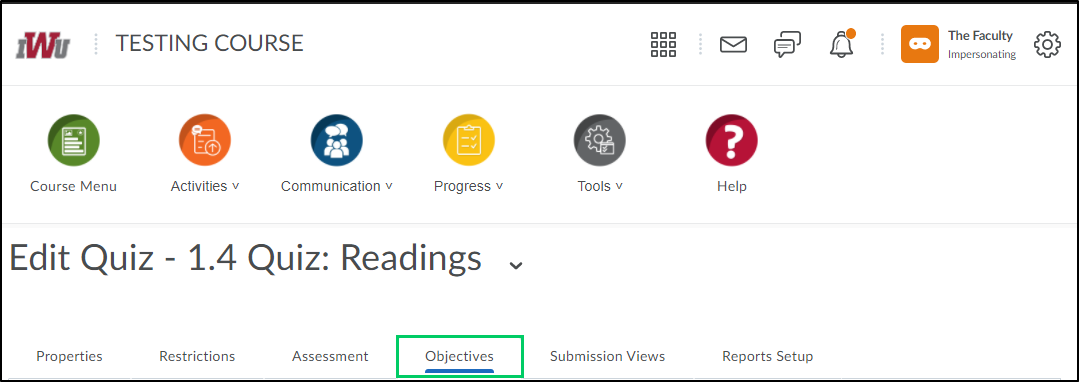
7. The "Objectives" tab allows faculty to associate learning objectives to the quiz.
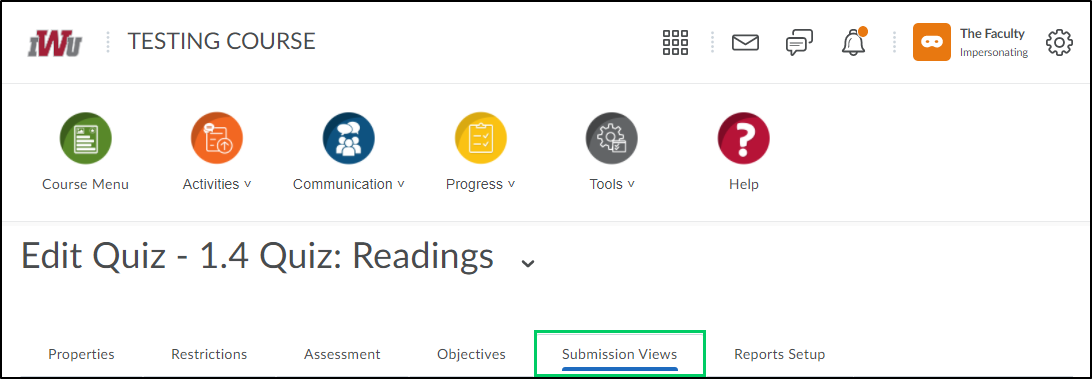
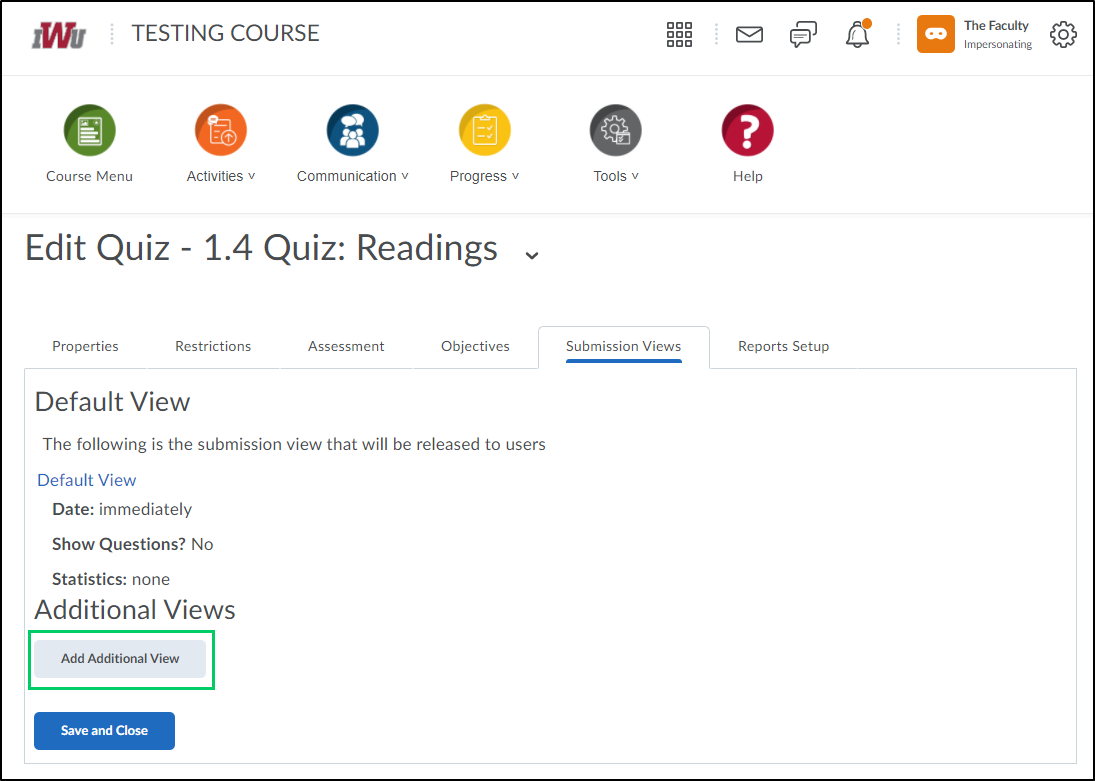
8. The "Submission Views" tab allows faculty to determine the submission view that students will see when they submit their quiz. For more information on creating a new or modifying an existing submission view, see the guide on How to Create or Modify a Quiz Submission View.
8a. To modify the default view, select the "Default View" link.
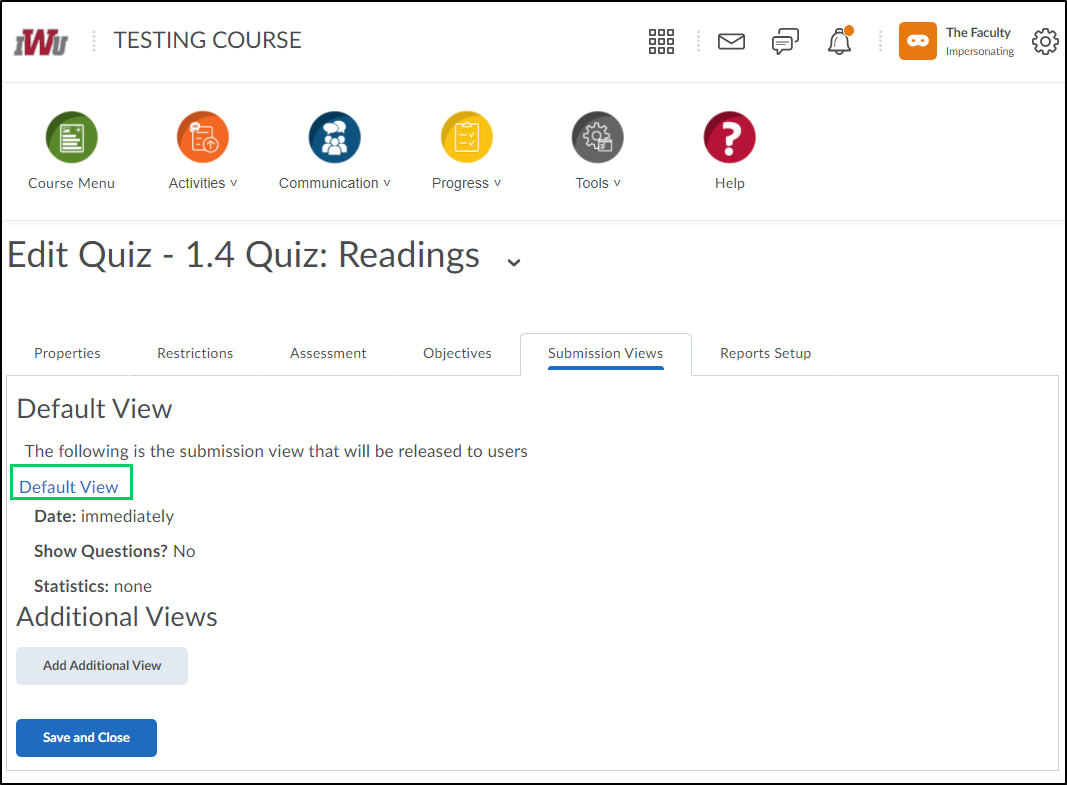
8b. To create a new view, select the "Add Additional View" button.
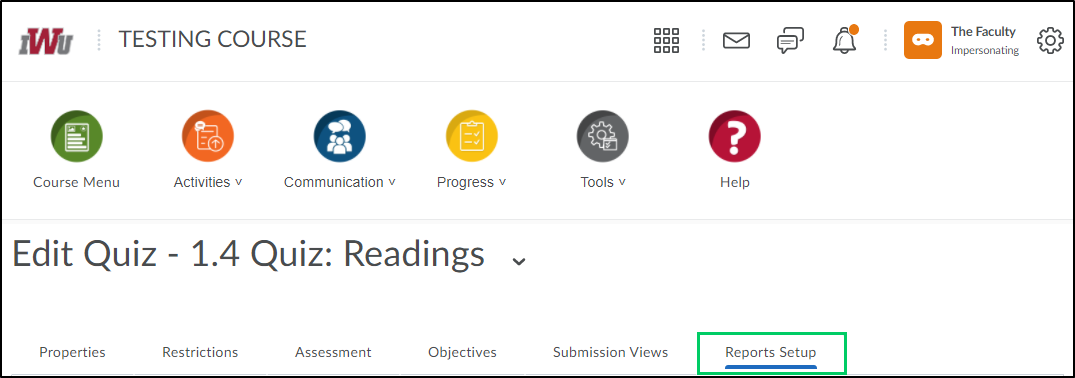
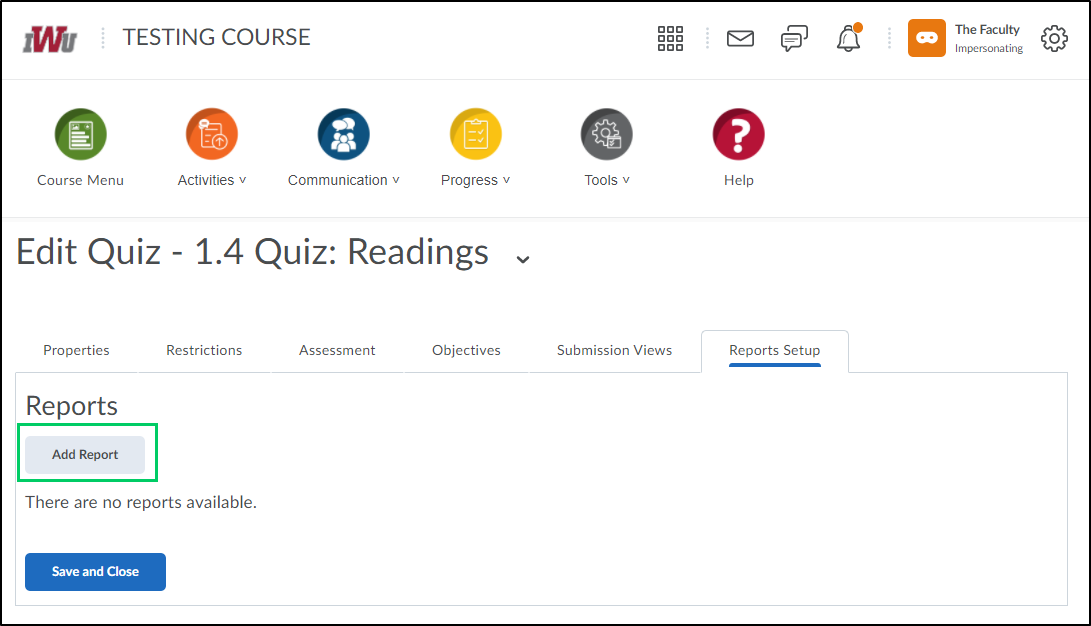
9. The "Reports Setup" tab allows faculty to create reports using submitted quiz information and release it to specific Brightspace roles.
9a. Select the "Add Report" button and determine the criteria needed. For specific information on creating a quiz report, access the "How to Create a Report in the Quiz/Survey Tool" guide.
10. Selecting the "Save and Close" or "Save" button will save the selections made within a tab. In addition, moving from one tab to another tab will automatically save the selections made in the previous tab.
