How to Create a Discussion Topic
Goal
After completing this how-to you will have the knowledge needed to create a discussion topic within the Discussion activity tool. For other guides on the Discussion tool, see the Discussions topic page.
Navigation
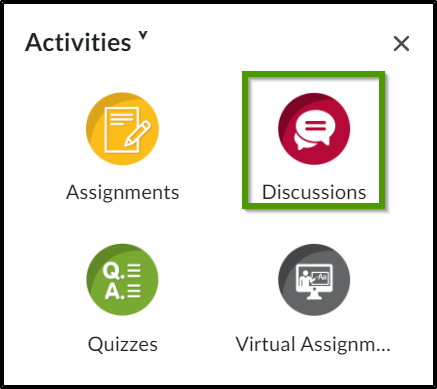
- To create a discussion in the Activities tool, select the "Activities" icon located within the course navbar.
- Select "Discussions" from the Activities dropdown menu.
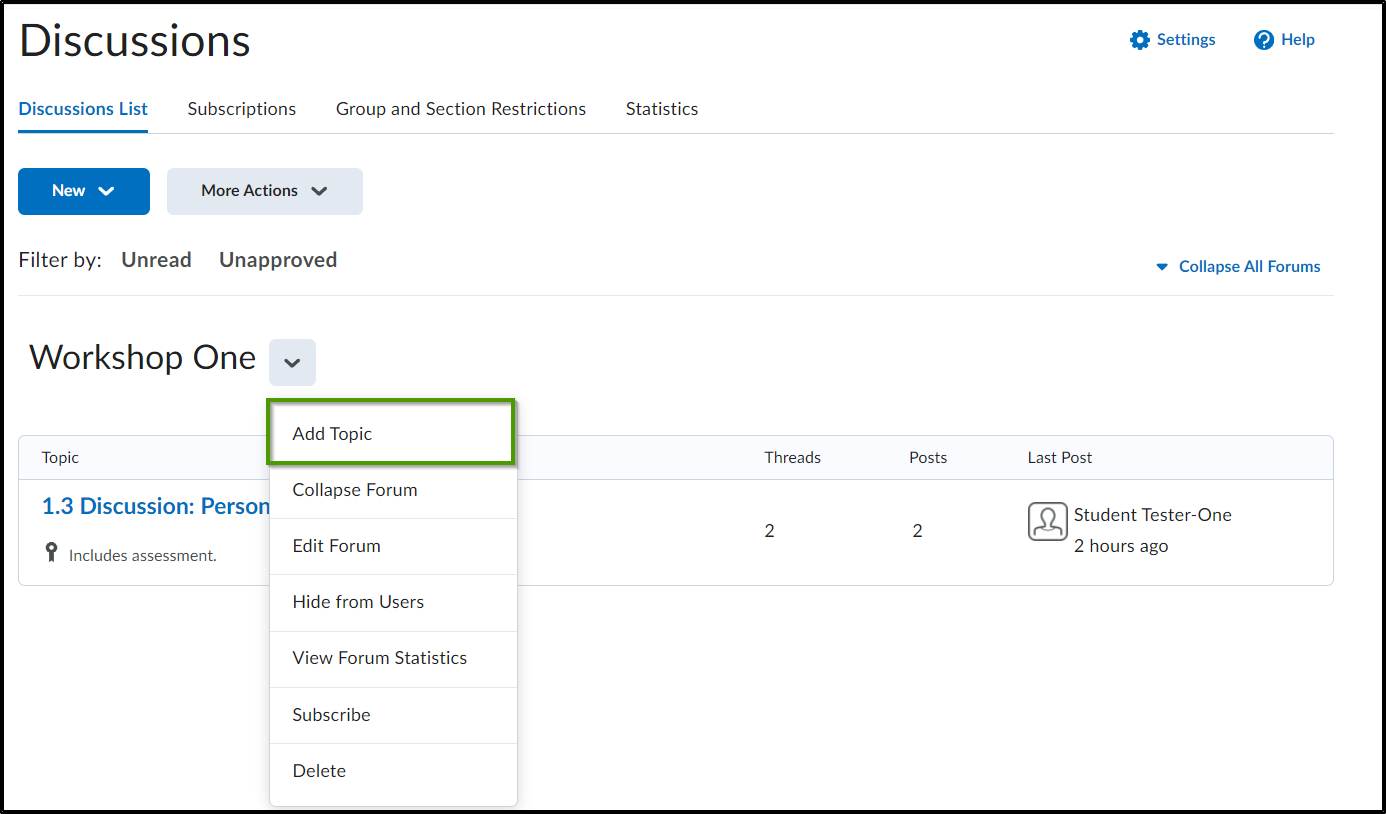
- Select the dropdown menu from within an existing discussion forum and choose "Add Topic".
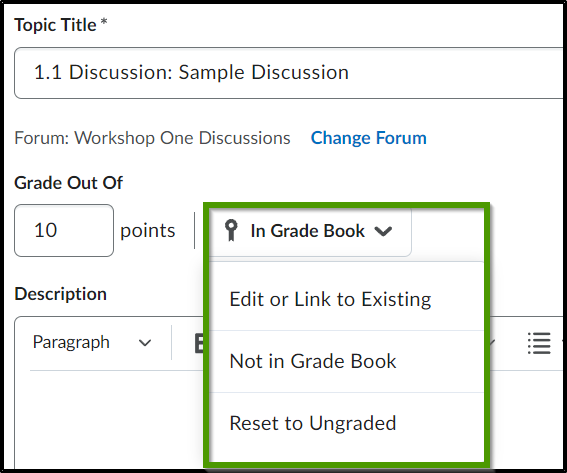
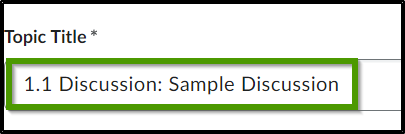
- Enter the title of the topic in the "Topic Title" field.
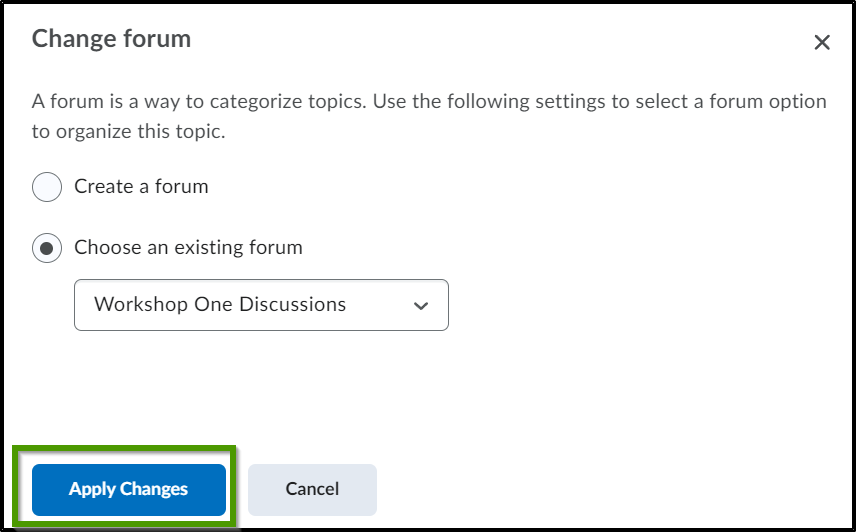
- By selecting the "Change Forum" link, a new forum can be created or the topic can be associated with a different forum. Select "Apply Changes" when all changes have been made.
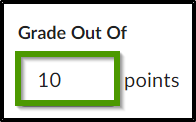
- In the "Grade Out Of" field, enter the number of points the discussion is worth.
- From the "In Grade Book" dropdown, the discussion can be linked to an existing grade item, can be marked as "not in the grade book", or reset to "ungraded".
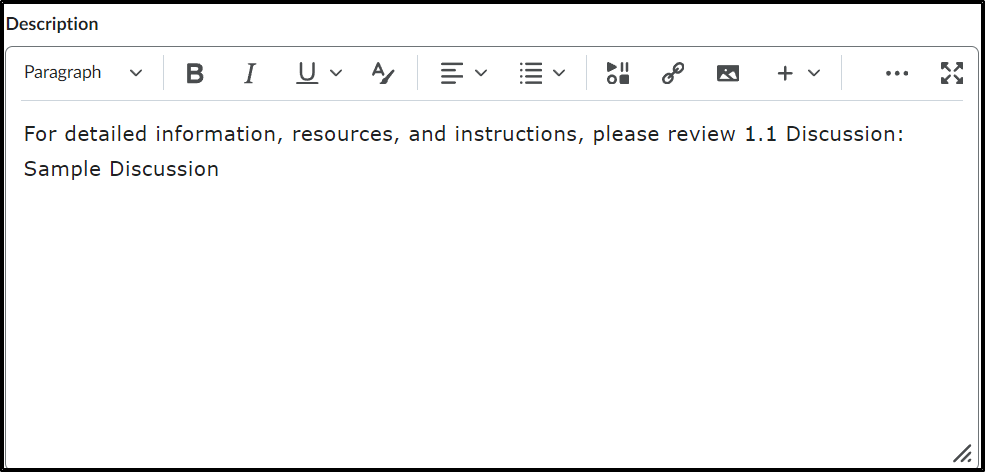
- In the "Description" text box add the information that will link back to the instructions for the discussion. i.e. For detailed information, resources, and instructions, please review 1.1 Discussion: Sample Discussion.
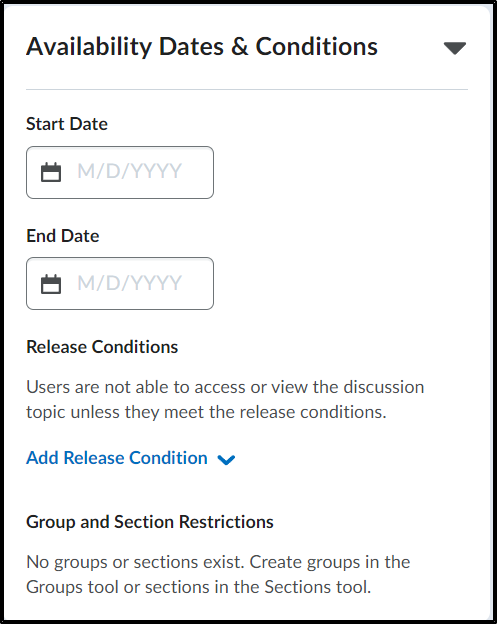
- By expanding the "Availability Dates & Conditions" section, you can add start and end dates to the activity, add release conditions, and add group restrictions if groups exist.
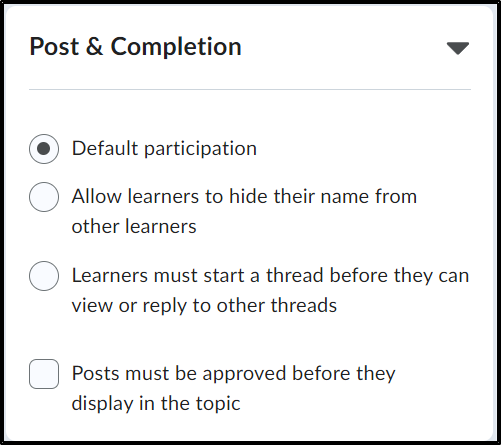
- By expanding the Post & Completion section, you can select discussion guidelines for both students and posts.
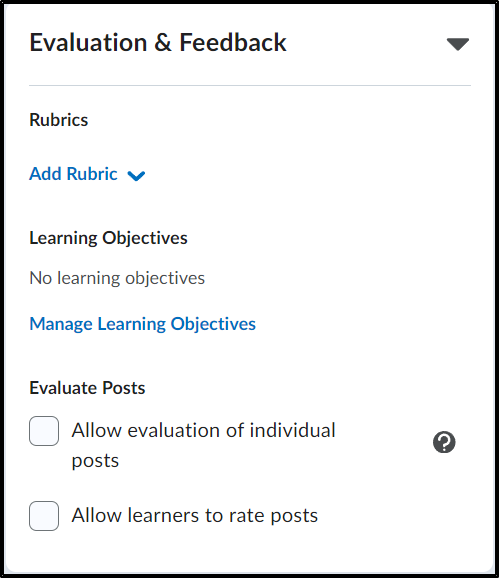
- By expanding the Evaluation & Feedback section, you can add a rubric, manage learning objectives, allow the evaluation of individual posts or allow learners to rate posts.
- To make the topic viewable by students, select the circle and ensure that it says "Visible".
- To save all changes, select the "Save and Close" or "Save" button.